Picture this: I was in the middle of a midnight snack frenzy, the fridge humming like a sleepy dragon, when a rogue pear slipped from my hand and smashed against the counter, leaving a green, gooey mess that looked like a crime scene. I stared at the splatter, realizing I could either clean up the disaster or turn it into something delicious. I decided on the latter. That single, reckless moment sparked a culinary revolution that would later become the 15‑Minute Healthy Pear Crumble.
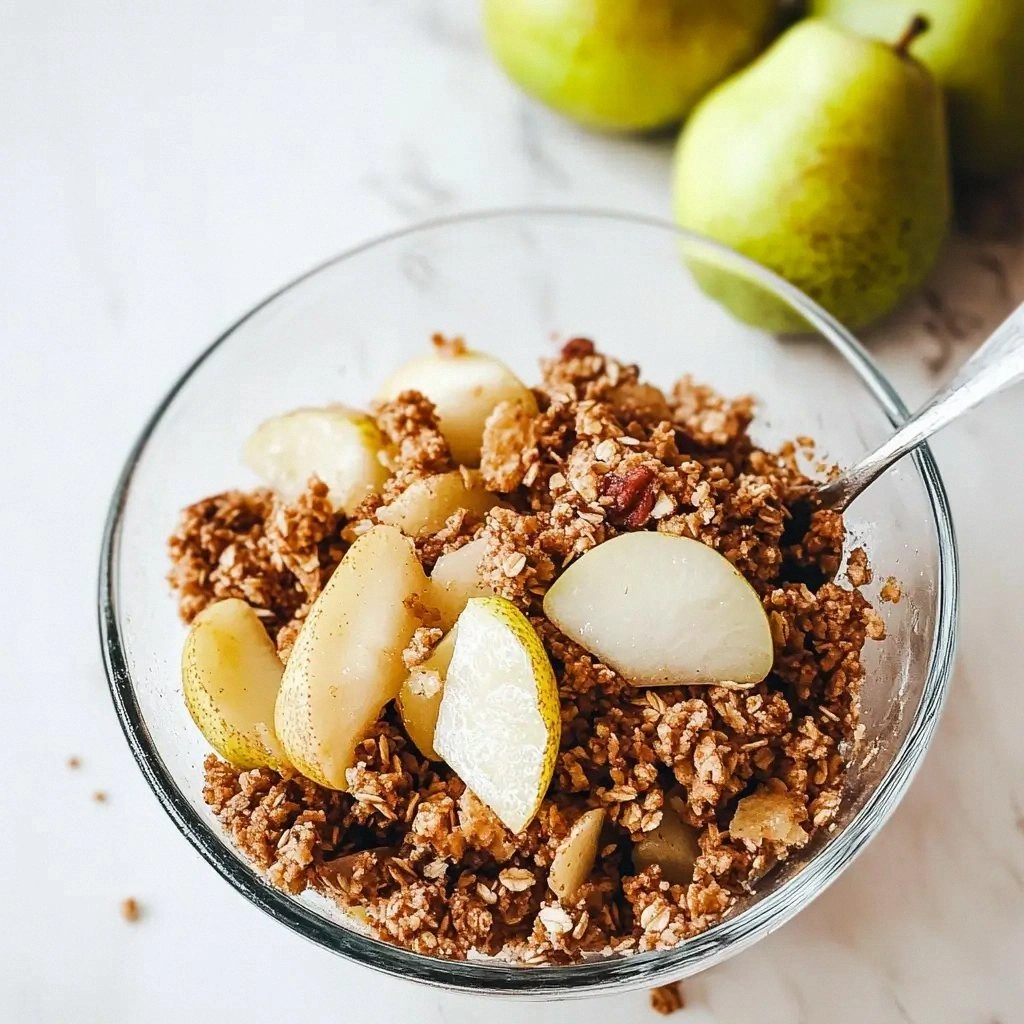
I’ve always loved pears for their subtle sweetness and the way they melt into a silky texture when cooked. But the real magic happens when you pair that buttery softness with a crisp, crumbly topping that crunches like freshly fallen snow. The aroma that rises from the pan—spiced with cinnamon and vanilla—has a way of making the entire kitchen feel like a cozy cabin in the woods. And the first bite? A burst of honeyed fruit, followed by a gentle, nutty crunch that lingers like a secret handshake.
What sets this version apart from every other pear crumble you’ve tried is the sheer simplicity of the ingredients, the speed of the preparation, and the health‑friendly tweaks that don’t compromise flavor. I swapped out heavy butter for coconut oil, used a blend of rolled oats and almond flour to keep the crumb light yet satisfying, and added a touch of maple syrup for natural sweetness. The result is a dessert that feels indulgent but is actually packed with fiber, protein, and heart‑healthy fats. I dare you to taste this and not go back for seconds.
If you’re thinking this is just another fruit crumble, think again. The technique of pre‑cooking the pears with a splash of lemon juice and a dash of cinnamon locks in flavor and ensures a silky interior. The crumble topping is tossed with a pinch of sea salt, giving the sweet fruit a surprising savory note that elevates the whole dish. By the time the crust turns golden brown, the kitchen smells like a warm hug. Let me walk you through every single step—by the end, you’ll wonder how you ever made it any other way.
What Makes This Version Stand Out
- Speed: The entire process from prep to finish takes less than 45 minutes, making it a perfect solution for week‑night cravings or last‑minute dessert plans. The key is pre‑cutting the pears and using a quick‑bake crumb.
- Health Focus: Replacing butter with coconut oil and incorporating almond flour reduces saturated fat while adding healthy monounsaturated fats and plant protein. The oat component provides soluble fiber that helps keep you full longer.
- Texture: The crumb’s combination of rolled oats, almond flour, and a dash of honey creates a contrast between a crunchy exterior and a melt‑in‑your‑mouth interior. The pears become soft without turning mushy.
- Flavor Depth: Cinnamon, vanilla, and a splash of lemon juice create a layered flavor profile that feels both comforting and sophisticated. The subtle tartness of the pears balances the natural sweetness.
- Versatility: This recipe scales effortlessly—from a single serving to a crowd‑pleasing batch—without losing its character. It also adapts well to dietary restrictions, such as dairy‑free or low‑sugar variants.
- Make‑Ahead Friendly: The crumble can be assembled and refrigerated for up to 24 hours. When you’re ready to bake, just pop it in the oven, and the aroma will instantly lift the mood.
Alright, let’s break down exactly what goes into this masterpiece…
Inside the Ingredient List
The Flavor Base
The pears are the star of the show—ripe, slightly firm, and naturally sweet. Slice them into quarters, removing the core, and toss them with a splash of lemon juice to prevent oxidation. Lemon not only preserves color but also adds a bright, citrusy undertone that cuts through the richness of the crumble.
Cinnamon is the backbone of the flavor profile. A teaspoon of ground cinnamon sprinkled over the pears enhances their natural sweetness and adds a warm, spicy aroma that lingers long after the last bite. If you’re a fan of subtle heat, consider adding a pinch of nutmeg for an extra layer of warmth.
The Texture Crew
Rolled oats are the cornerstone of the crumb, providing a hearty, chewy base that contrasts with the buttery softness of the topping. They also contribute a dose of fiber, making the dessert both satisfying and gentle on the gut. For a lighter texture, you can substitute half of the oats with quinoa flakes, which add a nutty flavor.
Almond flour adds a delicate, nutty flavor while keeping the crumb airy. Unlike wheat flour, almond flour doesn’t absorb as much liquid, preventing the topping from becoming soggy. If you’re on a low‑carb diet, you can replace almond flour with coconut flour, but you’ll need to adjust the liquid ratio slightly.
The Unexpected Star
Coconut oil is the secret weapon that replaces butter without sacrificing richness. It melts at a lower temperature, creating a crisp, golden crust that’s free from the heaviness of butter. Coconut oil also adds a subtle tropical note that pairs beautifully with the pears’ natural sweetness.
Maple syrup is the natural sweetener that brings everything together. A tablespoon of pure maple syrup balances the tartness of the pears and the heat of the cinnamon. If you prefer a lower sugar option, you can use a sugar‑free syrup or reduce the amount to taste.
The Final Flourish
A pinch of sea salt is essential for enhancing the overall flavor. Salt brings out the sweetness in the fruit and the richness in the topping, creating a harmonious balance. Remember, a little goes a long way—too much salt can overpower the delicate pear notes.
Vanilla extract adds a subtle depth that rounds out the dessert. A teaspoon of pure vanilla brings warmth and complexity, making the crumble feel more luxurious. If you’re avoiding dairy, opt for a dairy‑free vanilla extract to keep the recipe clean.
Everything's prepped? Good. Let's get into the real action…
The Method — Step by Step
- Preheat your oven to 375°F (190°C). While the oven warms, line a 9‑inch pie dish with parchment paper, ensuring the edges are covered. This step prevents sticking and makes cleanup a breeze. The oven should be hot enough to give the crumble a crisp finish without burning the pears.
- In a large mixing bowl, combine the sliced pears, lemon juice, cinnamon, and a pinch of sea salt. Toss gently so that each piece is coated evenly. The lemon juice not only stops browning but also adds a bright counterpoint to the sweet pears. Make sure no pear is left dry; a little moisture helps the fruit cook evenly.
- Transfer the pear mixture into the prepared pie dish, spreading it out in an even layer. Gently press down with the back of a spoon to compact the fruit slightly, ensuring a uniform bake. At this point, you’ll notice the pears releasing a sweet, aromatic steam—absorb that scent; it’s pure comfort.
- In a separate bowl, whisk together the rolled oats, almond flour, and a pinch of sea salt. This dry mix will become the crumb’s foundation. The oats give body, the almond flour adds a subtle nutty flavor, and the salt ties everything together. Feel free to sift the mixture to remove any lumps for an even crumb.
- Melt the coconut oil in a small saucepan over low heat until liquid. Add the maple syrup and vanilla extract, stirring until the mixture is glossy and fragrant. This wet mix will bind the dry ingredients and create that coveted golden crust. The maple syrup’s natural sugars caramelize, giving the topping a beautiful sheen.
- Pour the coconut‑oil mixture over the oat‑flour blend, stirring until the crumbs are evenly coated. The mixture should feel like slightly damp sand—too dry and the crust will crumble, too wet and it will be soggy. Sprinkle the crumb evenly over the pears, pressing gently with a spatula to ensure good contact.
- Slide the dish into the preheated oven. Bake for 25–30 minutes, or until the top is golden brown and the pears are bubbling. Keep an eye on the crust; if it browns too quickly, tent the dish with foil to prevent burning.
- Remove the crumble from the oven and let it rest for 5 minutes. The residual heat will continue to cook the pears, and the crumb will set perfectly. While it rests, the aroma will fill the kitchen, making you feel like you’re in a bakery. Serve warm, optionally with a dollop of Greek yogurt or a drizzle of honey.
That's it—you did it. But hold on, I've got a few more tricks that'll take this to another level…
Insider Tricks for Flawless Results
The Temperature Rule Nobody Follows
Many bakers think a higher oven temperature always yields a crisper crust, but that’s a myth. A moderate 375°F (190°C) allows the crumb to bake evenly without burning the top. I once baked at 400°F and the crust blackened while the pears stayed undercooked. Stick to the recommended temperature for consistent results.
Why Your Nose Knows Best
The scent of a baking crumble is a reliable indicator of doneness. When the aroma becomes sweet, nutty, and slightly caramelized, the pears are ready. Trust your nose; it’s a better gauge than the clock. If you’re unsure, do a quick visual check of the crust’s color.
The 5‑Minute Rest That Changes Everything
Letting the crumble rest for five minutes after baking isn’t just a courtesy—it’s essential. The residual heat finishes cooking the pears, and the crumb sets, preventing it from sliding off the dish. I’ve seen crumble toppers slide off the dish when served immediately; a short rest solves that problem.
Add a Splash of Water Before Reheating
Reheating can dry out the crumble, so add a tiny splash of water or a drizzle of maple syrup before warming. This step restores moisture and keeps the pears juicy. The water also helps the crumb regain its crispness.
Use a Parchment‑Lined Dish
A parchment‑lined dish not only prevents sticking but also promotes even baking. The parchment creates a slight barrier, allowing heat to circulate around the crumble. It’s a simple trick that saves you from a sticky cleanup.
Creative Twists and Variations
This recipe is a playground. Here are some of my favorite ways to switch things up:
Spiced Apple Pear Crumble
Add diced apples to the pear mixture for a dual‑fruit dessert. The apples bring a tart contrast that balances the pears’ sweetness. Sprinkle a pinch of cardamom for an exotic twist.
Chocolate‑Infused Crumble
Fold a tablespoon of cocoa powder into the dry crumb mixture. The chocolate adds a rich, bittersweet layer that pairs wonderfully with the fruit’s natural sugars. A drizzle of dark chocolate on top after baking gives a decadent finish.
Almond‑Honey Crumble
Replace the maple syrup with honey and add sliced almonds to the topping. The honey’s floral notes complement the pears, while the almonds provide a satisfying crunch. This version is especially good for a brunch spread.
Low‑Sugar Crumble
Use a sugar‑free maple syrup or reduce the amount of sweetener by half. The pears’ natural sugars will still shine through, making this version ideal for those watching their carbohydrate intake.
Cheesecake‑Style Pear Crumble
Top the finished crumble with a dollop of low‑fat Greek yogurt and a sprinkle of granola. The creamy yogurt adds a tangy contrast, while the granola keeps the texture fun. This combo is a crowd‑pleaser at parties.
Storing and Bringing It Back to Life
Fridge Storage
Store the cooled crumble in an airtight container in the refrigerator for up to 3 days. The crumb may soften slightly, but it will regain its crispness when reheated. Keep the container sealed to prevent the crumble from absorbing fridge odors.
Freezer Friendly
Wrap the crumble tightly in plastic wrap, then place it in a freezer bag. It will stay fresh for up to 2 weeks. When ready to serve, thaw overnight in the refrigerator, then reheat in a preheated oven at 350°F (175°C) for 10 minutes.
Best Reheating Method
Reheat the crumble in a 350°F oven for 8–10 minutes, or until the top is golden and the pears are steaming. Add a splash of water or a drizzle of maple syrup before reheating to keep the crumb moist. Serve warm for the best experience.