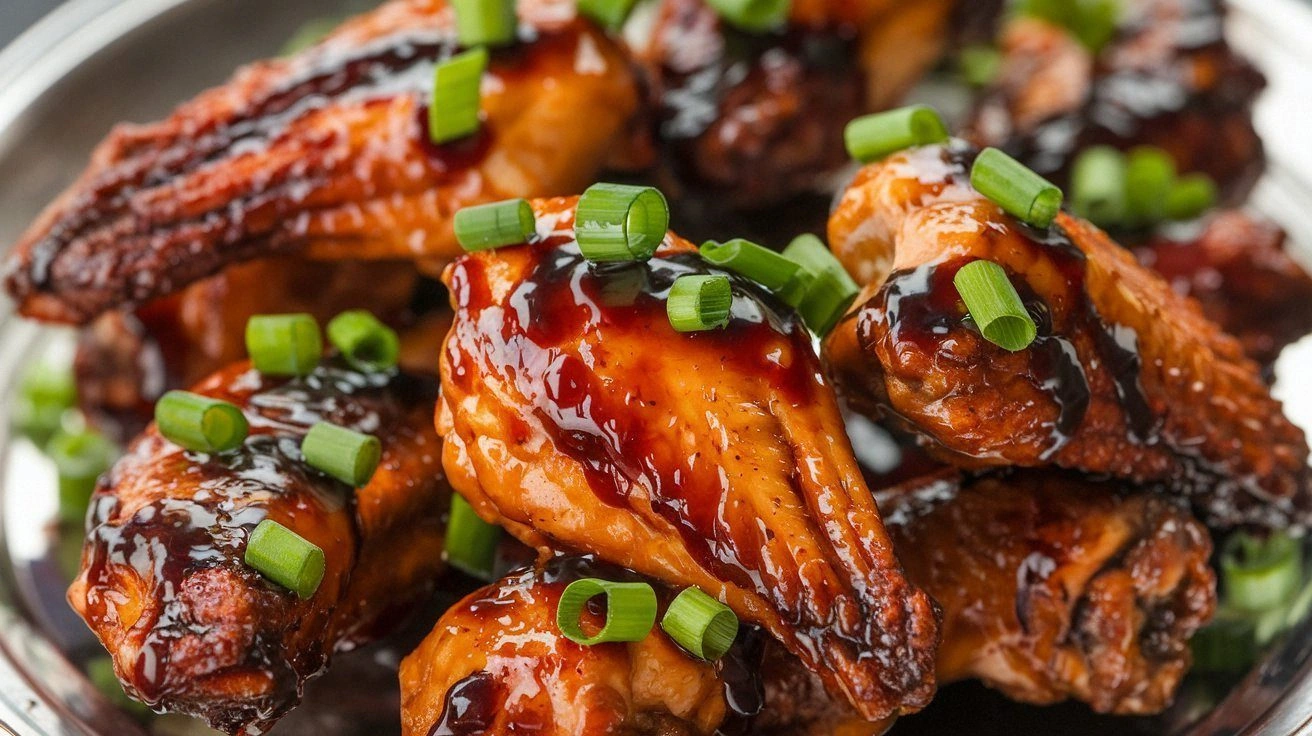
The kitchen was a chaotic mess of sizzling pans and burnt onions when I first discovered that the secret to unforgettable wings lies not in the spice rack but in a humble bottle of balsamic vinegar. I was halfway through a midnight snack, craving something that could make even the most skeptical of friends swoon, when a stray drop of that deep, caramelized liquid landed on my skillet and transformed the ordinary into extraordinary. That single splash of sweet‑tangy flavor turned a batch of over‑cooked, flavor‑dead wings into a symphony of caramelized glaze, crisp edges that crackle like thin ice, and a lingering aftertaste that made the air taste like a summer garden. I dare you to taste this and not go back for seconds; the moment you bite, your taste buds will do a backflip. I’ve spent years experimenting with wing recipes, but this version—this version that marries the classic crunch with a luxurious glaze—has become my go‑to. It’s hands down the best version you’ll ever make at home, and the proof is in every bite. Let me walk you through every single step—by the end, you’ll wonder how you ever made it any other way.
What Makes This Version Stand Out
- Taste: The sauce balances sweet, savory, and a hint of umami, creating a flavor profile that feels both familiar and utterly new.
- Texture: The wings finish with a crispy exterior that shatters under the knife, while the interior remains juicy and tender.
- Simultaneous Cooking: Basting the wings while they roast allows the glaze to caramelize in place, eliminating the need for a post‑bake glaze.
- Ingredient Quality: Fresh, high‑quality ingredients make all the difference; the balsamic must be a true aged variety, not a cheap sweet syrup.
- Make‑Ahead Potential: The glaze can be pre‑made and stored; the wings can be roasted later without losing flavor.
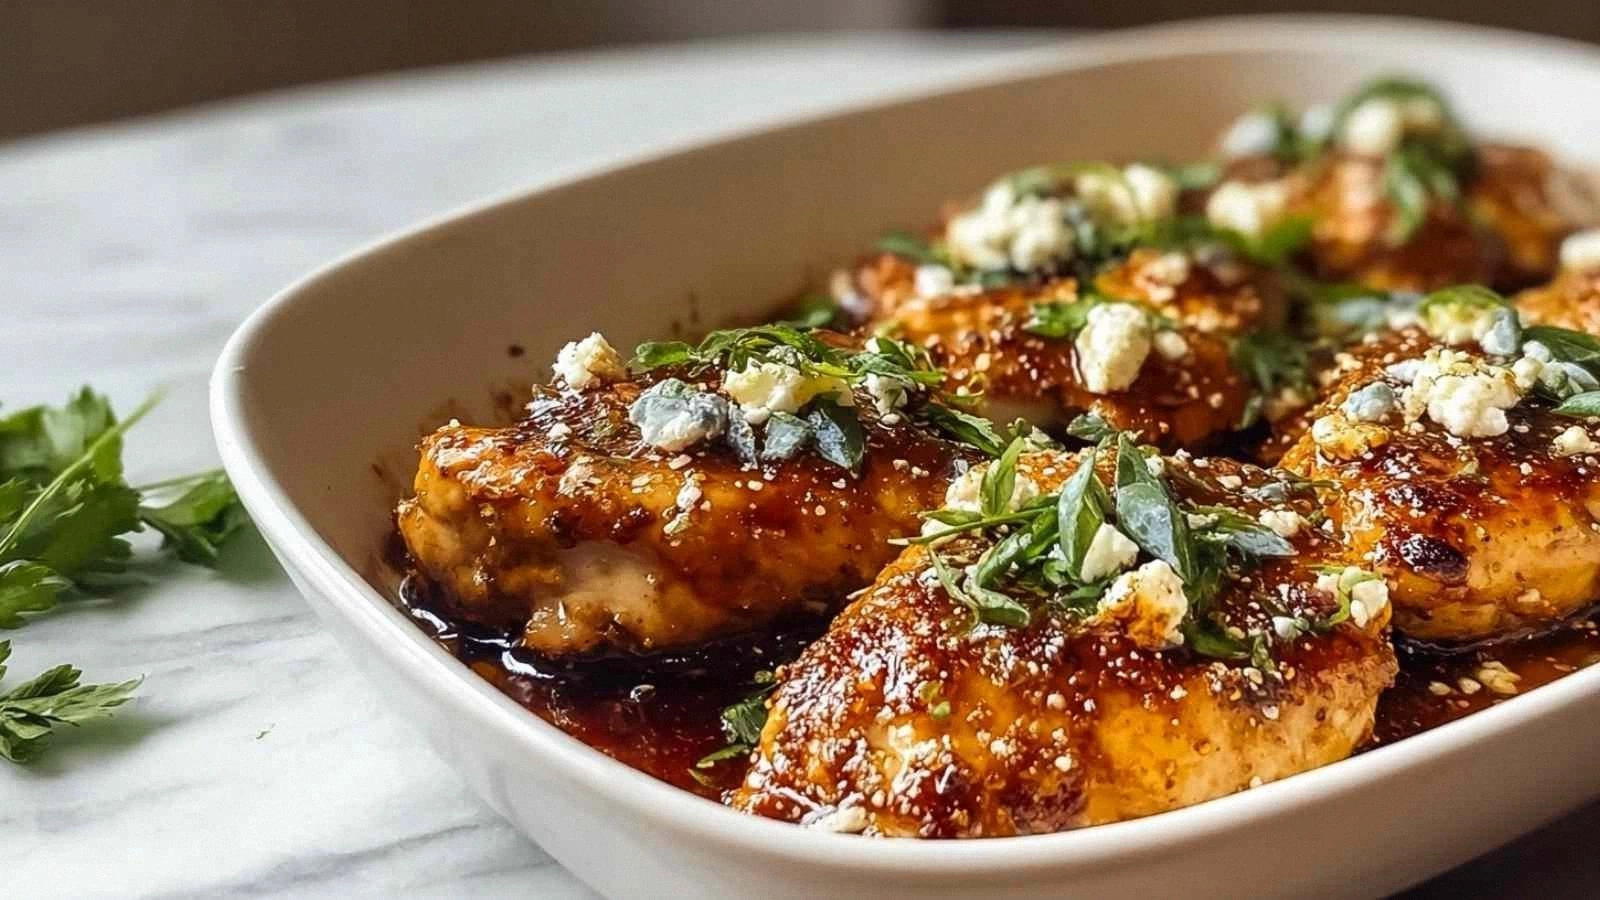
- Crowd Reaction: Friends rave about the “wow” factor when they see the glossy finish and hear the satisfying crackle.
- Visual Appeal: The glossy glaze reflects light like a jewel, making the dish Instagram‑ready.
Alright, let’s break down exactly what goes into this masterpiece. First, we’ll talk about the ingredients. Then we’ll dive into the method that turns simple wings into a showstopper. And don’t worry, I’ll sprinkle in a few hacks along the way because I love a good shortcut. If you’re ready to level up your wing game, stay with me.
Inside the Ingredient List
The Flavor Base
The foundation of this glaze is a marriage of balsamic vinegar, honey, and soy sauce. Balsamic brings depth and a natural sweetness, honey adds a silky sheen, and soy sauce injects umami that rounds out the flavor. Skipping any of these would leave the glaze thin and less complex. If you’re vegan, simply replace honey with maple syrup and the result remains delicious.
The Texture Crew
Flour, salt, pepper, garlic powder, onion powder, and smoked paprika form the dry seasoning that coats the wings before roasting. This dry rub ensures a crisp skin that cracks pleasantly when you bite. If you forget the paprika, the wings will still be good, but the smoky undertone will be missing. A pinch of cayenne can add a subtle heat if you like a little kick.
The Unexpected Star
The chicken broth and butter are the unsung heroes that keep the wings moist during the long roasting period. The broth adds moisture, while the butter contributes richness and helps the glaze stick. If you’re watching calories, replace butter with a tablespoon of olive oil; the flavor will still be lush.
The Final Flourish
Minced garlic and red pepper flakes are added at the very end to give a burst of aroma and a hint of heat. The garlic’s sharpness cuts through the sweetness, and the flakes add a subtle crunch. If you’re allergic to garlic, you can omit it or use garlic powder instead.
Everything’s prepped? Good. Let’s get into the real action.
The Method — Step by Step
- Preheat your oven to 425°F (220°C). Line a baking sheet with parchment paper to prevent sticking. Place a wire rack on top of the sheet; this allows air to circulate and ensures even cooking. Let the oven heat fully; a lukewarm oven will produce soggy wings.
- Pat the wings dry with paper towels. Moisture is the enemy of crispiness; the drier the surface, the better the coating adheres. Sprinkle the dry rub over the wings, ensuring every surface is coated. Shake off excess powder to avoid clumping.
- Heat a large skillet over medium heat and add olive oil. Once the oil shimmers, add the wings in a single layer. Avoid overcrowding; the wings need room to brown. Cook for 5 minutes on one side until golden before flipping.
- Transfer the wings to the prepared baking sheet. Arrange them in a single layer, leaving space between each piece. This prevents steaming and keeps the edges crisp. Place the sheet in the preheated oven.
- While the wings roast, combine balsamic vinegar, honey, soy sauce, minced garlic, and red pepper flakes in a small saucepan. Bring to a gentle simmer over low heat, stirring constantly. The mixture should thicken into a glossy glaze, but be careful not to scorch the sugars.
- At the 15‑minute mark, remove the wings from the oven and brush them generously with the glaze. The glaze will caramelize as the wings continue to cook. Return the wings to the oven and continue roasting for another 10 minutes.
- Halfway through the second roasting period, baste the wings again. This second coat locks in moisture and adds depth to the glaze. The wings should emit a sweet, caramelized aroma that will fill your kitchen.
- When the wings reach 165°F (74°C) and the glaze is thick and glossy, remove them from the oven. Let them rest on the rack for 5 minutes; this allows the juices to redistribute. Serve immediately with a sprinkle of fresh parsley or a squeeze of lemon for brightness.
That’s it—you did it. But hold on, I’ve got a few more tricks that will take this to another level, ensuring every bite is a revelation.
Insider Tricks for Flawless Results
The Temperature Rule Nobody Follows
Many cooks bake wings at 375°F, but that temperature is too low for optimal crispness. 425°F gives the wings a chance to brown quickly, creating a crackling skin that’s impossible to resist. If you’re using a convection oven, reduce the temperature by 25°F to avoid over‑browning. I’ve tried 450°F once, and the wings came out too dry—so stick to 425°F for best results.
Why Your Nose Knows Best
The smell of caramelizing glaze is a powerful cue. When the aroma becomes sweet and slightly smoky, that’s your signal to check the glaze’s thickness. A thin glaze means you’re still cooking too low; a thick, glossy glaze indicates readiness. Trust your nose—it’s more reliable than a timer when it comes to flavor.
The 5‑Minute Rest That Changes Everything
Letting the wings rest on a wire rack after baking allows the steam to escape, preventing sogginess. It also lets the glaze set into a glossy coating. If you cut into them immediately, the juices will run out, leaving the wings dry. Resting is a small step that makes a big difference.
Use Fresh Garlic, Not Powder
Fresh garlic adds a bright, aromatic punch that garlic powder can’t match. Mince the garlic finely so it integrates into the glaze without forming clumps. If you’re short on time, a teaspoon of garlic paste works, but fresh is best.
Keep the Wings in a Single Layer
Overcrowding the pan creates steam, which prevents the wings from crisping. If you’re cooking a large batch, use two racks or two pans. This ensures even heat distribution and a uniformly crisp exterior.
Creative Twists and Variations
This recipe is a playground. Here are some of my favorite ways to switch things up:
Spicy Sriracha Glaze
Swap the honey for a tablespoon of Sriracha to give the wings a fiery kick. Add a splash of lime juice to balance the heat. This version is a hit at game nights when you want to keep the crowd on their toes.
Maple‑Mustard Fusion
Replace balsamic with maple syrup and add a teaspoon of Dijon mustard. The result is a sweet‑savory glaze that pairs wonderfully with roasted sweet potatoes. The mustard adds a subtle tang that cuts through the sweetness.
Herb‑Infused Delight
Incorporate fresh rosemary and thyme into the glaze. The herbs lend a fragrant aroma that elevates the dish. This version is perfect for a summer barbecue.
Cheesecake‑Inspired Finish
After roasting, sprinkle the wings with a mix of grated parmesan and cheddar. The cheese melts into the glaze, creating a creamy, savory layer. Serve with a side of marinara for a pizza‑themed snack.
Asian‑Inspired Teriyaki
Use soy sauce as the base, add ginger, sesame oil, and a splash of rice vinegar. The glaze will have a deep umami flavor reminiscent of teriyaki chicken. Garnish with sesame seeds for a crunchy finish.
Low‑Calorie Option
Omit the honey and replace it with a sugar‑free syrup. Use a small amount of olive oil instead of butter. This version keeps the flavor profile intact while cutting calories.
Storing and Bringing It Back to Life
Fridge Storage
Cool the wings completely before placing them in an airtight container. Store in the refrigerator for up to 3 days. The glaze will thicken slightly, but a quick reheat will restore its sheen.
Freezer Friendly
Wrap the wings tightly in plastic wrap and place them in a freezer bag. They stay best for up to 2 months. When ready to eat, thaw overnight in the fridge before reheating.
Best Reheating Method
Reheat the wings in a 375°F oven for 10 minutes, or until the glaze is bubbly. Add a splash of water before reheating to keep them from drying out. Finish under the broiler for 2 minutes to restore crispness.