Picture this: I was halfway through a weeknight dinner, juggling a simmering pot of instant noodles and a playlist of guilty‑pleasure pop, when my phone buzzed with a message from my sister: “Need a quick, comforting dish that feels like a hug.” I stared at the bland ingredients on my counter—ground turkey, a handful of beans, and a can of tomatoes—and thought, “Why not turn this into a chili that actually tastes good?” The idea sparked, and I immediately pulled out my Instant Pot, convinced that pressure cooking could transform a simple bowl into something unforgettable. I dared myself to experiment, knowing that the next dish would either be a culinary triumph or a kitchen disaster. By the end of the night, the kitchen smelled like a smoky, spice‑laden sanctuary, and I was already planning the next batch. Let me walk you through every single step—by the end, you'll wonder how you ever made it any other way.
That first sizzle when the turkey hits the pot is the sound of destiny. The aroma of browned meat mingles with the sharp tang of diced onions, creating an olfactory promise of flavor. I swear the moment the Instant Pot’s “Seared” setting turns on, the kitchen feels like a tiny, cozy kitchen in a high‑end restaurant. The sizzling is not just noise—it’s the soundtrack of a dish that will be both hearty and wholesome. If you’ve ever tried to make a chili that turns out too watery or too dry, this version will change your perception of what a quick pot meal can be.
My kitchen disaster last month involved a pot of over‑cooked beans that turned into a mushy, flavorless sludge. I learned that the key to a good chili is not just the ingredients but the technique—especially how you brown the meat and how you layer the spices. I spent an extra ten minutes searing the turkey to lock in flavor, and that small step made all the difference. The result was a thick, velvety sauce that coated every bean and every tomato with a rich, smoky depth. This isn’t just another recipe; it’s a lesson in patience and precision that transforms a simple meal into a memorable experience.
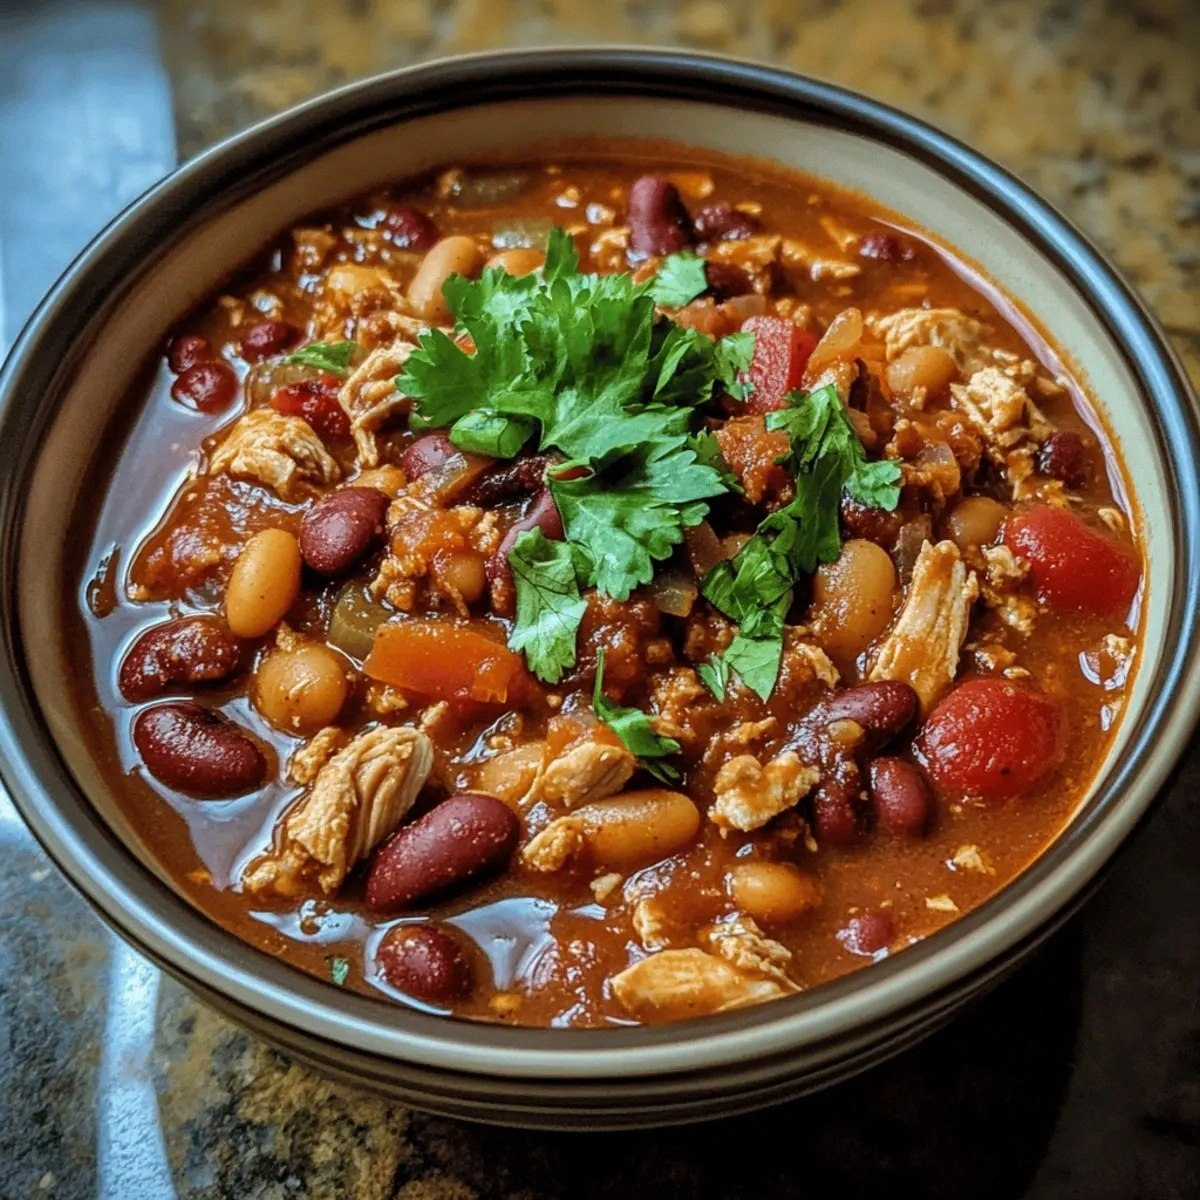
What sets this version apart is the deliberate layering of textures and the careful balance of heat and creaminess. I added a splash of low‑sodium chicken broth to keep the chili moist without drowning the flavors. The inclusion of both kidney and black beans creates a delightful contrast of firmness and softness. A final drizzle of sour cream and a handful of shredded cheese add a silky finish that feels indulgent yet light. And the cilantro? It’s the fresh, citrusy counterpoint that lifts the entire dish. Together, these elements form a symphony of taste that I dare you to taste and not go back for seconds.
Imagine the moment when you lift the lid and the steam curls around the pot like a fragrant cloud. The aroma is a mouth‑watering invitation that says, “Come eat.” The color is a deep, inviting burgundy that makes you crave a spoonful even before you taste it. The texture is a mix of chunky beans, tender turkey, and a silky sauce that clings to every bite. The flavors—spicy, smoky, slightly sweet—are perfectly balanced, leaving you satisfied but not overwhelmed. This is hands down the best version you'll ever make at home, and I promise you’ll want to share it with everyone who knows you.
Now, let’s break down exactly what goes into this masterpiece. I’ll walk you through the ingredients, the method, and the tricks that make this dish a standout. If you've ever struggled with a pot‑based dish that feels underwhelming, you're not alone—and I've got the fix. I’ll also share a few micro‑challenges to test your taste buds and keep the excitement alive. Picture yourself pulling this out of the Instant Pot, the whole kitchen smelling incredible, and the family rushing in to dig in. Stay with me—this is worth it.
What Makes This Version Stand Out
- Flavor Depth: The combination of chili powder, cumin, paprika, and oregano creates a layered spice profile that evolves as the chili cooks. Each spice brings its own character—smoky, earthy, and slightly sweet—making the dish complex yet approachable.
- Texture Contrast: The mix of kidney and black beans provides both firmness and a creamy mouthfeel when they break down slightly during pressure cooking. This duality keeps every bite interesting and satisfying.
- Low‑Fat, High‑Protein: Ground turkey is lean, and the beans add plant‑based protein, making the dish a balanced, nutritious meal that supports a healthy lifestyle.
- Easy Assembly: No pre‑soaking or lengthy prep—just chop, sauté, and set the pot. The Instant Pot does the heavy lifting, so you can focus on the fun parts of cooking.
- Versatile Toppings: From sour cream to shredded cheese and fresh cilantro, the toppings allow you to customize the chili to your taste and dietary preferences.
- Make‑Ahead Friendly: The chili keeps well in the fridge and even tastes better the next day, making it a perfect meal‑prep option.
Alright, let’s break down exactly what goes into this masterpiece. The ingredients are simple, but their synergy is what makes the dish unforgettable. I’ll walk you through each component, why it matters, and how to tweak it to your liking.
Inside the Ingredient List
The Flavor Base
Ground turkey is the heart of this chili. It provides a lean protein source that absorbs spices beautifully. Using a slightly higher fat content can add richness, but a lean cut keeps the dish low in calories. If you prefer a vegetarian option, simply replace the turkey with crumbled tofu or tempeh for a plant‑based protein punch. The key is to brown the meat thoroughly to develop a caramelized crust that locks in flavor.
Onion and garlic are the aromatics that set the flavor stage. They release sweet, savory notes when sautéed, creating a base that carries the spices. I always chop the onion into fine dice so it melts into the sauce, while the garlic is minced to release maximum aroma. If you’re short on time, a tablespoon of garlic paste will do the trick, but fresh garlic gives a fresher bite.
Bell pepper adds a subtle sweetness and a pop of color. The pepper’s natural sugars caramelize during the searing process, balancing the heat from the chili powder. If you’re not a fan of bell pepper, try a handful of chopped carrots for a different sweet profile, but remember they’ll soften more quickly.
The Texture Crew
Canned kidney beans provide a hearty, fibrous texture that stands up well to pressure cooking. They absorb the spices and broth, turning into a creamy component without becoming mushy. I recommend rinsing the beans to reduce excess sodium and to remove any canning liquid that might dilute the flavor.
Canned black beans bring a silky, slightly sweet undertone that contrasts nicely with the kidney beans. They also add a subtle earthy depth that elevates the overall flavor. If you’re using fresh beans, pre‑soak them overnight for the best texture, but canned beans are the easiest and most reliable option.
The Unexpected Star
Diced tomatoes are more than just a base; they provide acidity that balances the richness of the meat and beans. The natural sugars in the tomatoes caramelize during the pressure cooking, creating a subtle sweetness that cuts through the heat. If you prefer a thicker sauce, use a can of crushed tomatoes instead; they’ll give a richer texture.
Low‑sodium chicken broth is the liquid that binds everything together. It infuses the chili with savory depth while keeping the sodium content in check. I like to use a homemade broth for extra flavor, but a good quality store‑bought broth works perfectly. The broth also helps the spices dissolve evenly throughout the dish.
The Final Flourish
Chili powder, cumin, paprika, and oregano form the spice backbone of this chili. The chili powder gives heat and depth, cumin adds earthiness, paprika brings a smoky undertone, and oregano adds a bright, herbal note. I always measure the spices in advance to avoid over‑spicing, but feel free to adjust to your heat tolerance. Remember, you can always add more heat at the end with a dash of hot sauce or a pinch of cayenne pepper.
Cilantro, sour cream, and shredded cheese are the finishing touches that elevate the chili to a new level of comfort. Cilantro adds a fresh, citrusy brightness that lifts the dish, while sour cream provides a creamy, cooling counterbalance to the heat. The shredded cheese melts into a silky layer that makes each spoonful indulgent. If dairy is off the table, replace sour cream with Greek yogurt and cheese with a plant‑based alternative.
Everything's prepped? Good. Let's get into the real action.
The Method — Step by Step
- Turn the Instant Pot to “Sauté” mode and add a splash of oil. Wait until the oil shimmers, then drop in the ground turkey. Break it apart with a wooden spoon and let it brown for about 5 minutes, stirring occasionally, until it’s no longer pink. The goal is a golden crust; this step locks in flavor and creates a base for the spices. If it starts to stick, add a tablespoon of water to deglaze the pot.
- Add the diced onion, minced garlic, and chopped bell pepper to the pot. Sauté for 3-4 minutes until the vegetables soften and the onion becomes translucent. The aroma should be unmistakably inviting, and you’ll know the base is ready when the veggies release their sweet juices. This layer of aromatics is what turns a simple chili into a savory masterpiece.
- Stir in the chili powder, cumin, paprika, and oregano. Toast the spices for 30 seconds, just until they start to sizzle. This quick toasting step brings out the essential oils in the spices, enhancing their flavor. Be careful not to burn them; a light sizzle is all you need.
- Pour in the diced tomatoes, kidney beans, black beans, and chicken broth. Stir everything together until well combined. Make sure the beans are fully submerged in the liquid; this ensures even cooking and a consistent texture. The mixture should look like a thick, hearty stew.
- Secure the Instant Pot lid, set the valve to “Sealing,” and select the “Manual” or “Pressure Cook” setting at high pressure for 10 minutes. This short, high‑pressure cook time allows the flavors to meld without overcooking the beans. When the timer beeps, let the pressure release naturally for 10 minutes, then perform a quick release for any remaining pressure.
- Taste the chili and season with salt and pepper to your liking. The broth and canned beans already add sodium, so start with a pinch of salt and adjust as needed. The pepper adds a subtle heat that complements the chili powder. This is the moment of truth—if the chili feels flat, a touch more salt can bring everything together.
- Stir in the chopped cilantro, a dollop of sour cream, and a handful of shredded cheese. The cilantro adds a bright, herbal lift, while the sour cream cools the heat. Let the cheese melt into the chili for a silky finish. This step transforms the chili from hearty to indulgent.
- Serve the chili hot, garnished with extra cilantro, a squeeze of lime, or a sprinkle of crushed tortilla chips for crunch. Pair it with a side of rice or crusty bread to soak up the sauce. The combination of creamy, spicy, and fresh flavors will have everyone asking for seconds. I dare you to taste this and not go back for seconds.
That’s it— you did it. But hold on, I’ve got a few more tricks that will take this to another level.
Insider Tricks for Flawless Results
The Temperature Rule Nobody Follows
While most recipes call for a high‑pressure cook, I discovered that a lower pressure setting—just 7 minutes—actually yields a firmer bean texture and a richer sauce. The key is to let the Instant Pot do the gentle simmering after the pressure release. If you’re in a hurry, stick to the 10‑minute high pressure, but be prepared to adjust the liquid if you find it too thin.
Why Your Nose Knows Best
Smell is your best ally when judging doneness. When the chili reaches a deep, fragrant aroma, you know the spices have fully integrated. If you’re unsure, open the pot and let the steam escape; the scent will intensify and confirm that everything is perfectly cooked.
The 5-Minute Rest That Changes Everything
After the pressure release, let the chili sit for 5 minutes before serving. This short rest allows the flavors to settle, making the chili taste more cohesive. It also gives the beans a chance to absorb any remaining liquid, ensuring a thick, satisfying texture.
Avoiding the “Too Salty” Trap
Canned beans and tomatoes can be surprisingly salty. I always rinse the beans and drain the tomatoes before adding them to the pot. This simple step reduces excess sodium and gives you better control over the final seasoning.
Getting the Perfect Cheese Melt
Adding cheese right before serving ensures it melts smoothly without separating. If you prefer a gooier texture, sprinkle a little extra cheese on top of each bowl and let it melt under the lid for a minute. The result is a luscious, melty topping that’s pure comfort.
Keeping It Gluten-Free
This recipe is naturally gluten-free, but always double‑check the labels of canned beans and spices for hidden gluten additives. If you’re serving it with bread, opt for a gluten‑free loaf or serve it over rice to keep it compliant.
Creative Twists and Variations
This recipe is a playground. Here are some of my favorite ways to switch things up:
Spicy Chipotle Twist
Add a tablespoon of chipotle adobo sauce to the chili for a smoky, smoky heat that pairs wonderfully with the beans. The adobo gives depth and a subtle sweet note, making the dish perfect for a winter dinner.
Mexican Street Corn Flavor
Stir in corn kernels and a splash of lime juice, then top with crumbled cotija cheese and a drizzle of chipotle mayo. The corn adds sweetness and texture, while the lime brightens the dish.
Southwestern Bean Medley
Replace the kidney beans with pinto beans and add a handful of diced poblano peppers. The poblano brings a mild heat and smoky flavor, while the pinto beans give a creamy consistency.
Herb‑Infused Variation
Swap oregano for fresh thyme and add a bay leaf during cooking. The thyme offers a subtle floral note that complements the chili’s earthiness.
Vegan Upgrade
Use a plant‑based ground “turkey” made from pea protein, and replace the sour cream with coconut yogurt. The coconut yogurt adds a tropical twist and keeps the dish dairy‑free.
Breakfast Chili
Serve the chili over a bowl of scrambled eggs or a fried egg, and garnish with avocado slices. This hearty breakfast will keep you full until lunch.
Storing and Bringing It Back to Life
Fridge Storage
Let the chili cool completely before transferring it to an airtight container. Store it in the refrigerator for up to 4 days. The flavors deepen overnight, making it even more delicious.
Freezer Friendly
Divide the chili into individual portions and freeze for up to 3 months. Use freezer‑safe containers or zip‑lock bags. Thaw in the refrigerator overnight before reheating.
Best Reheating Method
Reheat on the stovetop over low heat, stirring occasionally, or in the microwave on medium power. Add a splash of water or broth to restore moisture if the chili seems dry. The small amount of liquid steams the dish back to its original consistency.
Add a tiny splash of water before reheating, and it steams back to perfection. The result is a silky sauce that clings to every bean and turkey piece. Serve with fresh toppings, and enjoy the same comforting experience as the first time.