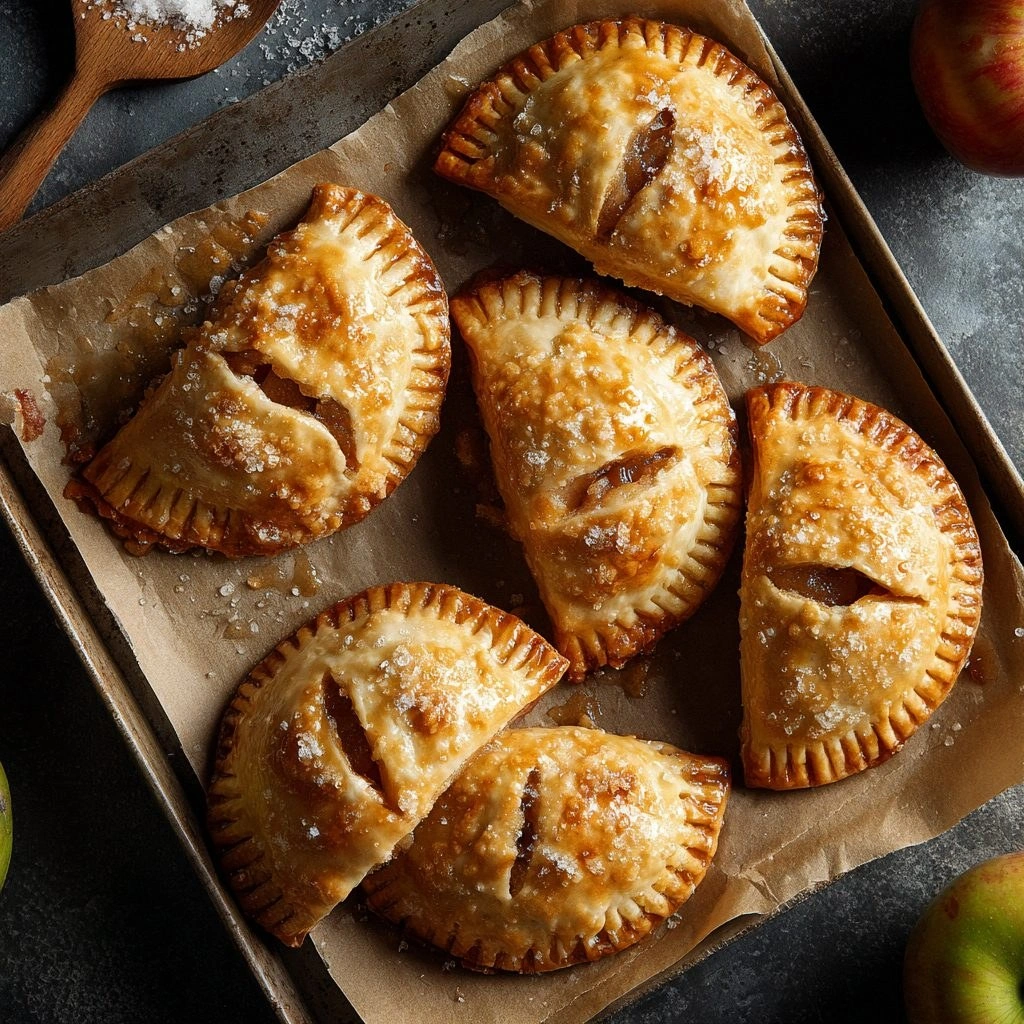
I remember that night like it was yesterday—my kitchen was a battlefield, flour dusting the countertops like snow, a half‑finished apple pie crust left on the counter, and my phone buzzing with a frantic text from a friend: “I’m starving, can you make something that’s both sweet and savory?” I stared at the abandoned pie, the apples still unpeeled, and thought, “What if I could turn that disaster into a bite‑sized masterpiece?” That single moment sparked the birth of the Bite‑Sized Apple Hand Pies, a recipe that has since become my go‑to for quick, crowd‑pleasing treats. It’s the kind of dish that feels like a warm hug in miniature form, with crisp edges that crackle like thin ice and a filling that melts into a fragrant, spiced apple jam. Picture yourself pulling these golden pockets out of the oven, the kitchen filling with the scent of cinnamon, nutmeg, and butter, and the anticipation of the first bite. This isn’t just another apple pie; it’s a reimagined, portable version that keeps the comforting essence while adding a playful twist. If you’re tired of the same old apple desserts, this is the fresh, delicious angle you’ve been missing.
Now, I dare you to taste these and not go back for seconds—though I’ll be honest, I ate half the batch before anyone else got a chance. That’s the power of this recipe: the first bite is a burst of sweet‑spiced apple, followed by a buttery, flaky crust that shatters delightfully under your teeth. Most recipes get this completely wrong, treating the apple filling like a simple sauce and the crust like a cookie. Here’s what actually works: a balanced ratio of sweet and tart, a pinch of acid to brighten the fruit, and a crust that’s airy yet sturdy enough to hold the filling without collapsing. The result? A hand pie that’s bite‑sized, yet feels like a full‑scale dessert, making it the perfect snack for a brunch, a party, or a cozy evening at home. Picture yourself pulling this out of the oven, the whole kitchen smelling incredible, and the first bite delivering a symphony of flavors that will have your taste buds dancing. Let me walk you through every single step — by the end, you’ll wonder how you ever made it any other way.
What Makes This Version Stand Out
- Flavor: The apple filling is a sweet‑tart explosion, enhanced by a splash of lemon juice that brightens the natural apple sweetness and balances the richness of the buttery crust.
- Texture: The crust is a flaky, golden masterpiece that cracks pleasantly when you bite, while the filling remains moist but not soggy, thanks to the perfect flour-to-fat ratio.
- Ease: Even if you’re a novice, the recipe’s step‑by‑step guidance ensures that every part feels intuitive, from the initial dough prep to the final golden finish.
- Uniqueness: Unlike classic hand pies that often use pre‑made dough or pie crust, this recipe uses a simple, homemade shortcrust that delivers a buttery flavor you can’t find in store‑bought versions.
- Crowd Appeal: Whether you’re feeding a small family or a large group at a potluck, the bite‑sized format is universally loved and easy to share.
- Ingredient Quality: The recipe highlights the importance of cold butter and fresh apples, turning each bite into a testament to the power of quality ingredients.
- Make‑Ahead Potential: The dough can be prepared a day ahead, and the filled pies can be frozen, making this a perfect recipe for busy weeknights.
- Versatility: The core technique can be adapted to other fruits or savory fillings, giving you a canvas for endless creative twists.
Alright, let’s break down exactly what goes into this masterpiece…
Inside the Ingredient List
The Flavor Base
The foundation of these hand pies is the shortcrust dough, a marriage of flour, butter, sugar, and a touch of salt. The butter is the star here; its fat content coats the flour particles, creating a tender, flaky crust that melts in your mouth. If you skip the butter, you’ll end up with a dense, crumbly dough that won’t hold the filling. A small twist: using a mix of all‑purpose and pastry flour gives a slightly lighter crumb without sacrificing structure. When selecting flour, look for a protein content around 10–12%; it strikes the right balance between tenderness and chewiness.
The Texture Crew
The texture of the filling is as important as its flavor. The apples, diced into bite‑sized pieces, provide a juicy burst that contrasts with the buttery crust. A splash of lemon juice not only brightens the apple’s natural tartness but also prevents the fruit from browning, keeping the pie visually appealing. The brown sugar adds depth and caramelization, while the ground cinnamon and nutmeg deliver that warm spice profile that screams autumn. Skipping the lemon juice will lead to a slightly dull, oxidized filling that’s less vibrant and more prone to sogginess.
The Unexpected Star
The egg wash is the secret weapon that gives the crust its glossy, golden finish. The beaten egg, lightly brushed over the tops of each hand pie, creates a caramelized surface that’s both visually stunning and deliciously crisp. If you’re avoiding eggs, a mixture of milk and a dash of vinegar can mimic the effect, though it won’t give the same depth of color. The vanilla extract, though a small amount, adds an aromatic undertone that ties the spices together, creating a harmonious flavor profile.
The Final Flourish
The final flourish is the assembly and baking process. Folding the dough into small rounds, placing a heaping spoonful of apple filling, and sealing the edges with a fork or finger creates the classic hand pie shape. The baking temperature and time are critical: 375°F (190°C) for 15–18 minutes until the crust is a deep golden brown. If you bake too long, the crust becomes overly hard; too short, and the filling may be undercooked. Remember to let the pies rest for a few minutes after removal; this allows the filling to set, preventing a soggy bottom.
Everything’s prepped? Good. Let’s get into the real action…
The Method — Step by Step
- Prepare the dough: In a large bowl, whisk together 2 cups all‑purpose flour, 1 tsp baking powder, and 1/2 tsp salt. Add 1/2 cup cold, cubed unsalted butter. Using your fingertips or a pastry cutter, work the butter into the flour until the mixture resembles coarse crumbs. Once the mixture looks like fine sand, drizzle in 1/4 cup granulated sugar and 1 tsp ground cinnamon, then gently mix to combine.Kitchen Hack: Chill the dough in the fridge for 10 minutes before rolling; this helps the butter firm up and prevents sticking.
- Form the dough: Transfer the dough onto a lightly floured surface and press it into a flat disc, about 1/2 inch thick. Wrap in plastic wrap and refrigerate for at least 30 minutes to let the gluten relax and the butter firm up. This step is crucial for a flaky crust; a hurried dough will result in a tough, chewy texture.
- Prepare the filling: While the dough chills, peel, core, and dice 1 large Granny Smith apple into small cubes. Toss the apple cubes in 1 tbsp lemon juice to prevent browning and add brightness. In a bowl, combine the apples with 1/2 cup packed light brown sugar, 1/4 tsp ground nutmeg, and 1 tsp vanilla extract. Stir until the apples are evenly coated.
- Assemble the hand pies: Remove the dough from the fridge and roll it out to a 12x12 inch square. Cut the dough into 12 equal squares. Place a heaping tablespoon of apple filling in the center of each square. Fold the dough over to form a triangle, pressing the edges together. Pinch the edges with a fork to seal and create a decorative crimp. If you’re feeling adventurous, use a toothpick to gently press the filling into the dough for a more secure seal.
- Egg wash: In a small bowl, beat 1 egg with 1 tbsp milk. Brush the tops of each hand pie with the egg wash; this step is the key to a glossy, golden crust. A light hand will give a subtle sheen, while a generous coat will produce a deep, caramelized finish.
- Watch Out: Place the assembled pies on a parchment‑lined baking sheet, spacing them about 1 inch apart.Watch Out: Overbaking can dry out the filling, leading to a tough bite. Keep a close eye on the color; the crust should be a deep golden brown, and the edges should pull away from the pan slightly.
- Bake: Preheat the oven to 375°F (190°C). Bake the hand pies for 15–18 minutes, or until the crust is golden and the filling is bubbling at the seams. The aroma that fills the kitchen during this stage is the prelude to pure bliss.
- Cool: Remove the pies from the oven and let them rest on a wire rack for 5 minutes. This brief cooling period allows the filling to set, preventing a soggy bottom. The first bite after cooling delivers a crisp crust that cracks like thin ice, followed by a molten apple filling that oozes out in a sweet, spiced cascade.
- Serve: Serve the hand pies warm, optionally dusted with a light sprinkle of powdered sugar or served alongside a scoop of vanilla ice cream. The contrast of warm, buttery pastry with cool, creamy ice cream is a match made in dessert heaven.
That’s it — you did it. But hold on, I’ve got a few more tricks that’ll take this to another level…
Insider Tricks for Flawless Results
The Temperature Rule Nobody Follows
Many home bakers bake at a high temperature, hoping for a quick crust, but the secret is a steady 375°F (190°C). This allows the butter to slowly melt, creating steam pockets that puff up the dough without burning the sugar. If you’re using a convection oven, lower the temperature by 25°F (14°C) to avoid over‑browning. A quick test: place a small piece of dough on a baking sheet; it should rise slightly and turn golden in about 12–15 minutes.
Why Your Nose Knows Best
The smell of cinnamon and butter is a powerful indicator of progress. As the dough bakes, you’ll notice a warm, comforting aroma that signals the sugars are caramelizing just right. If the scent feels metallic or burnt, the oven temperature is too high. Trust your nose; a good aroma often precedes a good bite.
The 5‑Minute Rest That Changes Everything
After baking, let the hand pies rest for exactly five minutes before serving. This short rest allows the filling’s juices to redistribute, ensuring each bite is evenly sweet and not overly liquid. Skipping this step can result in a soggy bottom or uneven texture. Think of it as a brief “cool‑down” that elevates the overall experience.
The Perfect Seal
Sealing the edges with a fork not only secures the filling but also creates a decorative pattern that enhances the visual appeal. Press the fork gently to avoid tearing the dough. If you prefer a smoother edge, use a dampened finger to press the seam; this helps prevent the crust from cracking during baking.
The Quick Chill Trick
If you’re in a hurry, place the dough on a chilled baking sheet for a few minutes before rolling. The cold surface helps keep the butter firm, preventing the dough from sticking and resulting in a cleaner cut. This trick is especially useful in hot kitchens or when you’re working with a large batch.
The Crumbless Edge
For a polished look, lightly brush the edges with beaten egg before sealing. This not only gives a shiny finish but also helps the crust stay intact during baking. A light coat is enough; too much will cause the dough to spread and flatten.
Creative Twists and Variations
This recipe is a playground. Here are some of my favorite ways to switch things up:
Caramel Apple Hand Pies
Swap the brown sugar for caramel sauce and add a pinch of sea salt to the filling. The caramel adds a rich, buttery sweetness that pairs beautifully with the apple’s tartness. Serve with a drizzle of extra caramel on top for a decadent finish.
Cranberry Orange Hand Pies
Replace the apples with fresh cranberries and add 1 tbsp orange zest to the filling. The tart cranberries and citrus zest create a bright, festive flavor profile. Top with a dusting of powdered sugar for a wintery touch.
Nutty Apple Hand Pies
Add 1/4 cup chopped walnuts or pecans to the apple filling for crunch. The nuts provide a nutty, buttery contrast to the sweet filling. A sprinkle of chopped nuts on top before baking adds a delightful crunch.
Chocolate‑Covered Hand Pies
After baking, dip each hand pie in melted dark chocolate and let it set on parchment. The chocolate coating gives a luxurious, indulgent finish. Add a pinch of sea salt to the chocolate for a sweet‑savory balance.
Spiced Pear Hand Pies
Use pears instead of apples for a subtler sweetness. Add a dash of cardamom and a splash of vanilla extract to the filling. The pears soften beautifully during baking, creating a silky filling.
Savory Cheese Hand Pies
For a savory twist, replace the apple filling with a mixture of shredded cheddar, chopped spinach, and a splash of cream. The cheese melts into a gooey center while the crust stays flaky. Serve with a side of marinara for dipping.
Storing and Bringing It Back to Life
Fridge Storage
Store leftover hand pies in an airtight container in the refrigerator for up to 3 days. The crust may soften slightly, but the filling remains fresh. To maintain crispness, reheat in a preheated oven at 350°F (175°C) for 5 minutes before serving.
Freezer Friendly
For longer storage, wrap each hand pie individually in parchment and then aluminum foil. Freeze for up to 2 months. When ready to eat, thaw at room temperature for 30 minutes, then bake at 375°F (190°C) for 10 minutes. The crust will regain its golden crunch.
Best Reheating Method
The secret to reheating is a splash of water. Add 1 tsp of water to the bottom of the pan, cover with foil, and heat at 350°F (175°C) for 5–7 minutes. The steam will keep the filling moist while the crust stays crisp. Avoid microwaving; it will make the crust soggy.