
A decadent, silky‑smooth chocolate egg with a creamy peanut butter center—perfect for Easter brunch or a festive breakfast.

I still remember the first time I saw a chocolate egg perched atop a springtime brunch table, its glossy shell catching the morning light like a tiny sunrise. My grandmother, a master of holiday confections, would always tell the story of how each egg was a labor of love, a sweet secret shared between generations. When I decided to reinvent that classic for my own kitchen, I wanted something that felt both nostalgic and daring—a treat that would make kids squeal and adults sigh in indulgent relief.
Chocolate Peanut Butter Eggs are a modern twist on the traditional Easter egg, blending the deep, slightly bitter notes of 70% dark chocolate with the comforting, nutty richness of creamy peanut butter. This combination is rooted in the beloved American tradition of pairing chocolate and peanut butter, yet it carries the elegance of a handcrafted confection. The recipe is deliberately simple, allowing the flavors to shine without overwhelming technique.
In this guide, I’ll walk you through every step—from tempering the chocolate for that perfect snap to creating a silky peanut butter ganache that stays soft at room temperature. You’ll learn how to achieve a glossy finish, how to use simple kitchen tools to shape perfect eggs, and how to store them so they stay fresh for weeks. By the end, you’ll have a show‑stopping dessert that feels luxurious yet is entirely achievable in a home kitchen.
I’m thrilled to share this recipe with you, and I hope you’ll find as much joy in making it as I do in eating it. Let’s get cracking!
🌟 Why This Recipe Will Win Your Heart
From the first bite to the lingering aftertaste, this treat delivers a balanced symphony of flavors and textures that keep you coming back for more.
- ✨ Irresistible Flavor Contrast: The bittersweet dark chocolate shell frames a luxuriously creamy peanut butter center, creating a delightful push‑and‑pull on the palate.
- ✨ No‑Bake Simplicity: With zero oven time, you can prepare these eggs in under an hour, perfect for busy mornings or last‑minute holiday gatherings.
- ✨ Customizable Aesthetics: The smooth chocolate surface invites decorative touches—sprinkles, sea salt, or a drizzle of white chocolate—so you can tailor each egg to your personal style.
- ✨ Nutrient Boost: Peanut butter adds protein and healthy fats, making the treat a more satisfying snack that steadies blood sugar compared to pure chocolate.
- ✨ Kid‑Friendly Fun: Shaping the mixture into eggs turns cooking into a playful activity, encouraging children to get involved and learn basic kitchen skills.
- ✨ Long Shelf Life: Properly stored, these eggs keep for up to two weeks in the fridge, allowing you to prepare them ahead of the Easter rush.
🥗 Ingredients
📝 Complete Ingredient List
For the Chocolate Shell:
For the Peanut Butter Filling:
For Decoration (Optional):

🔍 Focus on Key Ingredients
Dark Chocolate (70% Cocoa)
The backbone of the shell, dark chocolate provides a deep, slightly bitter flavor that balances the sweetness of the peanut butter. Look for chocolate bars that list cocoa solids as the first ingredient and contain minimal added sugar. High cocoa content ensures a firm snap when you bite into the egg.
Creamy Peanut Butter
Choosing a natural, unsweetened peanut butter is crucial for texture. It should be smooth enough to blend without lumps but still retain that characteristic nutty aroma. This ingredient adds protein and healthy monounsaturated fats, turning the treat into a more sustaining snack.
Powdered Sugar
Powdered sugar dissolves effortlessly into the peanut butter, creating a silky ganache that stays glossy at room temperature. It also lightens the overall sweetness, preventing the filling from becoming cloyingly sugary.
🔄 Quick Substitutions
| If you don’t have... | Use instead... |
|---|---|
| Dark chocolate (70%) | Milk chocolate with 55% cocoa (slightly sweeter) |
| Unsalted butter | Ghee (adds a nutty note) |
| Peanut butter | Almond butter (for a milder flavor) |
👨🍳 Step‑by‑Step Instructions
Follow these carefully crafted steps to create flawless chocolate eggs with a luscious peanut butter heart.
📋 Phase 1: Preparation & Mise en Place
Gather your tools and start by prepping the chocolate shell.
Temper the Dark Chocolate
Chop the dark chocolate into uniform 1‑cm pieces. Place two‑thirds of the chocolate in a heat‑proof bowl over a pot of simmering water (double boiler). Stir gently until melted and reaches 45‑48 °C (113‑118 °F). Remove from heat, add the remaining chocolate, and stir until the temperature drops to 31‑32 °C (88‑90 °F). This tempering process guarantees a glossy finish and a firm snap.
Prepare the Peanut Butter Ganache
In a medium bowl, combine the creamy peanut butter, powdered sugar, softened butter, and sea salt. Beat with a hand mixer on medium speed for about 2 minutes, until the mixture is light, fluffy, and slightly glossy. Set aside at room temperature; the ganache will stay soft but firm enough to pipe.
🔥 Phase 2: Assembly
Create the shells, fill them, and seal the eggs.
Form the Chocolate Shells
Using a small silicone egg mold (or two half‑egg silicone molds), brush a thin layer of tempered chocolate onto the interior surfaces. Ensure even coverage, especially around the edges. Chill the molds in the refrigerator for 5‑7 minutes until the chocolate sets.
Add a Second Layer for Strength
Apply a second, slightly thicker layer of chocolate over the first set. This reinforces the shell and creates a sturdier vessel for the filling. Refrigerate again for another 5 minutes.
Pipe the Peanut Butter Filling
Transfer the ganache to a piping bag fitted with a medium round tip. Pipe a generous dollop (about 1‑1.5 tbsp) into the center of each chocolate half, leaving a small margin from the edges. Avoid over‑filling, as the shell must be able to close.
✨ Phase 3: Finishing & Presentation
Seal, decorate, and set the final eggs.
Seal the Eggs
Warm a clean brush with a few drops of melted chocolate. Lightly brush the outer rim of each half, then press the two halves together gently, allowing the chocolate to act as a natural “glue.” Hold for a few seconds until the seal is firm.
Optional Decorative Drizzle
Melt the white chocolate in a microwave or double boiler. Using a fork, drizzle the white chocolate over each egg in a zig‑zag pattern. Sprinkle cocoa nibs or chopped peanuts for added texture and visual appeal.
Set the Eggs
Place the finished eggs on a parchment‑lined tray and refrigerate for at least 20 minutes. This ensures the chocolate fully hardens and the decorative drizzle sets.
Serve or Store
When ready to serve, let the eggs sit at room temperature for 5‑10 minutes to soften slightly, revealing the glossy sheen. They can be enjoyed immediately or stored as described in the conservation section.
💡 Expert Tips & Tricks
🛒 Choosing the Right Ingredients
When selecting chocolate, aim for a bar with at least 70% cocoa solids; this ensures a balanced bitterness that won’t overwhelm the peanut butter. For peanut butter, avoid brands with added hydrogenated oils or excessive sugar—natural creamy varieties provide the smoothest ganache. Butter should be unsalted to give you full control over the final salt level.
🔪 Preparation Techniques
Use a fine‑grated microplane to shave any excess chocolate from the mold before chilling; this prevents uneven thickness. When piping the ganache, keep the bag vertical to avoid air bubbles. A small offset spatula can help smooth the surface of each half after the second chocolate layer.
🌡️ Mastering the Cooking (Tempering) Process
Temper the chocolate slowly; rapid temperature changes cause bloom (white streaks) and a dull finish. If you don’t have a thermometer, the “cold plate” test works—dip a spoon into the chocolate; if it hardens within seconds and looks shiny, it’s tempered.
🍽️ Presentation & Service
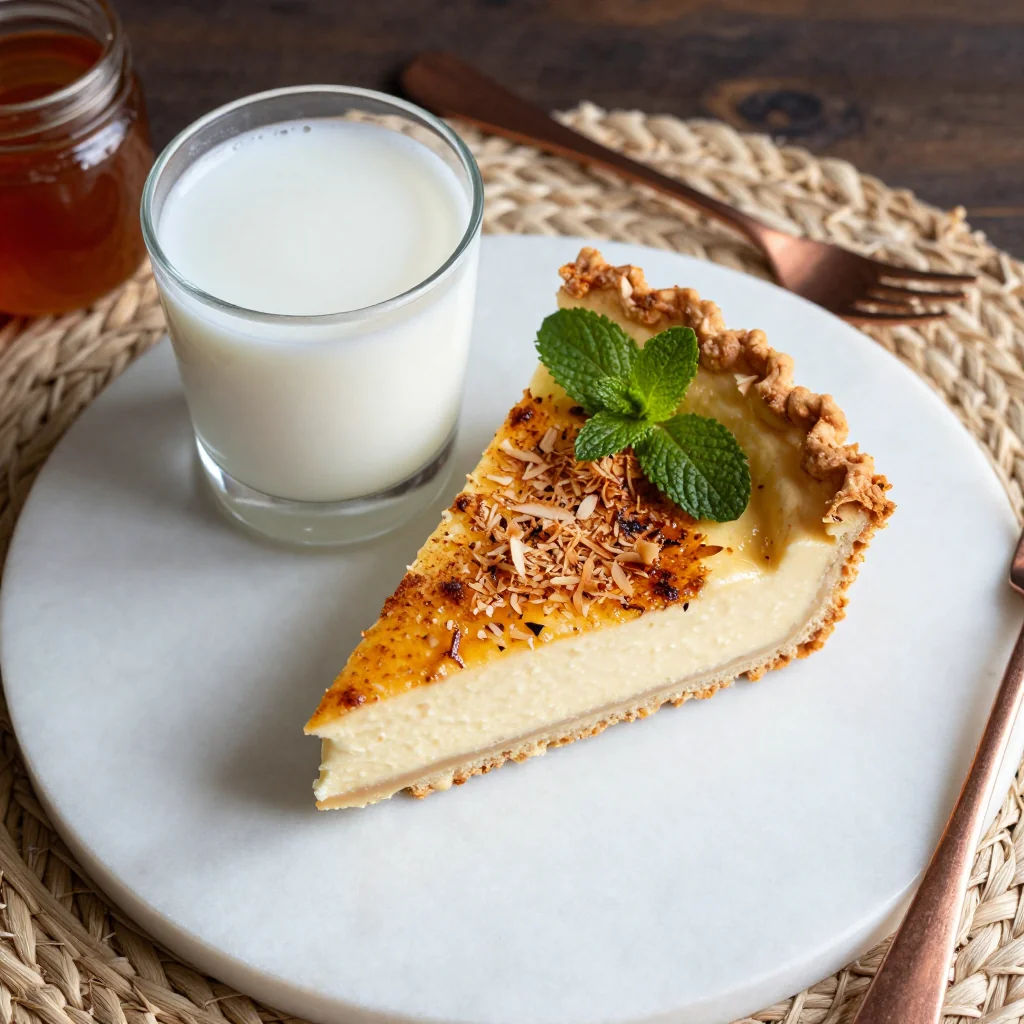
Arrange the eggs on a white marble slab or a pastel-colored plate to make the colors pop. Dust a light sprinkle of sea salt over the white chocolate drizzle for a sophisticated sweet‑salty contrast. Pair with a small glass of chilled milk or a fruity tea to balance the richness.
🏆 Pro Tips
Elevate your chocolate eggs from delightful to unforgettable with these professional insights.
- 🎯 Precise Temperature Control: Tempering at 45‑48 °C ensures the cocoa butter crystals form in the V‑type structure, which gives the chocolate its snap and gloss. Skipping this step may result in a dull, soft shell that cracks easily.
- 🎯 Use a Silicone Brush for Sealing: A silicone pastry brush holds a thin film of melted chocolate, allowing you to apply an even bead around the rim without excess, ensuring a seamless seal.
- 🎯 Air‑Bubble Elimination: After each chocolate coat, gently tap the mold on the counter to release trapped air. This prevents voids that could cause the shell to break when bitten.
- 🎯 Flavor Layering: Add a pinch of smoked sea salt to the ganache for a subtle umami note that heightens the chocolate’s depth.
- 🎯 Decorative Drizzle Technique: Use a spoon to drizzle white chocolate in thin ribbons, then immediately use a toothpick to swirl the ribbons for a marbled effect.
- 🎯 Storage Science: Store the eggs in an airtight container with a thin layer of parchment between each to prevent sticking. The cool environment keeps the chocolate firm and the ganache from softening too much.
“The secret to a perfect chocolate confection is patience and precise temperature; once mastered, the results are pure magic.” — Jacques Torres
🔄 Variations & Adaptations
Whether you’re catering to dietary needs or craving new flavor twists, this recipe is a versatile canvas.
🥬 Vegetarian / Vegan Version
Swap the dairy butter for a plant‑based alternative such as coconut oil or vegan butter. Use a vegan dark chocolate (certified dairy‑free) and choose a natural almond or cashew butter in place of peanuts. The texture remains creamy, and the flavor profile stays indulgent.
- Vegan butter (30 g) replaces unsalted butter in both shell and ganache.
- Almond butter (200 g) replaces peanut butter for a milder taste.
🌶️ Flavor Variations
Play with complementary spices or regional twists to keep the experience fresh.
Spicy Version:
Add ¼ tsp of cayenne pepper to the ganache and a pinch of smoked paprika to the chocolate shell for a subtle heat that awakens the palate.
Mediterranean Version:
Incorporate finely chopped toasted pistachios into the filling and drizzle with a honey‑infused white chocolate for a nutty‑sweet Mediterranean flair.
Asian Inspired Version:
Mix a splash of soy sauce (just a few drops) into the ganache and top with toasted sesame seeds for an umami‑rich, slightly salty surprise.
⚠️ Dietary Adaptations
Gluten‑Free:
The recipe is naturally gluten‑free; ensure any decorative toppings (e.g., sprinkles) are certified gluten‑free.
Lactose‑Free:
Use lactose‑free butter or coconut oil, and select a dairy‑free chocolate. The ganache will stay smooth with the right fat content.
Low‑Calorie:
Replace half of the dark chocolate with cocoa nibs and reduce powdered sugar to 70 g. Use a reduced‑fat peanut butter (or blend with Greek yogurt) to cut calories while preserving creaminess.
👶 Family / Kids Version
For younger palates, swap the dark chocolate for milk chocolate and add a drizzle of colorful candy sprinkles. Reduce the sea salt in the ganache, and consider a fun shape—like bunny silhouettes—using silicone bunny molds instead of eggs.
📦 Conservation & Reheating
🧊 Conservation
Refrigerator:
- Duration: 10‑14 days
- Recommended container: Airtight glass or BPA‑free plastic with a parchment layer
- Tip: Place a thin sheet of wax paper between each egg to prevent sticking.
Freezer:
- Duration: Up to 3 months
- Method: Wrap each egg individually in cling film, then store in a freezer‑safe bag.
- Defrosting: Transfer to the refrigerator overnight, then let sit at room temperature for 10 minutes before serving.
💡 For optimal texture, avoid freezing the ganache for more than two weeks; prolonged freezing can cause graininess.
♨️ Reheating
🔥 Oven (Recommended):
- Preheat to 150 °C (300 °F).
- Place eggs on a parchment‑lined tray and cover loosely with aluminum foil.
- Heat for 8‑10 minutes until the chocolate softens slightly.
- Remove foil and warm an additional 2 minutes for a glossy finish.
⚡ Microwave (Quick):
- Place an egg on a microwave‑safe plate; cover with a microwave‑safe lid.
- Heat on medium power for 15‑20 seconds.
- Check softness; repeat in 5‑second bursts if needed.
🍳 Skillet:
If you prefer a stovetop method, warm a non‑stick skillet over low heat, add a splash of water, and briefly steam the egg for 30 seconds, turning gently.
🍷 Perfect Pairings
🥗 Side Dishes
- Fresh Berry Salad: A mix of strawberries, blueberries, and mint provides acidity that cuts through the richness.
- Greek Yogurt with Honey: Creamy tang and a drizzle of honey echo the sweet notes of the chocolate.
- Light Citrus Quinoa: The bright citrus zest balances the deep chocolate flavor.
🍷 Wine & Beverage Pairings
- Ruby Port: Its sweet, fortified profile mirrors the chocolate’s depth while adding fruit complexity.
- Cold Brew Coffee: The bitterness of coffee highlights the chocolate’s cocoa richness.
- Non‑Alcoholic Option: A chilled hibiscus iced tea with a hint of orange blossom.
🍰 Complementary Courses
Start with a light citrus vinaigrette salad, move to the chocolate eggs as the main sweet centerpiece, and finish with a simple vanilla panna cotta topped with caramelized bananas for a harmonious progression.
❓ Frequently Asked Questions
Q: Can I use milk chocolate instead of dark chocolate?
A: Absolutely! Milk chocolate will produce a sweeter, softer shell. If you prefer a milder flavor, choose a chocolate with at least 55% cocoa. Keep in mind that the shell may be less firm, so handle the eggs gently.
Q: How do I prevent the chocolate from blooming?
A: Bloom occurs when chocolate is exposed to temperature fluctuations. Temper the chocolate correctly, store the finished eggs in a cool, dry place, and avoid refrigerating them for long periods unless you plan to serve them chilled.
Q: What if I don’t have a silicone egg mold?
A: You can create a makeshift mold using two small metal bowls placed back‑to‑back, or shape the shells by hand on a parchment sheet, allowing the chocolate to set before cutting into halves.
Q: My ganache is too runny—what’s wrong?
A: The ganache may be too warm or contain too much powdered sugar. Ensure the butter is fully softened but not melted, and beat the mixture until it thickens. If needed, add an extra tablespoon of powdered sugar to achieve a firmer consistency.
Q: Can I add other flavors to the filling?
A: Yes! Consider adding a splash of espresso, a pinch of cinnamon, or a swirl of caramel for new flavor dimensions. Adjust the sugar level accordingly to maintain balance.
Q: How far in advance can I prepare the eggs?
A: The eggs can be fully assembled and stored in the refrigerator for up to two weeks. For best texture, wait at least 24 hours before serving to allow the flavors to meld.
🎉 To Your Oven!
These Chocolate Peanut Butter Eggs Easter Treats combine the comforting nostalgia of a holiday classic with the modern flair of gourmet confectionery. With a glossy dark chocolate shell, a velvety peanut butter heart, and optional decorative accents, they are as beautiful as they are delicious. Whether you’re impressing guests at a brunch, creating a memorable Easter basket, or simply indulging in a weekend treat, this recipe delivers satisfaction in every bite.
Give it a try, experiment with the variations, and don’t hesitate to make it your own. The joy of crafting something from scratch is amplified when you see the smiles around the table. Share your creations, ask questions, and let the community celebrate your success.
Have you tried this recipe?
Leave a comment and rating below! Share your photos on Instagram with #EasterEggTreat for a chance to be featured.
Chocolate Peanut Butter Eggs Easter Treat
Decadent chocolate eggs filled with creamy peanut butter—perfect for Easter brunch.
📝 Ingredients
Chocolate Shell
Peanut Butter Filling
Decoration (Optional)
👨🍳 Instructions
- 1 Temper the dark chocolate using a double boiler, then cool to 31‑32 °C.
- 2 Mix peanut butter, powdered sugar, softened butter, and sea salt until light and fluffy.
- 3 Brush a thin layer of tempered chocolate into silicone egg molds; chill 5 min.
- 4 Add a second chocolate layer for strength; chill again.
- 5 Pipe the peanut butter ganache into each half, leaving a margin.
- 6 Brush the rims with melted chocolate and press halves together to seal.
- 7 Drizzle white chocolate and sprinkle cocoa nibs if desired.
- 8 Refrigerate the assembled eggs for at least 20 min to set.
- 9 Transfer to a serving platter; let sit at room temperature 5 min before serving.
- 10 Enjoy with your favorite beverage and share the joy!
🥗 Nutritional Information (per serving)
*Nutrition facts are estimates based on standard ingredients.
📚 You Might Also Like
Strawberry Chocolate Tart
Coconut Lime Pancakes
Matcha White Chocolate Truffles


💬 Comments & Reviews
Leave a Comment
No comments yet. Be the first to share your thoughts!