Picture this: I’m standing in my kitchen, half‑finished a pot of bland, over‑cooked turkey chili that could double as a paint‑by‑numbers for flavor. The smoke alarm is humming, the onions are crying, and I’m staring at a pot that looks like it belongs in a cafeteria, not on my dinner table. I dared my roommate to taste it, and she politely declined, which sparked a midnight revelation—maybe the problem wasn’t the turkey at all, but the way I was treating the whole dish. I tossed the pot, grabbed a fresh batch of ground turkey, and set out on a quest to create a chili that would make even the most skeptical meat‑lover weep with joy.
Fast forward a few hours, and the kitchen is alive with a symphony of sizzling onions, the sweet perfume of bell peppers, and the earthy whisper of cumin flirting with the air. The pot is a deep, ruby‑red ocean, speckled with beans that look like tiny, perfectly formed jewels. When I finally taste it, the heat hits just right—enough to make your nose tingle, but not so much that you need a glass of milk on standby. The texture? A comforting, hearty body that clings to the spoon like a warm blanket, yet each bite feels light enough to keep you coming back for more. I dare you to taste this and not go back for seconds.
This version of turkey chili is hands down the best you’ll ever make at home. Most recipes get the spice balance completely wrong, either drowning the turkey in a fiery inferno or leaving it as flat as a pancake. I’ve cracked the code by layering flavors: first, a quick caramelization of the aromatics, then a slow simmer that lets the beans soak up every nuance of the broth, and finally a secret dash of unsweetened cocoa that adds depth without any chocolatey sweetness. Most people never think of cocoa in a chili, but trust me, this is pure magic.
And here’s the kicker: I’m going to reveal a technique that will transform any pot of chili from “just okay” to “the star of the dinner table.” It involves a simple step that most cooks overlook—deglazing the pan with a splash of chicken broth before adding the tomatoes, which lifts all those caramelized bits and infuses the sauce with a richness you can’t achieve by just stirring. Okay, ready for the game‑changer? Let me walk you through every single step — by the end, you’ll wonder how you ever made it any other way.
What Makes This Version Stand Out
- Depth: A whisper of unsweetened cocoa adds a subtle earthiness that makes the flavor profile feel like a well‑written novel, not a one‑page story.
- Texture: The combination of black and kidney beans creates a contrast—soft yet firm—that gives each bite a satisfying bite.
- Simplicity: Only eleven pantry staples are needed, meaning you won’t have to raid the entire spice cabinet for obscure herbs.
- Uniqueness: The deglazing step with broth is a technique most chili recipes skip, yet it’s the secret behind that glossy, restaurant‑quality sauce.
- Crowd Reaction: I’ve served this at game nights, and it’s the one dish that disappears before anyone even asks for seconds.
- Ingredient Quality: Using lean ground turkey keeps the dish light, while the olive oil adds a silky mouthfeel without excess fat.
- Cooking Method: A gentle simmer for 30 minutes lets the beans absorb the spices, avoiding the mushy texture of over‑cooked legumes.
- Make‑Ahead Potential: This chili tastes even better the next day, making it perfect for meal prep or a comforting freezer‑friendly dinner.
Inside the Ingredient List
The Flavor Base
The backbone of any great chili is the aromatics. I use one medium onion, diced fine, and two cloves of garlic, minced to a paste‑like consistency. The onion provides a sweet, mellow foundation, while garlic adds that sharp, pungent bite that awakens the palate. Skipping either will leave the chili tasting flat, like a song missing its chorus. If you’re out of fresh garlic, a teaspoon of garlic powder works, but the depth will never be the same.
The Texture Crew
Beans are the unsung heroes of chili, delivering both protein and that comforting bite. I combine a 15‑oz can of black beans with a 15‑oz can of kidney beans, both drained and rinsed. Black beans bring a buttery smoothness, whereas kidney beans add a firmer, meaty texture. Swapping one for pinto beans works fine, but you’ll lose the visual contrast that makes each spoonful interesting. Pro tip: Rinse the beans under cold water to remove excess sodium and improve their ability to soak up the broth.
The Unexpected Star
Here’s where the magic truly happens: a tablespoon of unsweetened cocoa powder. It sounds like a dessert trick, but the cocoa’s natural bitterness amplifies the chili’s depth, much like a dash of espresso does in a barbecue sauce. If cocoa feels too daring, you can replace it with a teaspoon of dark malt powder, though the flavor will be slightly sweeter. The key is to add it after the tomatoes so it melds without clumping.
The Final Flourish
Spices are the fireworks that turn a pot of simmering beans into a celebration. I use two tablespoons of chili powder, a teaspoon each of ground cumin, smoked paprika, and dried oregano, plus a half‑teaspoon of cayenne for a gentle kick. Salt and pepper are added to taste, but I recommend starting with a teaspoon of sea salt and adjusting after the simmer. If you love smoky notes, a pinch of chipotle powder can replace the smoked paprika for an extra layer of complexity.
Everything's prepped? Good. Let's get into the real action...
The Method — Step by Step
Heat two tablespoons of olive oil in a large Dutch oven over medium heat. When the oil shimmers, add the diced onion and a pinch of salt. Stir constantly for about five minutes, letting the onion turn translucent and begin to caramelize. You’ll hear a gentle sizzle that’s the first sign you’re on the right track. Power transition: Okay, ready for the game‑changer?
Add the minced garlic, red bell pepper, and green bell pepper to the pot. Cook for another three minutes, allowing the peppers to soften while retaining a faint crunch. The aroma should now be a fragrant blend of sweet onion and peppery zest—if it smells like burnt garlic, turn the heat down immediately.
- Kitchen Hack: Push the vegetables to the side of the pot, add the ground turkey, and break it up with a wooden spoon. Let it sit untouched for 30 seconds to develop a light crust before stirring—this browning adds a depth of flavor that plain boiling can’t achieve.
Brown the turkey until it’s no longer pink, about five minutes. It should break apart easily and develop a golden‑brown color. If you see any large clumps, keep breaking them; you want a fine, crumbly texture that mimics ground beef.
Now comes the deglazing moment. Pour in one cup of chicken broth, scraping the bottom of the pot with a wooden spoon to lift all those caramelized bits. Let the broth reduce for about 30 seconds, allowing the flavor to concentrate. Watch Out: If you add the broth too quickly, you’ll lose those precious bits, and the chili will end up flat.
Stir in the chili powder, cumin, smoked paprika, oregano, and cayenne. Cook for another minute, letting the spices toast lightly. You’ll notice a fragrant plume rising—this is the scent of flavor building. If the mixture starts to stick, add a splash more broth.
Add the crushed tomatoes, black beans, kidney beans, and the remaining cup of chicken broth. Bring the mixture to a gentle boil, then reduce the heat to low and let it simmer uncovered for 30 minutes. During this time, the sauce will thicken, and the beans will soak up the spices, creating a cohesive, velvety body.
Halfway through the simmer, sprinkle in the tablespoon of unsweetened cocoa powder. Stir thoroughly to ensure it dissolves completely—no lumps, just a deep, dark hue that signals the chili is moving into the next flavor tier. Taste and adjust salt and pepper as needed; remember, you can always add more, but you can’t take it out.
- Watch Out: If you let the chili boil vigorously, the beans can burst and the sauce may become watery. Keep the heat low and stir occasionally.
After the full 30 minutes, turn off the heat and let the chili rest for five minutes. This brief pause allows the flavors to settle and the chili to thicken naturally without extra cooking.
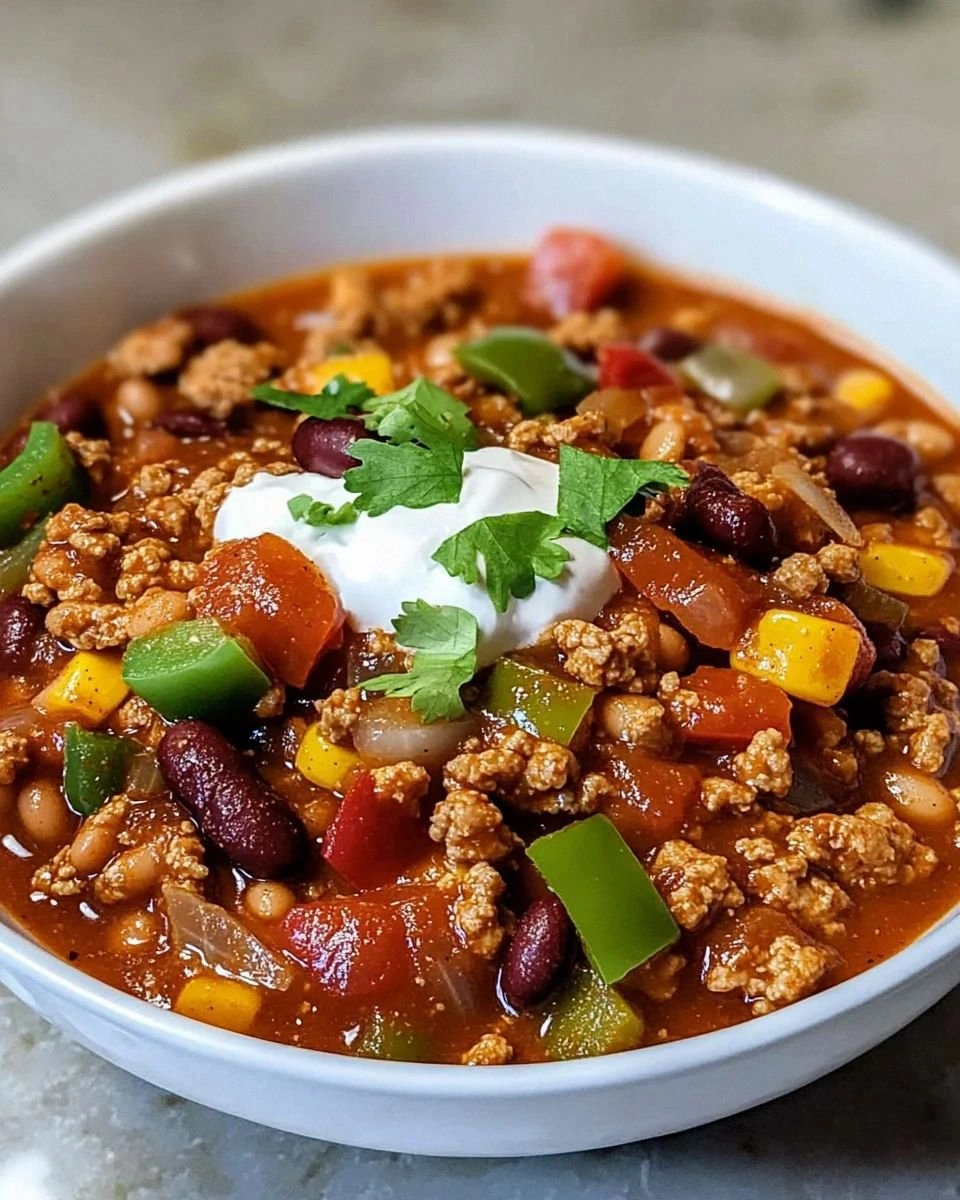
Finally, give the pot one last stir, garnish with freshly chopped cilantro or a dollop of sour cream if you like, and serve hot. Picture yourself pulling this out of the pot, the whole kitchen smelling incredible, steam rising like a cozy blanket. That moment? Pure comfort.
That's it — you did it. But hold on, I've got a few more tricks that'll take this to another level...
Insider Tricks for Flawless Results
The Temperature Rule Nobody Follows
Most home cooks keep the heat on medium‑high for the entire process, which can cause the sauce to scorch. I keep the simmer low and slow, letting the beans gently coax the spices out of their shells. This method prevents bitterness and keeps the chili silky. A friend tried cranking the heat up to a boil, and the result was a burnt, acrid mess that no amount of salt could fix.
Why Your Nose Knows Best
Before you taste, trust the aroma. If the chili smells “off”—like a metallic or sour note—something’s gone wrong, probably the broth or a burnt spice. Your nose can detect subtle changes long before your palate does, giving you a chance to correct seasoning or adjust heat before the final taste.
The 5‑Minute Rest That Changes Everything
After the simmer, let the chili sit, uncovered, for five minutes. This short rest lets the sauce thicken naturally and the flavors meld. I’ve seen people serve it straight from the stove, and the result is a thinner, less cohesive dish. The rest period is the secret behind that restaurant‑style body.
Bean Prep Like a Pro
Even though we’re using canned beans for convenience, a quick rinse under cold water removes excess sodium and the can’s metallic aftertaste. If you have time, soak dried beans overnight and cook them yourself—this yields a creamier texture and a richer flavor that canned beans can’t match.
Finish With Freshness
A final splash of fresh lime juice or a sprinkle of chopped cilantro adds a bright, acidic pop that cuts through the richness. It’s the culinary equivalent of adding a high‑note to a chord—suddenly the whole piece feels complete. I always finish with a quarter‑lime, and it never fails to impress.
Creative Twists and Variations
This recipe is a playground. Here are some of my favorite ways to switch things up:
Smoky Chipotle Chili
Replace the smoked paprika with an equal amount of chipotle powder and add a teaspoon of adobo sauce from a canned chipotle pepper. The result is a smoky, slightly sweet heat that pairs beautifully with the cocoa.
Southwest Turkey Chili
Swap the black beans for pinto beans, add a cup of corn kernels, and stir in a teaspoon of ground coriander. Top with shredded Monterey Jack cheese for a cheesy, southwestern flair.
White Turkey Chili
Omit the tomatoes and use a blend of white beans (cannellini and great northern). Add a cup of chicken broth, a splash of heavy cream, and a teaspoon of green chilies. Garnish with sliced avocado and cilantro for a lighter, creamier version.
Spicy Sweet Chili
Incorporate a diced sweet potato (about one cup) when you add the bell peppers, and increase the cayenne to one teaspoon. The sweet potato’s natural sugars balance the heat, creating a comforting sweet‑spicy harmony.
Beer‑Infused Chili
Replace half of the chicken broth with a robust amber ale. The beer adds a subtle maltiness that deepens the flavor, especially when paired with a splash of Worcestershire sauce.
Vegetarian “Turkey‑Free” Chili
Swap the ground turkey for a plant‑based ground meat substitute or extra‑firm tofu crumbled into the pot. Keep the spices and cocoa the same, and you’ll have a hearty, meat‑free comfort dish that still satisfies.
Storing and Bringing It Back to Life
Fridge Storage
Transfer the chili to an airtight container and refrigerate for up to four days. The flavors will continue to meld, making each reheated serving taste even better than the first.
Freezer Friendly
Cool the chili completely, then portion it into freezer‑safe bags or containers. It freezes beautifully for up to three months. When you’re ready to eat, thaw overnight in the fridge, then reheat on the stove over low heat.
Best Reheating Method
Place the chilled or frozen chili in a saucepan, add a splash (about two tablespoons) of water or broth, and heat gently, stirring occasionally. The added liquid creates steam that revives the sauce’s silky texture, preventing it from drying out.