I was standing in my kitchen, the clock ticking like a metronome, when a sudden craving for something sweet, creamy, and protein‑packed hit me like a bolt of lightning. I grabbed a banana, a tub of vanilla protein powder, and a bottle of salted caramel sauce, only to realize I’d left my blender on the counter, a silent, accusing reminder of every half‑finished smoothie I’d ever abandoned. The air smelled faintly of coffee and the faint hum of the fridge, while the countertop was a battlefield of mismatched measuring cups and a rogue spoon that had slipped into the sink. I swear, I could hear the milk sighing as it waited to be transformed, and the Greek yogurt gave off that subtle tang that makes you think of a Greek tavern on a sunny afternoon. That moment of chaos turned into a dare: “I bet you can’t make a shake this good without a kitchen disaster,” and I accepted, promising myself a treat that would make even the most skeptical fitness junkie drool.
Fast forward a half hour later, and the kitchen was a symphony of whirring blades, the caramel sauce swirling like molten gold, and the banana surrendering its sweet secrets into the mix. The texture was so smooth it felt like silk sliding across your skin, and the aroma? Imagine a caramel‑laden cloud drifting over a vanilla bean field at sunrise—pure, intoxicating, and impossible to ignore. I took a sip, and the salty kiss of sea salt danced with the buttery caramel, while the protein powder added a subtle, creamy depth that made the whole thing feel like a dessert you could actually brag about at the gym. This isn’t just a shake; it’s a handheld celebration, a post‑workout reward that feels indulgent without the guilt.
Most recipes I’ve tried either skimp on flavor, drown in artificial sweeteners, or forget the importance of texture—resulting in a watery mess that could double as a cleaning solution. I’ve seen people throw in a scoop of protein powder and a splash of milk, only to end up with a gritty, chalky disappointment that makes you wonder why you even bothered. That’s why this version stands out: it balances the richness of caramel, the brightness of banana, and the tang of Greek yogurt, all while staying wholesome and protein‑packed. The secret weapon? A pinch of sea salt that amplifies the caramel’s sweetness and a splash of vanilla extract that ties everything together like a perfectly tuned chord.
Okay, ready for the game‑changer? I’m about to walk you through every single step—by the end, you’ll wonder how you ever made a shake any other way. I dare you to taste this and not go back for seconds. Trust me, this is hands down the best version you’ll ever make at home, and I’ll be honest—I ate half the batch before anyone else got to try it. Let’s dive in, and remember: if you’ve ever struggled with a bland protein shake, you’re not alone, and I’ve got the fix.
What Makes This Version Stand Out
- Flavor Explosion: The combination of salted caramel and ripe banana creates a sweet‑savory harmony that feels like a dessert bar in a glass, while the vanilla protein powder adds a subtle, creamy undertone that never overpowers.
- Silky Texture: Greek yogurt and a splash of milk blend into a velvety mouthfeel, making the shake feel richer than a milkshake yet lighter than a milk‑laden pudding.
- Protein Power: With 25 grams of protein per serving, this shake fuels muscle recovery without the chalky aftertaste that most protein powders bring.
- Simplicity: All ingredients are pantry‑friendly, requiring no cooking, no oven, and just a blender—perfect for busy mornings or post‑gym refuel.
- Quality Matters: Using a high‑quality salted caramel sauce and Optimum Nutrition Gold Standard whey ensures a smooth, buttery base that cheap alternatives can’t match.
- Crowd‑Pleaser: This shake has become the go‑to treat at my family brunches; even the kids (who usually hate “healthy” stuff) beg for seconds.
- Make‑Ahead Potential: Prep the dry ingredients in a zip‑lock bag, and you’ll have a ready‑to‑blend shake in seconds—ideal for those “I forgot to eat breakfast” moments.
- Season‑Proof: The flavors are comforting enough for winter yet bright enough for summer, making this a year‑round staple.
Inside the Ingredient List
The Flavor Base
The star of the show is the salted caramel sauce. A thick, buttery sauce provides that deep, caramelized sweetness that coats the palate like velvet, while the pinch of sea salt cuts through the richness, preventing the shake from becoming cloyingly sweet. If you skip the salt, you’ll miss that bright contrast that makes the caramel sing. For a healthier twist, look for a low‑sugar caramel or make your own with a splash of maple syrup and a dash of sea salt.
The Protein Powerhouse
Vanilla protein powder is the backbone of this shake, delivering the essential amino acids needed for muscle repair. I recommend Optimum Nutrition Gold Standard because its smooth texture blends flawlessly without leaving gritty remnants. Using a cheaper, low‑quality powder often results in a chalky mouthfeel that can ruin the entire experience. If you’re dairy‑free, swap for a plant‑based vanilla pea protein, but expect a slightly different texture.
The Texture Crew
Greek yogurt adds a luxurious creaminess that mimics the richness of a dessert sauce while contributing an extra 5‑6 grams of protein per serving. Its tang balances the sweetness of the caramel and banana, preventing the shake from feeling like a sugar bomb. If you’re vegan, coconut yogurt works well, though it brings a subtle coconut flavor that pairs nicely with caramel.
Banana (half a ripe one) is the natural sweetener that also thickens the shake without the need for added sugars. Its starches turn silky when blended, creating that “smooth as silk” sensation you crave. Overripe bananas are best—they’re sweeter and blend more easily. If bananas aren’t your thing, try frozen mango for a tropical twist.
The Final Flourish
Milk (any kind you prefer) provides the liquid base, ensuring the shake is drinkable yet still thick enough to coat a spoon. Dairy milk adds a subtle creaminess, while almond, oat, or cashew milk keep the calorie count lower and add a nutty undertone. Vanilla extract (a quarter teaspoon) deepens the vanilla notes, making the flavor profile more cohesive.
Sea salt is a tiny pinch, but it’s the secret weapon that brightens the caramel, turning a simple sweet into a sophisticated sweet‑and‑salty experience. Don’t underestimate its power; a pinch too little and the flavor feels flat, too much and you’ll overpower the delicate balance.
Everything's prepped? Good. Let's get into the real action...
The Method — Step by Step
Gather all your ingredients and give them a quick visual check. Make sure the banana is ripe, the protein powder is scooped, and the caramel sauce is at room temperature; cold sauce can cling to the sides of the blender and cause uneven mixing. This is the moment of truth—if anything feels off, adjust now before the blender starts whirring.
Add the milk to the blender first. Starting with the liquid creates a vortex that pulls the other ingredients down, preventing air pockets. If you’re using a high‑speed blender, let the milk run for a few seconds on low to create a gentle whirl.
Drop in the Greek yogurt and banana. The banana should be mashed lightly with a fork before entering the blender; this reduces the chance of large chunks that could cause the blades to jam. The yogurt will begin to thicken the mixture, giving you that luxurious mouthfeel.
Sprinkle in the vanilla protein powder. This is where most people go wrong by adding the powder last, which can leave clumps. By adding it now, the powder has ample liquid to dissolve, ensuring a smooth, non‑grainy texture.
Pour in the salted caramel sauce, followed by the pinch of sea salt and the vanilla extract. As the caramel hits the blades, you’ll hear a faint, satisfying “whoosh” that signals it’s being incorporated. The sea salt should dissolve quickly; if it doesn’t, give the blender a quick pulse.
Add the ice cubes (if you like a chilled shake). Ice not only cools the drink but also adds volume, making the shake feel more substantial. For a frosty texture, use frozen banana slices instead of fresh banana and skip the ice.
Secure the lid tightly and start blending on low for 10 seconds, then ramp up to high for 30‑45 seconds. You’ll notice the mixture turning a deep caramel‑gold hue, and the scent will fill the kitchen like a bakery at dawn. The shake should be thick enough to coat the back of a spoon but still pourable.
Taste test! Take a small spoonful; you should feel the salty caramel, the subtle vanilla, and the banana’s natural sweetness all dancing together. If the flavor needs a boost, add a tiny drizzle of extra caramel or a pinch more sea salt, but remember: a little goes a long way.
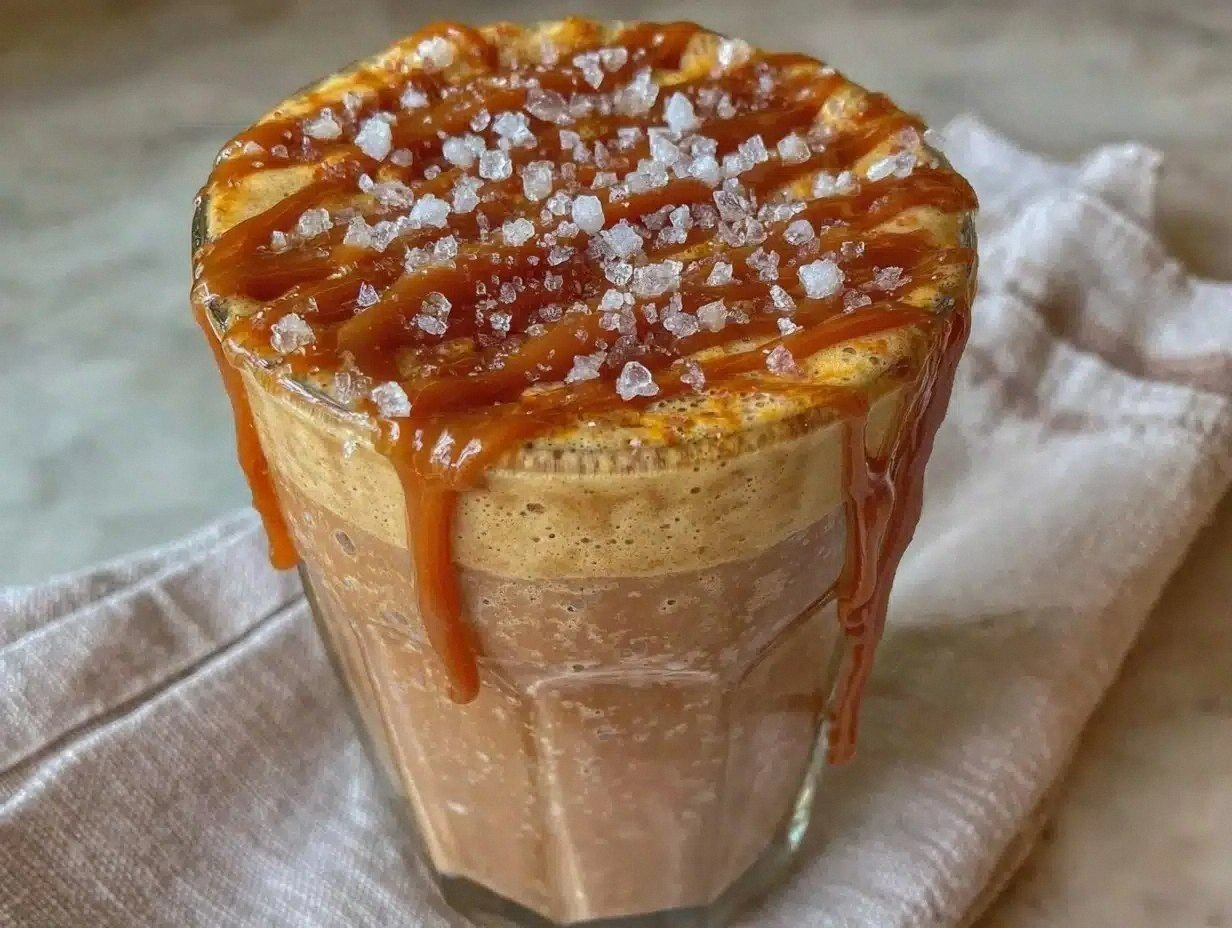
Pour the shake into chilled glasses or a sturdy travel bottle. For that Instagram‑worthy finish, drizzle a thin line of caramel across the rim and sprinkle a pinch of sea salt on top. Serve immediately, or store in the fridge for up to 24 hours—just give it a good shake before drinking.
That's it — you did it. But hold on, I've got a few more tricks that'll take this to another level. Trust me, these final touches will make your shake the talk of the gym, the office, and even your grandma’s Sunday brunch.
Insider Tricks for Flawless Results
The Temperature Rule Nobody Follows
Cold ingredients make a thicker shake, but if everything is too cold, the blender can struggle. Let the milk sit out for a minute or two before blending; this small temperature increase helps the blades spin more efficiently, resulting in a smoother texture. I once tried a frozen‑milk shake and ended up with a gritty mess—lesson learned. A lukewarm start, followed by a quick chill with ice, gives you the best of both worlds.
Why Your Nose Knows Best
Before you even sip, trust the aroma. The moment you smell the caramel’s buttery notes mingling with vanilla, you know the flavor balance is on point. If the scent feels flat, it usually means the caramel is too thin or the sea salt is missing. A quick sniff can save you from a bland batch—no need to waste a sip.
The 5‑Minute Rest That Changes Everything
After blending, let the shake rest for five minutes. This allows the flavors to meld, the banana’s starches to fully hydrate, and any air bubbles to rise to the surface. The result? A richer mouthfeel and a more cohesive taste. Skipping this step is like serving a cake before it’s cooled—still good, but not as perfect.
Freeze‑Ahead Banana Slices
Slice a banana, pop the pieces into a zip‑lock bag, and freeze them for future shakes. Frozen banana adds natural sweetness and a frosty texture without diluting the flavor, eliminating the need for ice cubes. It also saves you from the dreaded “banana‑flavor‑overpower” that fresh bananas can cause if you use too much.
Caramel Consistency Check
When using store‑bought caramel, give it a quick stir before measuring. The sauce often separates, with thicker caramel settling at the bottom. A quick stir ensures you get the right consistency and prevents clumps in the final shake. If the sauce is too runny, simmer it gently for a minute to thicken.
Creative Twists and Variations
This recipe is a playground. Here are some of my favorite ways to switch things up:
Mocha Salted Caramel
Add a tablespoon of cold brew concentrate and a pinch of espresso powder. The coffee’s bitterness amplifies the caramel’s depth, turning the shake into a post‑lunch pick‑me‑up that’s perfect for caffeine lovers.
Nutty Delight
Stir in a tablespoon of almond butter and swap oat milk for almond milk. The nutty undertones complement the caramel, and the extra healthy fats keep you satiated longer.
Berry‑Burst Caramel
Blend in a half‑cup of frozen mixed berries. The tartness of the berries cuts through the sweetness, creating a vibrant pink shake that’s as eye‑catching as it is tasty.
Vegan Coconut Dream
Replace Greek yogurt with coconut yogurt and use a plant‑based vanilla protein. The coconut adds a subtle tropical note, and the shake stays completely dairy‑free without sacrificing creaminess.
Spiced Autumn
Add a dash of cinnamon and a pinch of nutmeg. The warm spices echo the caramel’s buttery notes, making this variation perfect for chilly evenings.
Storing and Bringing It Back to Life
Fridge Storage
Transfer the shake to an airtight glass jar and store it in the refrigerator for up to 24 hours. Before drinking, give it a good shake or stir—ingredients may settle, but a quick mix restores the original texture. If it thickens too much, add a splash of milk and stir.
Freezer Friendly
Portion the shake into silicone muffin cups and freeze for up to 2 weeks. When you’re ready, pop a cup into the blender with a splash of milk and blend for a quick, icy treat. This method works especially well with frozen banana slices already in the mix.
Best Reheating Method
If you prefer a warm version (think caramel‑kissed latte), gently warm the shake in a saucepan over low heat, stirring constantly. Add a tiny splash of water or extra milk before reheating; the steam will bring back the silky texture you love without curdling the yogurt.