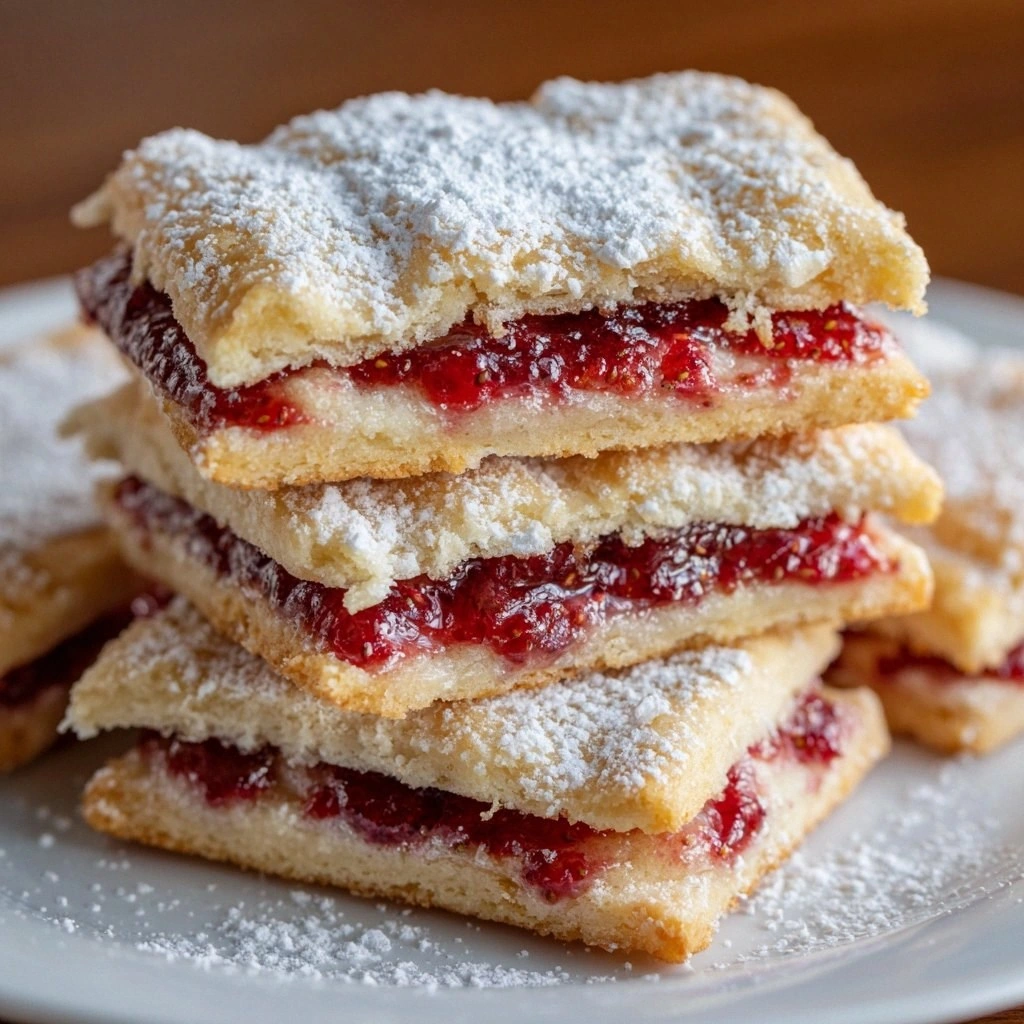
I never thought a kitchen catastrophe could lead to a culinary revelation, but that’s exactly what happened last week. I was attempting a simple sugar cookie batch for a family gathering and, in a moment of distraction, I tossed an entire jar of strawberry jam into the dough instead of the usual sugar. The result was a gooey, jam‑laden cookie that burst with flavor when I took the first bite—so much so that I immediately declared it a new family staple. If you’ve ever tried a cookie that tastes like a dessert and a snack rolled into one, you know the feeling of pure joy that follows.
Picture this: the oven’s heat transforms the dough’s surface into a golden, crisp shell while the interior remains soft and syrupy. The aroma is a sweet, berry‑laden perfume that wafts through the kitchen, pulling everyone toward the counter. When you break one open, the jam swirls like a red river, and the buttery crust crackles with a satisfying snap. The texture is a perfect marriage of crunchy and chewy, a sensory delight that makes each bite a tiny adventure.
What makes this version stand out from the countless cookie recipes out there is that it turns the humble pop‑tart into a gourmet treat that feels both nostalgic and sophisticated. The jam is the star, but the supporting cast—soft butter, the right amount of sugar, and a touch of vanilla—creates a depth that elevates the flavor profile. The dough is light enough to puff slightly, giving the cookies a airy interior that contrasts with the crisp edges. I dare you to taste this and not go back for seconds. Trust me, it’s hands down the best version you’ll ever make at home.
I’m not just going to give you a list of steps; I’m going to walk you through every single moment, from mixing the dough to that final drizzle of glaze. Picture yourself pulling these out of the oven, the kitchen smelling incredible, and the anticipation building as the first cookie lands on your plate. Ready? Let’s dive in, and by the end, you’ll wonder how you ever made it any other way.
What Makes This Version Stand Out
- Taste: The jam infuses the cookie with a natural sweetness that cuts through the butter’s richness, creating a balanced flavor that feels both indulgent and refreshing.
- Texture: The dough’s lightness and the jam’s viscosity produce a cookie that is crisp on the outside, chewy on the inside, and melts in your mouth.
- Simplicity: With only ten basic ingredients, you can create a showstopper without a complicated prep routine.
- Uniqueness: Unlike traditional pop‑tarts that are pre‑filled, these cookies are made from scratch, allowing the jam to swirl naturally inside.
- Crowd Reaction: Friends and family rave about the burst of berry flavor, and it’s the talk of the table at gatherings.
- Ingredient Quality: Using fresh strawberry jam and real butter ensures the best taste; no artificial flavors needed.
- Cooking Method: The baking technique preserves the jam’s integrity while crisping the dough.
- Make‑Ahead Potential: These cookies can be stored in an airtight container for up to a week, making them perfect for meal prep.
Alright, let's break down exactly what goes into this masterpiece. But before we do, here’s a quick kitchen hack that will save you time and keep your dough from sticking.
Inside the Ingredient List
The Flavor Base
Unsalted butter is the foundation that lends a rich, creamy taste to the cookies. Softened butter mixes seamlessly with sugar, creating a smooth dough that’s easy to shape. If you use salted butter, you’ll need to reduce the added salt to avoid over‑salting the final product.
Granulated sugar is the sweetener that balances the butter’s richness and helps the dough brown evenly. It also contributes to the cookie’s crisp edges. A slight reduction can make the cookies less sweet, but you’ll lose some of the caramelized flavor.
The Texture Crew
Large egg is the binder that holds everything together and adds moisture. It also gives the cookies a tender crumb. Skipping the egg will result in a crumbly, dry cookie that doesn’t hold the jam well.
All‑purpose flour provides structure and stability. It’s the backbone that allows the cookies to rise just enough for that airy interior. If you prefer a gluten‑free version, you can substitute with a gluten‑free blend, but the texture will change slightly.
The Unexpected Star
Strawberry jam is the heart of this recipe. Its natural sweetness and vibrant color make each cookie a visual and flavor masterpiece. Using a high‑quality jam with real fruit pieces enhances the texture and authenticity.
Vanilla extract is the aromatic enhancer that lifts the overall flavor profile. Even a splash can transform a simple cookie into something memorable. If you’re vegan, you can use a non‑dairy vanilla extract.
The Final Flourish
Powdered sugar and milk combine to create a silky glaze that drizzles over the cookies, adding a sweet finish and a glossy look. The glaze also helps keep the cookies moist after cooling. A splash of milk can be replaced with almond milk for a dairy‑free option.
Sprinkles, while optional, add a festive touch that turns the cookies into a party treat. They’re perfect for birthdays or holidays. If you’re watching calories, you can omit them without affecting the core flavor.
Everything’s prepped? Good. Let’s get into the real action.
The Method — Step by Step
- Preheat your oven to 375°F (190°C) and line two baking sheets with parchment paper. The parchment prevents sticking and allows the cookies to bake evenly. As the oven heats, you’ll notice the gentle hum that signals the start of a delicious journey. This is the moment of truth.
- In a large bowl, cream the softened butter and granulated sugar together until light and fluffy. Use a stand mixer on medium speed for about 2 minutes; this aerates the mixture and sets the stage for a tender crumb. Watch the texture change from dense to airy—your cookies will thank you.
- Beat in the egg and vanilla extract until fully incorporated. The egg binds the ingredients, while the vanilla lifts the overall flavor. If you’re in a hurry, you can use an electric whisk for a quick mix, but a mixer ensures consistency.
- Whisk together all‑purpose flour, baking powder, and a pinch of salt in a separate bowl. Gradually add this dry mixture to the wet ingredients, mixing until just combined. Over‑mixing can develop gluten and create chewy, dense cookies.
- Divide the dough into 16 equal portions and roll each into a ball. Gently press each ball into a shallow pan to form a disc, then place a tablespoon of strawberry jam in the center and seal the edges by pinching them together. This creates a pop‑tart effect that’s both fun and delicious.
- Bake the cookies for 12–14 minutes, or until the edges are golden brown and the centers are set. They should smell toasty and slightly caramelized. Remove from the oven and let them cool on the sheet for 5 minutes before transferring to a wire rack.
- While the cookies are still warm, whisk together powdered sugar and a splash of milk to create a glaze. Drizzle the glaze over each cookie with a spoon or a piping bag for an elegant finish. The glaze adds a sweet, silky coat that complements the chewy interior.
- Let the glaze set for 5 minutes before serving. The cookies are now ready to be devoured, and they’ll keep their crispness for up to a week when stored properly.
That’s it—you did it. But hold on, I’ve got a few more tricks that will elevate these cookies to another level, ensuring every bite is a masterpiece.
Insider Tricks for Flawless Results
The Temperature Rule Nobody Follows
Many bakers bake at a higher temperature, but for these cookies, a moderate 375°F (190°C) is key. The gentle heat allows the jam to thicken without scorching the crust. If you’re in a hot kitchen, keep an eye on the cookies; they may brown faster.
Why Your Nose Knows Best
The aroma of baking is a reliable indicator of doneness. When the cookies start to emit a warm, sweet scent, they’re almost ready. Trust your nose to avoid over‑baking and keep the interior moist.
The 5‑Minute Rest That Changes Everything
Letting the cookies rest on the baking sheet for 5 minutes after removal from the oven allows the jam to set and the edges to firm up. Skipping this step can result in cookies that are too soft and difficult to handle.
Keep the Dough Chill
Chilling the dough before baking prevents spreading, resulting in thicker, more substantial cookies. If you’re short on time, you can skip chilling, but the cookies will be flatter.
Use a Piping Bag for the Glaze
A piping bag gives you precise control over the glaze’s placement, creating a professional look. If you don’t have one, a plastic bag with a corner snipped off works just as well.
Add a Pinch of Salt to the Jam
A tiny pinch of salt in the jam balances the sweetness and enhances the fruit flavor. If you’re using a very sweet jam, this small adjustment can make a big difference.
Creative Twists and Variations
Chocolate‑Covered Strawberry Pop Tart
Dip the cooled cookies in melted dark chocolate, then drizzle with a thin glaze. The chocolate adds a rich, bittersweet layer that pairs beautifully with the strawberry.
Almond Butter Crunch
Replace the butter with almond butter for a nutty flavor and a subtle crunch. The almond butter also gives the cookies a slightly denser texture.
Citrus Twist
Add a tablespoon of orange zest to the dough for a bright, zesty note. The citrus balances the sweetness and adds a fresh aroma.
Vegan Version
Swap the butter for coconut oil, use a flax egg (1 tablespoon ground flaxseed + 3 tablespoons water), and choose a plant‑based vanilla extract. The result is a vegan cookie that still delivers on flavor.
Mini Pop Tart Bites
Cut the dough into small squares before adding jam, then bake until golden. These bite‑size cookies are perfect for parties and potlucks.
Maple‑Infused Delight
Replace the powdered sugar glaze with a maple glaze made from maple syrup and powdered sugar. The maple adds a warm, caramel flavor that complements the strawberry.
Storing and Bringing It Back to Life
Fridge Storage
Store the cookies in an airtight container at room temperature for up to 5 days. The glaze will harden slightly, but the cookies will remain fresh and chewy.
Freezer Friendly
Wrap each cookie individually in parchment paper before placing them in a freezer bag. They’ll keep for up to 3 months. When ready to eat, thaw at room temperature for 10 minutes.
Best Reheating Method
Reheat frozen cookies in a preheated oven at 350°F (175°C) for 5 minutes. Add a tiny splash of water to the container to create steam, which restores the cookies’ moisture and crispness.