I still remember the morning I accidentally created this masterpiece — standing in my kitchen at 6 AM, hair sticking up like I'd stuck my finger in a socket, desperately trying to recreate those golden arches magic without leaving my house. My kids were screaming for pancakes, my husband wanted bacon, and I wanted five more minutes of sleep. In my caffeine-deprived state, I dumped everything into one pan, said a little prayer to the breakfast gods, and created something that made my family go silent for the first time in recorded history. That hush when they took their first bites? Pure magic.
But here's the thing — most copycat recipes get this completely wrong. They try to complicate things with fancy techniques and ingredients you need a culinary degree to pronounce. Not this one. I stripped away all the nonsense and kept only what matters: that perfect sweet-savory balance, those fluffy pockets that soak up maple syrup like tiny edible sponges, and the crispy edges that shatter like thin ice when your fork hits them. The result? A casserole that tastes exactly like the drive-through version, only better because you didn't have to put on real pants to get it.
Picture yourself pulling this out of the oven, the whole kitchen smelling like a breakfast theme park, maple sweetness dancing with smoky bacon in the air. The top is golden and slightly crisp, the edges are caramelized to sticky perfection, and when you cut into it, steam rises carrying all those familiar flavors that make you feel like a kid again. I dare you to taste this and not go back for seconds — I've never seen it happen, and I've fed this to some pretty disciplined people.
The secret weapon here is something so simple you'll kick yourself for not thinking of it: we're using frozen mini pancakes as our base layer, but we transform them into something extraordinary with a custard mixture that seeps into every crevice. Stay with me here — this is worth it. Let me walk you through every single step — by the end, you'll wonder how you ever made it any other way.
What Makes This Version Stand Out
Speed Demon: From zero to breakfast hero in 45 minutes flat. While other recipes have you making pancakes from scratch and cooking bacon separately, we're throwing everything together like a breakfast-themed party where everyone's invited at the same time. The oven does all the heavy lifting while you mainline coffee and contemplate your life choices.
Feed-a-Crowd Champion: This casserole doesn't mess around — it serves six hungry adults or one teenager (I won't judge). The beauty is in the way it stretches expensive ingredients like bacon and sausage, making you look like a generous host while secretly being budget-savvy. Plus, no one fights over the last pancake because they're all fused together in glorious harmony.
Make-Ahead Magic: Prep this bad boy the night before, cover it with foil, and slide it into the fridge. Tomorrow morning, pop it straight from cold to hot oven while you're still rubbing sleep from your eyes. I've served this at brunch parties where I looked like I had it together, when really I'd assembled it at midnight in my pajamas while watching reality TV.
Texture Paradise: We're talking crispy edges that give way to custardy centers, with pockets of maple syrup that create these incredible sweet explosions. The bottom stays slightly chewy while the top gets that perfect golden crust that crackles under your fork. It's like someone took all the best parts of breakfast and made them get along in one pan.
Leftover Legend: Most breakfast casseroles turn into sad, soggy messes when reheated. Not this one — it actually gets better overnight as the flavors meld together. The pancakes firm up just enough to create this amazing bread pudding-like texture that'll have you sneaking bites straight from the fridge at midnight.
Kid-Approved, Adult-Adored: The sweetness level hits that perfect note that makes kids think they're eating dessert for breakfast, while the savory elements satisfy grown-up palates. I've watched picky eaters clean their plates and ask for more, which in my house is basically a Michelin star.
Alright, let's break down exactly what goes into this masterpiece...
Inside the Ingredient List
The Flavor Base
Let's talk about the foundation that makes this whole operation work. We're starting with a full pound of breakfast sausage because, honestly, anything less is just teasing your taste buds. The sausage needs to be the good stuff — I'm talking about that Jimmy Dean or Tennessee Pride with actual sage and pepper flecks visible. None of that mystery meat that looks like cat food, please. When you brown it properly, those little caramelized bits that stick to the bottom of your pan are liquid gold, packed with umami that'll make your casserole taste like it took hours instead of minutes.
The bacon situation is equally important — go thick-cut or go home. Those paper-thin slices dissolve into nothingness, leaving you with bacon-flavored disappointment. You want bacon that stands up to the custard and stays crispy even after baking. Pro tip: if you can find maple-flavored bacon, grab it with both hands and run. It adds this incredible layer of sweetness that plays beautifully with the savory elements.
The Texture Crew
Here's where things get interesting — instead of making pancakes from scratch like some kind of morning superhero, we're using frozen mini pancakes. But not just any frozen pancakes: you want the Buttermilk Mini Pancakes from Trader Joe's or the Target Good & Gather version. These little beauties are already perfectly sized, pre-cooked, and have that real buttermilk tang that fake syrups can't replicate. They create these amazing nooks and crannies that catch the custard like tiny edible bowls.
The custard itself is a simple affair of eggs, milk, and heavy cream, but here's the kicker — we add a quarter cup of real maple syrup right into the mix. Most recipes just drizzle syrup on top, but we're infusing every bite with that maple magic. The cream is non-negotiable; it creates this luxurious texture that milk alone can't achieve. Skip it, and your casserole tastes like diet food, which is not what we're going for here.
The Unexpected Star
Okay, ready for the game-changer? We're adding a cup of cottage cheese to the custard. Before you run away screaming, hear me out — it melts into the background and creates this incredibly creamy texture while adding protein that keeps everyone full until lunch. You won't taste it, I promise. It just makes everything rich and satisfying in a way that regular casseroles only dream about. I've served this to cottage cheese haters who begged for the recipe, none the wiser.
The cheese situation doesn't end there — we're also throwing in sharp cheddar for that tangy bite that cuts through all the sweetness. Not mild cheddar, not medium — sharp. We want flavor that punches back, not some wallflower cheese that gets lost in the mix. The trick is to grate it yourself; pre-shredded cheese is coated in cellulose that prevents proper melting and leaves you with a gritty texture.
The Final Flourish
Here's where we separate the amateurs from the pros — we're making a maple butter glaze that gets drizzled over the top during the last five minutes of baking. Real butter, real maple syrup, and a pinch of salt to make the flavors sing. This isn't your grandmother's watery syrup; this stuff caramelizes into a sticky, glossy topping that'll have people fighting over the corner pieces. The salt is crucial — it balances the sweetness and makes the maple taste more mapley, which should be a word if it isn't already.
And please, for the love of all that's holy, use real maple syrup. Not the corn syrup imposter in the plastic squeeze bottle. Real maple syrup has these complex flavors — vanilla, caramel, even floral notes — that the fake stuff can't touch. Yes, it costs more, but you're worth it, and this recipe only needs a quarter cup total. Your future self doing a little happy dance after every bite will thank you.
Everything's prepped? Good. Let's get into the real action...
The Method — Step by Step
- Start by preheating your oven to 375°F — not 350, not 400, but exactly 375. This temperature is the sweet spot where everything cooks evenly without burning the edges while leaving the center raw. While it's heating, grab your largest skillet and brown the sausage over medium-high heat, breaking it up with a wooden spoon into bite-sized pieces. You want it fully cooked with some crispy edges, which takes about 8-10 minutes. Don't drain all the fat — leave about a tablespoon because that's liquid flavor that'll keep your casserole from drying out.
- While the sausage works its magic, microwave your bacon between paper towels for 2-3 minutes — just enough to render some fat and get it started. You're not cooking it completely here, just giving it a head start so it crisps up perfectly in the oven. Chop it into bite-sized pieces, not too small or they'll disappear into the casserole. The smell at this point should be making your neighbors jealous and your stomach growl like an angry bear.
- Now for the fun part — spray a 9x13 baking dish with nonstick spray, then create your pancake layer. Arrange the frozen mini pancakes in a single layer, fitting them together like a delicious puzzle. Don't stress about perfect coverage — gaps are fine because they'll expand as they absorb the custard. If you can't find mini pancakes, regular ones cut into quarters work too, but mini ones create better texture. This layer is going to transform from frozen discs into custard-soaked clouds of breakfast heaven.
- In a large bowl, whisk together the eggs, milk, heavy cream, maple syrup, cottage cheese, salt, vanilla extract, and a pinch of cinnamon. The cinnamon is subtle — just enough to add warmth without making this taste like dessert. Whisk until the cottage cheese breaks down into small curds and everything looks smooth. If you've got an immersion blender, give it a quick buzz to really incorporate everything. The mixture should be pale yellow and slightly thick, like a breakfast milkshake.
- Sprinkle the cooked sausage and bacon evenly over the pancake layer, then add half the shredded cheddar. This creates little pockets of cheesy goodness throughout the casserole instead of just on top. Pour the custard mixture slowly over everything, letting it seep into all the nooks and crannies. Press down gently with a spatula to make sure all the pancakes are submerged — think of it as giving them a breakfast baptism. Let it sit for 5 minutes so the pancakes can start soaking up all that liquid gold.
- Top with the remaining cheddar cheese, then slide it into your preheated oven for 25 minutes. During this time, magic happens — the custard sets, the cheese melts into beautiful pools, and your kitchen starts smelling like you died and went to breakfast heaven. Resist the urge to open the door and peek; every time you do, you lose 25 degrees of heat and add 5 minutes to your cooking time. Trust the process and let chemistry do its thing.
- While the casserole bakes, make your maple butter glaze by melting butter in a small saucepan over medium heat. Once it's foamy and fragrant, stir in the maple syrup and a pinch of salt. Let it bubble gently for 2-3 minutes until it thickens slightly — you're looking for a consistency that coats the back of a spoon. This isn't just syrup; it's liquid breakfast jewelry that'll make everything shine.
- After 25 minutes, pull the casserole out and drizzle the maple butter glaze all over the top. It should sizzle when it hits the hot surface — that's the sound of breakfast perfection. Slide it back into the oven for another 5-7 minutes until the top is golden brown and the glaze has caramelized into a shiny, sticky coating. The edges should be bubbling like a breakfast volcano, and a knife inserted in the center should come out clean.
- Let it rest for 10 minutes before serving — I know, torture when it smells this good, but this is crucial. The resting time lets the custard set properly so you get clean slices instead of a breakfast landslide. During this time, the glaze continues to seep into every bite, creating this incredible sweet-savory balance that'll make your taste buds do backflips. Garnish with a light dusting of powdered sugar if you're feeling fancy, or just dig in with a big spoon like the breakfast champion you are.
That's it — you did it. But hold on, I've got a few more tricks that'll take this to another level...
Insider Tricks for Flawless Results
The Temperature Rule Nobody Follows
Here's the thing that separates breakfast rookies from seasoned pros — all your ingredients need to be at room temperature before you start. Cold eggs straight from the fridge will seize up when they hit the hot custard mixture, creating little white flecks that ruin the texture. Cold milk prevents the custard from blending smoothly, leaving you with a lumpy mess that bakes unevenly. Take everything out 30 minutes before you start cooking, even if you're a morning zombie who can barely remember your own name. Your future self will thank you when you slice into a casserole that's smooth as silk and creamy throughout.
Why Your Nose Knows Best
Don't trust the timer blindly — your nose is the most accurate doneness indicator you own. When this casserole is perfectly baked, your kitchen will smell like a maple bacony cloud of breakfast dreams, not quite caramelized but definitely on its way. If you smell sharp, acrid notes, you've gone too far and the edges are burning. If you don't smell much at all, give it another 5 minutes. I'll be honest — I ate half the batch before anyone else got to try it because I couldn't resist when that aroma started wafting through the house.
The 5-Minute Rest That Changes Everything
Remember when I said to let it rest? I'm not kidding about this part. Most people skip this step and end up with a casserole that falls apart faster than my willpower at an all-you-can-eat brunch. Those 10 minutes of patience allow the custard to finish setting from residual heat, creating clean slices that hold their shape. During this time, the maple glaze continues to penetrate every bite, turning from a surface coating into an integral part of each forkful. A friend tried skipping this step once — let's just say it didn't end well, and she ended up serving breakfast casserole soup to her in-laws.
Creative Twists and Variations
This recipe is a playground. Here are some of my favorite ways to switch things up:
The Tex-Mex Takeover
Swap the sausage for chorizo, add a can of diced green chiles to the custard, and replace the cheddar with pepper jack. Top with fresh cilantro and a drizzle of hot honey for a sweet-heat situation that'll wake up your palate better than coffee. The smoky paprika in the chorizo creates this incredible depth that makes the maple notes taste even sweeter by comparison. Serve with a side of salsa and watch people lose their minds over breakfast.
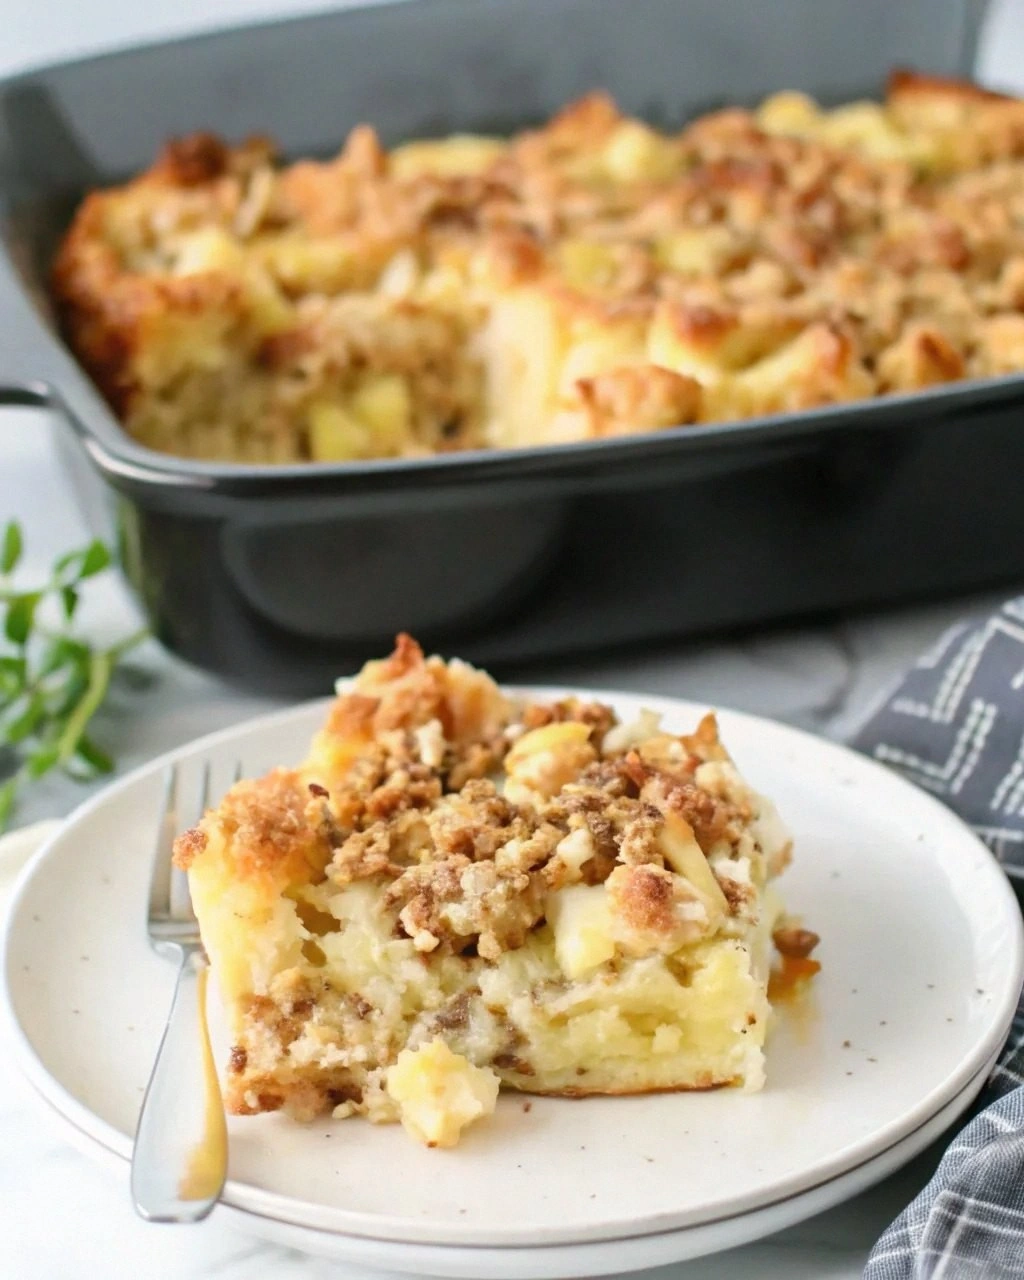
The Apple Pie Edition
Fold in diced apples sautéed in butter and cinnamon, use apple chicken sausage instead of regular, and add a crumble topping made from brown sugar and oats. It tastes like someone took apple pie and breakfast casserole to a romantic dinner, and nine months later, this beautiful baby emerged. The apples provide these little pockets of tartness that cut through all the richness, making you feel slightly virtuous while still eating cheese and bacon for breakfast.
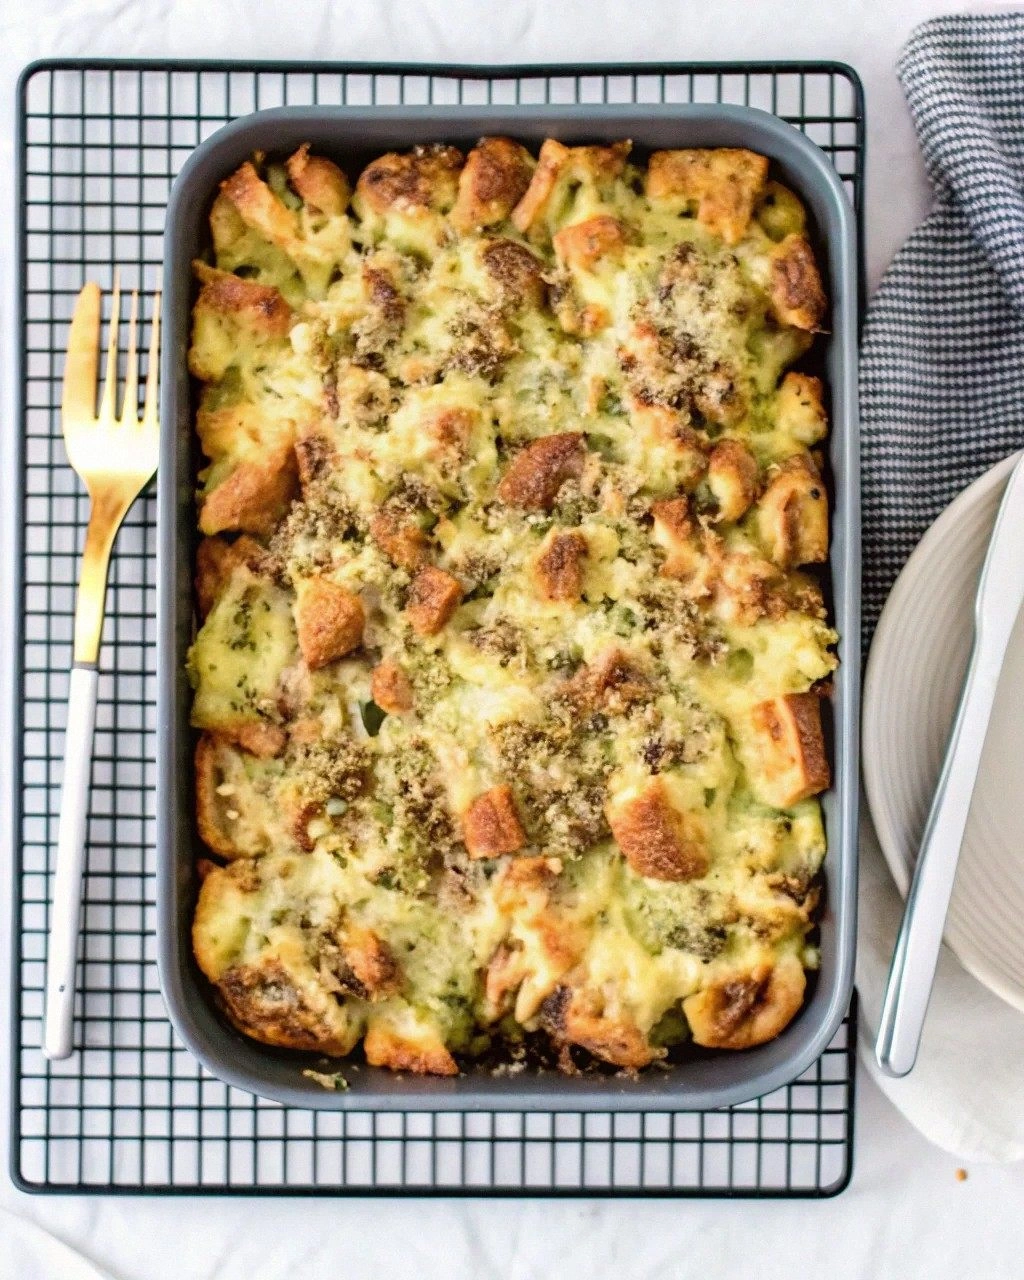
The Vegetarian Victory
Replace the meats with vegetarian sausage and mushroom bacon (trust me on this one), add spinach and sun-dried tomatoes, and use smoked gouda for that smoky depth you usually get from bacon. Even dedicated carnivores scarf this down without complaint, mostly because they can't tell the difference once everything's baked together under that maple glaze. The key is getting the mushroom bacon really crispy so it provides that textural contrast you'd normally get from real bacon.
The Holiday Spectacular
Add dried cranberries and chopped pecans to the custard, use sage sausage, and replace half the maple syrup with orange marmalade. It tastes like Thanksgiving morning exploded in the best possible way, with bright citrus notes that prevent it from feeling too heavy after you've already eaten your weight in pie the night before. This version has converted more brunch skeptics than I can count, especially when served with mimosas.
The Kid-Friendly Fun Version
Mix in mini chocolate chips, use regular breakfast sausage, and add rainbow sprinkles on top during the last 2 minutes of baking. It's basically dessert disguised as breakfast, which means you win at parenting and your kids think you're the coolest parent ever. The chocolate melts into little pockets of gooey goodness that make every bite feel like finding treasure. If you've ever struggled with picky eaters, you're not alone — and I've got the fix.
The Low-Carb Adaptation
Replace the pancakes with cauliflower hash browns, use heavy cream instead of milk, and add extra cheese to compensate for the missing carbs. While it won't taste exactly like the original, it scratches that same sweet-savory itch without sending your blood sugar on a roller coaster ride. The trick is getting the cauliflower really crispy first so it holds up under the custard without turning into mush.
Storing and Bringing It Back to Life
Fridge Storage
Let the casserole cool completely, then cut it into individual portions and store in airtight containers. It keeps for up to 5 days in the refrigerator, though good luck making it last that long. The flavors actually intensify overnight, making leftovers arguably better than the fresh batch. Wrap each portion in plastic wrap first, then foil, creating a double barrier against fridge odors that want to infiltrate your breakfast masterpiece. I've found that storing the glaze separately keeps the top from getting soggy, but honestly, it's never lasted long enough in my house to matter.
Freezer Friendly
This casserole freezes beautifully for up to 3 months — cut it into portions, wrap each piece in plastic wrap and foil, then store in freezer bags. When you're ready to eat, thaw overnight in the refrigerator, then reheat in a 350°F oven for 15-20 minutes. The microwave works in a pinch, but the oven brings back that fresh-baked texture that makes it taste like you just made it. Pro tip: freeze individual portions on a baking sheet first, then transfer to bags — this prevents them from freezing into one giant breakfast brick that requires a chisel to separate.
Best Reheating Method
Add a tiny splash of water before reheating — it steams back to perfection and prevents the edges from turning into breakfast jerky. Cover with foil if reheating in the oven, or add a damp paper towel if using the microwave. The goal is gentle warming that brings back the creamy texture without drying it out. For best results, reheat to 165°F internal temperature, which takes about 15 minutes in a 350°F oven or 2-3 minutes in the microwave with proper rotation. And if you're really feeling fancy, make a fresh batch of maple butter glaze to drizzle over the top — it's like giving your leftovers a spa day.