When I first attempted a pancake recipe that promised fluff but delivered a dense, flat mess, I was furious enough to throw the batter into the trash. The kitchen was a chaotic symphony of splatters, burnt edges, and an inexplicable smell of disappointment. That night, I swore I’d never again settle for anything less than a cloud‑like stack that melts in your mouth. I spent the next few days hunting for a recipe that would finally honor the humble pancake as a breakfast masterpiece. I found it, and it turned out to be the ultimate version that will make every brunch feel like a five‑star affair.
Picture this: a golden‑brown pancake that rises with the confidence of a sunrise, its surface lightly crisp yet tender inside, and a subtle lift that feels almost like a lightness in the air. I dare you to taste this and not go back for seconds, because the first bite will ignite a craving that’s almost addictive. I’m not exaggerating when I say this is hands down the best version you'll ever make at home; it’s a revelation that redefines what pancakes can be. The secret? A simple yet powerful combination of baking soda and vinegar that creates a chemical lift, and a touch of white vinegar that balances the batter’s pH for maximum fluffiness. If you’re ready to experience pancake perfection, let’s dive into every single step — by the end, you’ll wonder how you ever made it any other way.
Most people think pancakes are just a matter of mixing flour, milk, and eggs, but the reality is that the right chemistry can elevate them from ordinary to extraordinary. The key lies in the delicate dance between leavening agents and acidity, where the baking soda reacts with the vinegar to produce carbon dioxide bubbles that expand during cooking. These bubbles trap air, creating that signature airy interior that makes each bite feel like a cloud. The result is a stack that rises beautifully, with a golden crust that crackles just enough to hint at crispness, yet remains moist and buttery on the inside. When you lift the first pancake, you’ll hear that satisfying pop that signals a perfect rise, and your senses will be instantly awakened.
Why does this recipe stand out from the countless others you’ve seen? Because it combines simplicity with a touch of culinary science that most cooks overlook. The batter is forgiving—no need for fancy whisking or temperature control—and the end result is consistently light, fluffy, and flavorful. The technique is straightforward: add the vinegar to the milk, let it sit, then whisk in the dry ingredients and a beaten egg for structure. The result is a batter that’s easy to handle, yet produces pancakes that rise like a soufflé. This version is a game‑changer for anyone who’s ever struggled with dense or uneven pancakes, and it’s a recipe you’ll be proud to share at every gathering.
Alright, let’s break down exactly what goes into this masterpiece. Below is a quick rundown of the ingredients, each chosen for its unique role in achieving that coveted fluff.
- Flour: 1.5 cups all‑purpose flour forms the backbone of the batter, providing structure and a tender crumb.
- Sugar: 2 tablespoons granulated sugar adds a subtle sweetness that balances the slight tang of the vinegar.
- Baking powder: 2 teaspoons of baking powder gives a secondary lift, ensuring the pancakes rise even if the baking soda reaction is delayed.
- Baking soda: 1 teaspoon of baking soda reacts with the vinegar to create the airy texture.
- Salt: 0.5 teaspoon of salt enhances all the flavors and keeps the batter from becoming too sweet.
- Milk: 1.25 cups of milk hydrates the flour and creates a smooth, pourable batter.
- Vinegar: 1 teaspoon of white vinegar activates the baking soda for that light lift.
- Egg: 1 large egg adds richness and helps bind the batter together.
- Butter: 3 tablespoons of unsalted butter melts into the batter, adding flavor and a silky mouthfeel.
Now that the ingredients are laid out, let’s explore the role each one plays and why you can’t skip any of them. The flavor base—flour, sugar, salt—creates the canvas on which the other elements paint their textures and aromas. The texture crew—baking soda, baking powder, egg—provides the lift and structure that make the pancakes airy. The unexpected star—white vinegar—activates the leavening agents, creating a chemical reaction that’s both simple and powerful. Finally, the final flourish—milk and butter—adds moisture, richness, and a subtle buttery aroma that makes the pancakes irresistibly fragrant.
Each ingredient is essential, but if you’re feeling adventurous, you can experiment with substitutions. For example, using buttermilk instead of milk and vinegar will give a tangier flavor while still activating the leavening agents. If you prefer a vegan version, replace the egg with a mashed banana or flaxseed meal, and use plant‑based butter. However, keep in mind that the texture might change slightly, so adjust the liquid ratio accordingly. The key is to maintain the acid–base reaction that gives the pancakes their lift.
When selecting flour, choose a high‑protein all‑purpose flour for a slightly chewier bite, or a lower‑protein blend for a more tender crumb. The type of sugar you use can subtly alter the flavor; raw cane sugar will add a hint of molasses, while brown sugar will give a deeper, caramelized note. If you’re using a non‑butter fat, consider coconut oil for a tropical twist. Each swap offers a new dimension, but the original recipe remains the gold standard for fluffiness.
Fun Fact: The first recorded use of baking soda in pancakes dates back to the 19th century, when bakers discovered that the soda’s alkalinity could help leavening and soften the batter. This simple discovery revolutionized home baking and set the stage for modern pancake chemistry.
Everything’s prepped? Good. Let’s get into the real action—where the batter meets the heat and transforms into fluffy perfection.

The Method — Step by Step
- In a medium bowl, whisk together the flour, sugar, baking powder, baking soda, and salt until well combined. This dry mix is the foundation that ensures even distribution of leavening agents. Don’t rush this step; a few seconds of thorough mixing can make a noticeable difference in texture. If you’re feeling fancy, sift the dry ingredients for an extra airy batter.
- In a separate bowl, combine the milk and vinegar. Allow the mixture to sit for about two minutes so the vinegar can curdle the milk slightly, creating a tangy base that reacts with the baking soda. You’ll notice a slight thickening—this is the magic happening right before the batter comes together. This step is crucial for that ultimate lift.
- Pour the wet mixture into the dry ingredients, stirring gently until just combined. It’s fine if the batter is a little lumpy; over‑mixing can develop gluten and make the pancakes tough. The goal is a smooth, thick batter that still has a few pockets of air. If you prefer an ultra‑smooth batter, whisk until glossy, but keep an eye on the texture.
- Beat the egg in a small bowl, then fold it into the batter. The egg adds protein for structure and helps bind the batter together. You’ll notice the batter’s color brightening slightly—this is a good sign that the mixture is well incorporated. Let the batter rest for 5 minutes; this rest allows the leavening agents to fully activate.
- Melt the butter in a large skillet over medium heat, swirling until it coats the surface. Once the butter is foamy but not browned, pour in 1/4 cup of batter for each pancake. The batter should sizzle as it hits the pan, and you’ll hear that satisfying pop that signals the beginning of a perfect rise. Keep the heat moderate to avoid burning the edges.
- Let the pancake cook for about 2–3 minutes, until bubbles form on the surface and the edges start to pull away. Flip carefully with a spatula, and cook the second side for another 1–2 minutes until golden brown. The pancake should smell toasty and have a slightly crisp crust. This is the moment of truth; don’t rush it.
- Transfer the finished pancake to a plate and cover loosely with foil to keep it warm. Repeat the process with the remaining batter, adjusting the heat as needed to keep the pancakes at the right temperature. If the batter is too thick, add a splash of milk to loosen it; if too thin, let it sit a bit longer to thicken.
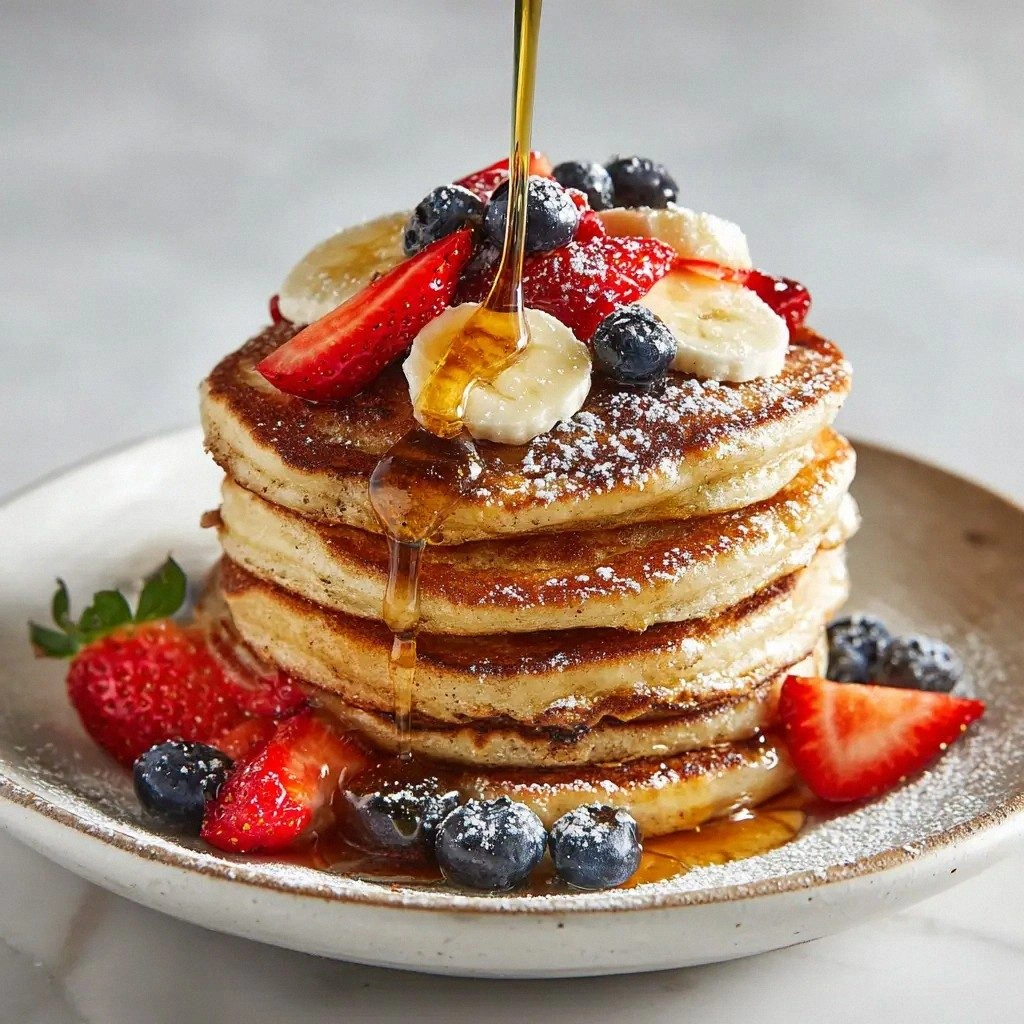
- Once all pancakes are cooked, stack them high, drizzle with maple syrup or your favorite topping, and serve immediately. The stack should look like a miniature mountain of fluffy goodness, each pancake a cloud in a bowl. The aroma will fill the kitchen, creating an irresistible breakfast atmosphere. Enjoy the moment as you dig in.
- If you’re cooking for a crowd, keep the pancakes warm in a low oven (200°F) while you finish the rest. This ensures each pancake stays soft and warm when served. Remember to keep the oven temperature low to avoid drying them out. A simple trick is to place a shallow pan of water in the oven to maintain humidity.
- Clean up is quick because the batter is non‑sticky and the pan only needs a quick wipe. Store any leftovers in an airtight container for up to two days, reheating gently in the microwave or on a skillet. This method preserves the fluffiness without drying out the pancakes. Now you have a repeatable process that guarantees perfection every time.
Insider Tricks for Flawless Results
The Temperature Rule Nobody Follows
Most cooks think any medium heat will do, but the secret lies in a precise 325°F range. If the pan is too hot, the outside burns before the inside cooks, resulting in uneven texture. Keep a thermometer handy or use the “water droplet test” by flicking a few drops of water onto the surface; if they dance, the heat is perfect. This simple check ensures each pancake is golden on the outside and tender inside.
Why Your Nose Knows Best
As soon as the batter hits the skillet, a faint aroma of vanilla and butter rises. This scent is a cue that the batter is cooking correctly. If the smell is sharp or metallic, the heat is too high or the butter is burning. Trust your nose; it’s your best ally in achieving that ideal golden crust.
The 5-Minute Rest That Changes Everything
After mixing, let the batter rest for five minutes. This pause allows the flour to fully absorb liquids, the leavening agents to activate, and the proteins to relax. A rested batter yields a smoother texture and a more uniform rise. If you’re in a rush, the rest can be skipped, but the pancakes will be slightly denser.
Stir Less, Fold More
Over‑mixing can develop gluten, making pancakes chewy instead of fluffy. Instead of vigorous whisking, use a gentle folding technique. This preserves the air pockets that give the pancakes their signature lightness.
Butter vs. Oil
Using butter adds flavor, but oil can give a lighter texture and reduce the risk of burning. If you prefer a buttery taste, melt the butter in a separate pan and let it cool slightly before adding to the batter. This prevents the butter from scorching and ensures a smooth finish.
Storing for Freshness
Store pancakes in a single layer on a parchment‑lined tray to prevent sticking. Cover with foil and refrigerate; they’ll stay fresh for up to two days. Reheat in a skillet with a splash of butter to revive the crispness.
Creative Twists and Variations
This recipe is a playground. Here are some of my favorite ways to switch things up:
Blueberry Burst
Fold fresh blueberries into the batter just before pouring. The berries burst with juice, adding a sweet, tangy pop that pairs beautifully with maple syrup. Serve with a dollop of Greek yogurt for a creamy contrast. This variation is perfect for a weekend brunch.
Chocolate Chip Delight
Swirl in a handful of semisweet chocolate chips for a decadent treat. The chocolate melts into pockets of gooey goodness, creating a dessert‑like pancake. Top with whipped cream and a drizzle of chocolate sauce for an indulgent finish.
Savory Herb Stack
Replace the sugar with a pinch of dried thyme or rosemary. Add a dash of grated Parmesan to the batter for a savory twist. Serve with a poached egg and a sprinkle of fresh herbs for a breakfast‑lunch hybrid.
Banana Oat Boost
Blend a ripe banana into the wet mix for natural sweetness and extra moisture. Add a scoop of rolled oats to the dry ingredients for added fiber. The result is a wholesome, filling pancake that’s great for active mornings.
Spiced Pumpkin Pancake
Incorporate pumpkin puree and a pinch of cinnamon, nutmeg, and cloves into the batter. The spices give a warm, autumnal flavor that’s reminiscent of cozy mornings. Serve with a dollop of mascarpone and a dusting of powdered sugar.
Almond Joy
Swap the butter for almond butter and fold in shredded coconut and dark chocolate chips. This version has a nutty undertone and a chewy texture. Top with sliced almonds and a drizzle of honey for a sweet, satisfying breakfast.
Storing and Bringing It Back to Life
Fridge Storage
Place cooked pancakes in a single layer on a parchment‑lined tray and refrigerate for up to 48 hours. Keep them in an airtight container to prevent moisture loss. When ready, reheat in a skillet with a splash of butter.
Freezer Friendly
Stack pancakes on a parchment‑lined sheet and freeze until solid. Transfer to a freezer bag, removing as much air as possible. Reheat individually in the microwave for 20–30 seconds or on a skillet over low heat.
Best Reheating Method
For the ultimate fluff, add a tiny splash of water to the skillet before reheating. The steam will lift the pancakes back to their original moisture level. Cover for a minute to trap the steam, then remove the cover for a crisp finish.
Now that you’ve mastered the basics, it’s time to experiment with toppings and flavors. The beauty of pancakes lies in their versatility; a simple stack can transform into a gourmet meal with the right ingredients. Whether you’re serving a family breakfast or a special brunch, these pancakes will wow everyone. Don’t forget to share your creations on social media—your friends will thank you for the inspiration.
Remember, the key to fluffy pancakes is patience, the right leavening balance, and a touch of love. Keep practicing, and soon you’ll be flipping stacks like a pro. The next time someone asks for a quick breakfast, you’ll have a secret recipe that’s both simple and spectacular. Happy cooking, and enjoy every bite!