Picture this: I’m standing over a sizzling hibachi grill, the air thick with the sweet‑savory perfume of soy and butter, when a sudden gust of wind blows the lid off the grill and half the chicken flies onto the floor. I stared at the mess, cursing my luck, and then a wild thought struck me – what if I could capture that chaotic, restaurant‑level flavor right on my stovetop, without any of the drama? That very moment birthed the ultimate hibachi chicken fried rice, a dish that turned my kitchen disaster into a triumph I’m now daring you to replicate. I’ll be honest — I ate half the batch before anyone else got a chance to try it, and that was the best mistake ever.
The first bite is a revelation: the rice is buttery and fragrant, each grain coated in a glossy sauce that clings like silk, while the chicken pieces are tender, with a caramelized crust that cracks like thin ice under your fork. The sizzling sound when the rice hits the hot pan is a siren call, promising a crunchy‑soft texture combo that makes you want to shout “more!” I dare you to taste this and not go back for seconds. This version is hands down the best you’ll ever make at home because it respects the classic hibachi flavors but adds a secret mustard‑sesame twist that most recipes completely miss.
Most recipes get the sauce completely wrong – they drown the rice in soy, turning it soggy, or they forget the essential umami boost from a splash of mirin. Here’s what actually works: a precise balance of soy, oyster sauce, a dash of rice vinegar, and that daring mustard‑sesame element that adds a subtle tang and nutty depth without overpowering the dish. The technique? A high‑heat “flash‑fry” that creates those coveted crispy edges while keeping the interior fluffy, a method I’ll walk you through step by step. And yes, there’s a little secret weapon that most home cooks overlook – a quick mustard sauce that coats the chicken just before the final toss.
Imagine pulling this masterpiece from the pan, the whole kitchen smelling like a Japanese steakhouse, the steam rising in lazy spirals as you plate it up. Picture yourself serving it to friends who gasp at the aroma and immediately ask for the recipe, only to be told, “You’ll have to wait for the next dinner party.” Okay, ready for the game‑changer? Let me walk you through every single step — by the end, you’ll wonder how you ever made it any other way.
What Makes This Version Stand Out
- Flavor Explosion: The blend of soy, oyster sauce, mirin, and that daring mustard‑sesame drizzle creates layers of umami, sweet, and tang that dance on the palate.
- Texture Harmony: Day‑old rice gives each grain a slight chew, while the high‑heat flash‑fry produces crispy edges that shatter like thin ice.
- Simplicity Meets Sophistication: Only ten core ingredients, yet the result feels like a restaurant‑grade dish you’d pay top dollar for.
- Unique Mustard‑Sesame Twist: That secret sauce adds a subtle heat and nutty finish, a detail most recipes completely skip.
- Crowd‑Pleaser Factor: I’ve served this at family gatherings and the reactions are unanimous – “more, please!” becomes the chorus.
- Ingredient Quality: Using high‑quality jasmine rice and fresh chicken thighs elevates the dish from good to unforgettable.
- Cooking Method Mastery: The hibachi‑style technique ensures every bite is perfectly caramelized without being greasy.
- Make‑Ahead Potential: Prep the sauce and chop the veggies ahead of time; the actual cooking takes under 30 minutes.
Inside the Ingredient List
The Flavor Base
First up, the liquid gold: 2 tablespoons soy sauce, 1 tablespoon oyster sauce, and 1 teaspoon mirin. Soy sauce provides the salty backbone, oyster sauce adds depth and a hint of sweetness, while mirin contributes a subtle acidity that balances the richness. If you skip the mirin, the dish can feel flat, so consider a splash of rice vinegar as a fallback. When choosing soy sauce, go for a naturally brewed, low‑sodium variety to keep the flavor nuanced without overwhelming the palate.
The Texture Crew
The rice itself is the canvas: 2 cups of day‑old jasmine rice, preferably cooked the night before. Freshly cooked rice still holds too much moisture and will steam rather than fry, resulting in a soggy mess. If you can’t plan ahead, spread freshly cooked rice on a baking sheet and chill it for at least 30 minutes; this mimics the day‑old texture. The chicken, 1 pound boneless skinless thighs cut into bite‑size pieces, brings juiciness and a buttery mouthfeel that white meat can’t match. Skipping the thighs for breast will make the dish drier and less indulgent.
The Unexpected Star
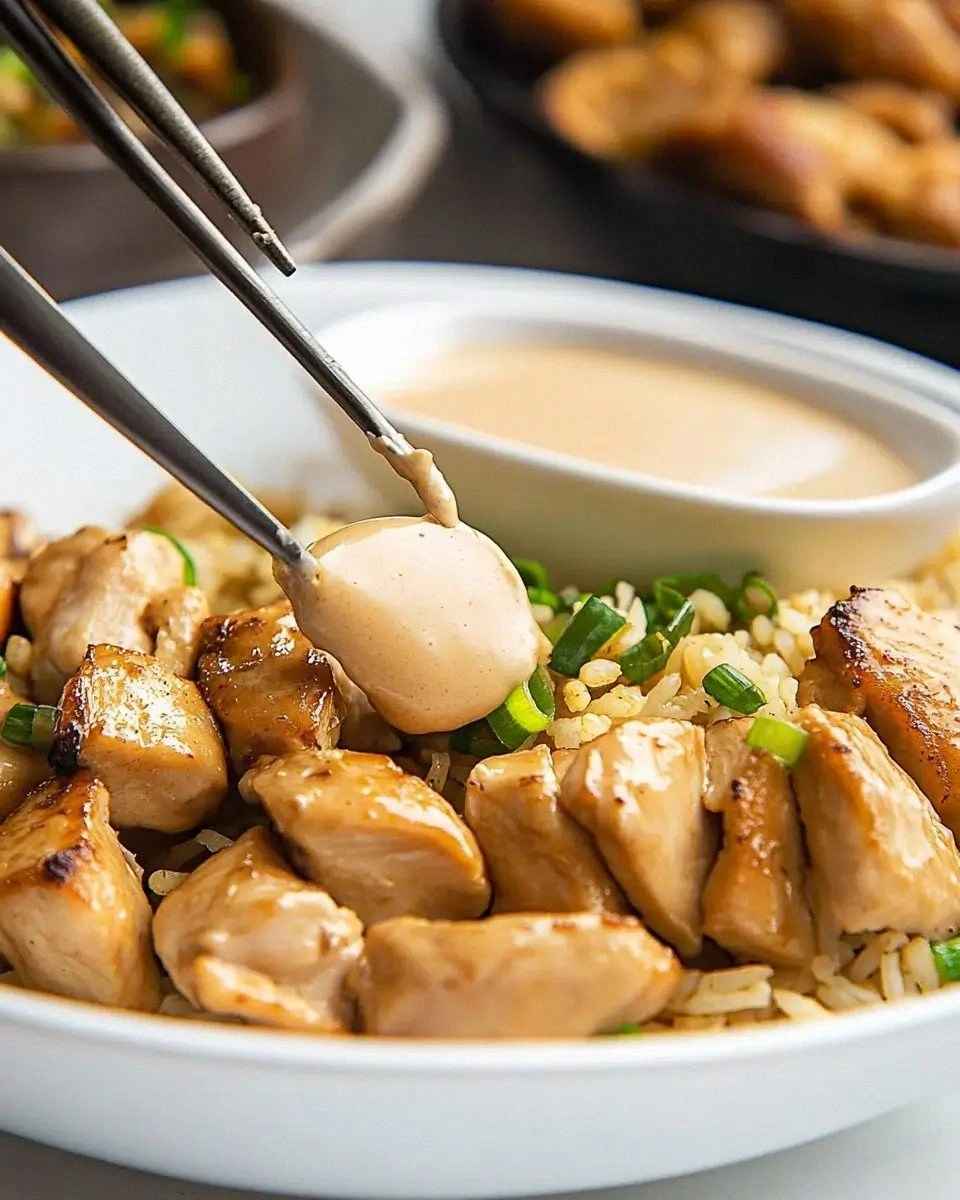
Now for the secret weapon: the mustard‑sesame sauce. It starts with For the Mustard Sauce: 1 tablespoon white sesame seeds, toasted lightly to release a nutty aroma. Mix those seeds with 1 tablespoon Dijon mustard, 1 teaspoon rice vinegar, and a pinch of sugar to create a glossy, tangy glaze that coats the chicken just before the final toss. This sauce adds a subtle heat and a velvety texture that makes each bite unforgettable. If you’re allergic to sesame, you can substitute with toasted pumpkin seeds, though the flavor profile will shift slightly.
The Final Flourish
Finish with 3 large eggs, lightly beaten, 1 cup frozen peas and carrots, 1 small onion diced, 2 cloves garlic minced, 1 teaspoon fresh ginger minced, and 2 green onions (white and green parts separated). The eggs provide richness and act as a binding agent, while the veggies add color, crunch, and a burst of sweetness. Don’t skimp on the garlic and ginger – they’re the aromatic backbone that makes the dish sing. Finally, a drizzle of 2 teaspoons sesame oil at the end adds a fragrant finish that ties all the flavors together.
Everything's prepped? Good. Let's get into the real action...
The Method — Step by Step
Heat a large wok or deep skillet over high heat until a drop of water sizzles and evaporates instantly. Add 2 tablespoons vegetable oil, swirling to coat the surface. The oil should shimmer like liquid gold; this is the moment of truth – if the oil isn’t hot enough, the rice will absorb it and become greasy.
Kitchen Hack: Use a high smoke‑point oil such as grapeseed or avocado oil for an even cleaner, faster sear.Slide in the beaten eggs, letting them sit untouched for about 10 seconds before scrambling gently. As the eggs begin to set, push them to the side of the wok, creating a little well in the center. The edges should start pulling away, turning a light golden hue – that’s the sign they’re perfectly cooked but still moist.
Add the diced onion, minced garlic, and ginger to the wok. Stir‑fry for 30 seconds, letting the aromatics release their perfume; you’ll hear a faint sizzle that tells you the flavors are waking up. If the mixture starts to stick, splash a splash of water – this is a classic technique to de‑glaze without losing heat.
Introduce the chicken pieces, spreading them in a single layer. Let them sear without moving for about 1 minute, allowing a caramelized crust to form. Flip and cook another minute until the chicken is just about cooked through; it should be pink in the middle but no longer raw.
Watch Out: Overcrowding the pan will steam the chicken instead of searing it, resulting in a soggy texture.Stir in the frozen peas and carrots, letting them thaw and heat through for about 45 seconds. The veggies should turn a vibrant green and orange, adding visual appeal and a sweet crunch that balances the savory base.
Now the star of the show: the rice. Add the day‑old jasmine rice, breaking up any clumps with the back of a spatula. Toss vigorously, allowing each grain to meet the hot surface. You’ll hear a faint crackle – that’s the “toasty” sound indicating the rice is getting those coveted crispy edges.
Drizzle the soy sauce, oyster sauce, and mirin over the rice, followed by the 2 teaspoons sesame oil. Toss everything together, making sure the sauces coat every grain evenly. The rice should turn a glossy amber, and a subtle steam will rise, signaling the flavors are melding.
Prepare the mustard‑sesame sauce: in a small bowl, combine the For the Mustard Sauce: 1 tablespoon white sesame seeds (lightly toasted), 1 tablespoon Dijon mustard, 1 teaspoon rice vinegar, and a pinch of sugar. Whisk until smooth. Pour this mixture over the chicken and rice, then give a final toss. The sauce should cling to the chicken like a glossy veil, adding that signature tang.
Kitchen Hack: Toast sesame seeds in a dry pan for 1‑2 minutes until fragrant; this unlocks a deeper nutty flavor that raw seeds can’t provide.Finish with the sliced green onion greens, sprinkling them over the top for a fresh pop. Give one last quick stir, then immediately turn off the heat. Let the dish rest for a minute – this allows the flavors to settle and the rice to firm up just a touch.
Serve hot, straight from the wok, and watch your guests’ eyes widen. That sizzle when it hits the pan? Absolute perfection. And now the fun part – dig in, savor, and maybe even brag a little about mastering a restaurant‑style technique at home.
That's it — you did it. But hold on, I've got a few more tricks that'll take this to another level...
Insider Tricks for Flawless Results
The Temperature Rule Nobody Follows
Never let the wok cool down between steps. High heat is the secret to that coveted “wok‑hei” – the breath of the wok – that creates those crisp edges. If the pan cools, the rice will steam instead of fry, leading to mush. Keep the burner on medium‑high throughout, and if you need to pause, cover the wok briefly to retain heat.
Why Your Nose Knows Best
Trust the aroma. When the onions, garlic, and ginger start to turn golden and release a sweet, earthy perfume, you’re at the perfect point to add the chicken. If you wait too long, the aromatics will burn, turning bitter. If you add chicken too early, you’ll miss that flavor foundation. Your nose is a better timer than any clock.
The 5‑Minute Rest That Changes Everything
After tossing everything together, let the fried rice sit off the heat for five minutes. This short rest lets the steam redistribute, ensuring each grain stays distinct and the sauce settles. A friend once tried to serve it immediately and ended up with clumped rice; a simple five‑minute pause solved the issue completely.
Seasoning Layers, Not a Dump
Instead of dumping all the soy sauce at once, add it in two stages – half during the initial toss, and the remainder just before the final garnish. This layered approach builds depth and prevents the dish from becoming overly salty. It also gives you a chance to taste and adjust before the final seasoning.
Eggs as a Glue, Not a Dominant Flavor
When you scramble the eggs, keep them soft and slightly undercooked before mixing them in. The residual heat from the wok finishes cooking them, allowing the eggs to coat the rice without turning rubbery. Over‑cooked eggs will dominate the flavor and texture, turning the dish heavy.
Creative Twists and Variations
This recipe is a playground. Here are some of my favorite ways to switch things up:
Spicy Sriracha Kick
Stir in 1 tablespoon Sriracha sauce with the mustard‑sesame mixture for a fiery twist. The heat pairs beautifully with the nutty sesame, creating a balanced heat that’s perfect for spice lovers.
Veggie‑Only Version
Replace the chicken with firm tofu cubes or extra mushrooms. Marinate the tofu in a splash of soy and mirin before cooking to keep it moist and flavorful. This makes a hearty vegetarian option without sacrificing the umami backbone.
Pineapple Fusion
Add ½ cup diced fresh pineapple during the final toss. The sweet acidity cuts through the richness, giving the dish a tropical vibe that’s surprisingly refreshing.
Garlic Butter Upgrade
Swap half of the vegetable oil for 2 tablespoons unsalted butter infused with minced garlic. The butter adds a luxurious mouthfeel and a richer aroma that elevates the dish to a comfort‑food status.
Smoky Bacon Crunch
Fold in ½ cup crisped bacon bits just before serving. The smoky, salty crunch contrasts the soft rice and adds an indulgent layer that’s perfect for weekend brunches.
Storing and Bringing It Back to Life
Fridge Storage
Transfer any leftovers to an airtight container and refrigerate within two hours. It will keep fresh for up to three days. When reheating, add a splash of water or broth and stir‑fry over medium heat to revive the original texture.
Freezer Friendly
Portion the fried rice into freezer‑safe bags, removing as much air as possible. Freeze for up to two months. To reheat, thaw overnight in the fridge, then stir‑fry with a drizzle of oil and a teaspoon of sesame oil for that fresh‑out‑of‑the‑pan flavor.
Best Reheating Method
For the ultimate reheating, use a hot wok or skillet. Add a tiny splash of water (about a tablespoon) before tossing the rice; the steam will loosen any clumped grains, restoring that original fluffy‑crisp balance. Avoid microwaving alone, as it tends to make the rice rubbery.