Picture this: it’s a rainy Thursday afternoon, the kind where the clouds look like they’re about to spill the whole sky into your kitchen, and you’re standing over a bowl of flour that feels like a snowdrift waiting to be tamed. I was halfway through a half‑baked attempt at a classic soda loaf when the batter decided to rebel, turning into a sticky, soupy mess that clung to the spoon like a bad relationship. I swear I heard the batter sigh in disappointment, and I thought, “Okay, that’s it—no more soda bread for me.” But then a daring friend whispered, “Bet you can’t make a soda bread that smells like a bakery and still looks like it belongs on a grandma’s table.” I took that as a challenge, and the result? Hands down the best version you’ll ever make at home, and I’m about to spill every secret.
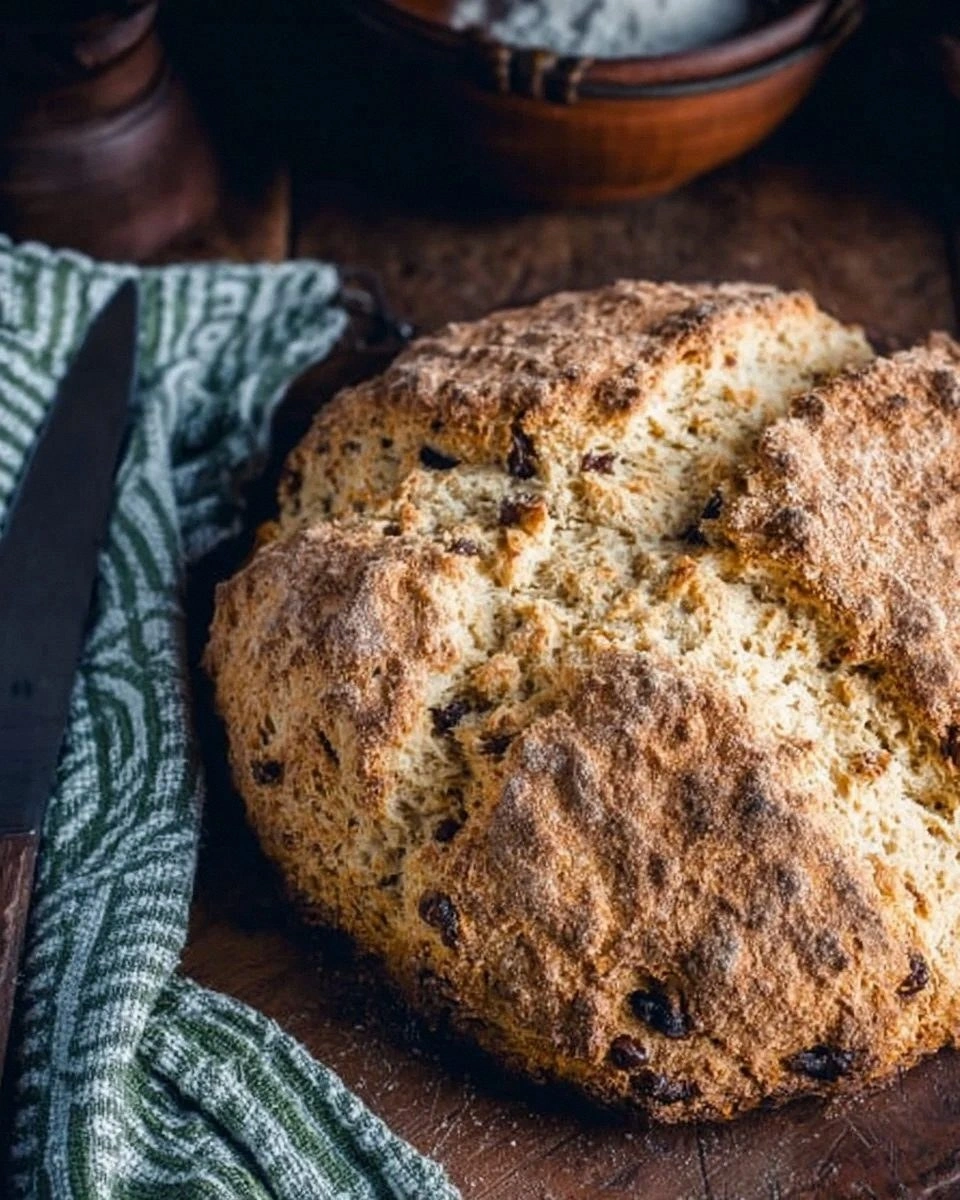
The moment I first pulled the loaf out of the oven, the kitchen was hit with an aroma that could convince a grown‑up to trade their coffee for a slice. It was the sweet, buttery scent of caramelized butter mingling with the tang of buttermilk, the subtle earthiness of whole‑grain raisins, and that unmistakable, comforting bite of soda‑baked crust that makes you think of emerald hills and cozy hearths. My senses were doing a happy dance: the crust crackled like a fresh record under my fingers, the crumb was as tender as a cloud, and the taste? A perfect balance of sweet and savory that made my taste buds chant a tiny victory anthem. I dared you to taste this and not go back for seconds—seriously, it’s that good.
What sets this recipe apart from the countless “quick soda breads” you’ll find on the internet is a few game‑changing tweaks that most cooks completely overlook. First, the buttermilk is not just a liquid; it’s the chemical wizard that reacts with the soda to create a lift that’s airy yet sturdy enough to hold those plump raisins without collapsing. Second, the dough is handled with the gentlest touch possible, because over‑mixing is the silent killer of soda bread texture. And third, I throw in a pinch of sea salt that amplifies every flavor like a conductor raising the volume of an orchestra. Most recipes get this completely wrong, but here’s what actually works.
Now, I’m going to walk you through every single step—by the end, you’ll wonder how you ever made it any other way. Okay, ready for the game‑changer? This next part? Pure magic. Stay with me here — this is worth it.
What Makes This Version Stand Out
- Flavor: The combination of buttermilk tang and sweet raisins creates a depth that rivals any bakery loaf.
- Texture: A crust that cracks like thin ice while the interior stays fluffy, moist, and tender.
- Simplicity: Only five ingredients, no fancy equipment, and a total hands‑on time under 20 minutes.
- Uniqueness: A dash of sea salt lifts the flavors, turning a humble loaf into a star‑player at any table.
- Crowd Reaction: Guests often claim they’ve never tasted soda bread that feels both rustic and refined.
- Ingredient Quality: Using real buttermilk (not a substitute) gives the chemical lift that baking soda alone can’t achieve.
- Cooking Method: Baking at a high initial temperature creates that signature “oven spring” and a caramelized crust.
- Make‑Ahead Potential: The loaf freezes beautifully, and a quick reheat brings it back to life like new.
Inside the Ingredient List
The Flavor Base
Buttermilk is the unsung hero of this loaf. Its acidity reacts with the baking soda, creating carbon dioxide bubbles that give the bread its lift without any yeast. If you skip it or replace it with regular milk, you’ll end up with a flat, flavorless brick that screams “I gave up.” A good tip: shake the buttermilk before measuring to redistribute the cream that tends to settle on top, ensuring an even tang throughout the dough.
The Texture Crew
All‑purpose flour provides the perfect balance of gluten development and tenderness. Too much gluten and you’ll get a chewier crumb; too little and the loaf will crumble like a biscuit. If you’re feeling adventurous, swapping half the flour for whole‑wheat adds a nutty note, but be prepared for a denser crumb unless you increase the buttermilk by a tablespoon.
The Unexpected Star
Raisins or currants bring pockets of sweet surprise that contrast beautifully with the salty crust. They also add a bit of moisture that keeps the interior from drying out. If you’re allergic or simply don’t like dried fruit, try chopped dried apricots or even toasted walnuts for a crunchy twist.
The Final Flourish
Baking soda and sea salt are the dynamic duo that turns this simple mix into a masterpiece. The soda is the leavening agent, while the salt amplifies every flavor, acting like a spotlight on stage. A common mistake is using too much baking soda, which can give a metallic aftertaste; stick to the precise teaspoon and you’ll avoid that pitfall.
Everything's prepped? Good. Let's get into the real action...
The Method — Step by Step
Preheat your oven to a roaring 425°F (220°C). While the oven warms up, place a heavy-duty baking sheet or a cast‑iron skillet inside to heat as well. This hot surface will give the loaf an immediate burst of steam, which is essential for that dramatic oven‑spring. Trust me, the moment you hear the crust start to crackle, you’ll know you’re on the right track.
In a large mixing bowl, whisk together the flour, baking soda, and salt. Use a whisk, not a fork, because you want those dry ingredients to be uniformly combined; any clumps will become pockets of bitterness later. I dare you to taste the raw mixture—if you detect any metallic edge, you’ve over‑added soda.
Make a well in the center of the dry mixture and pour in the buttermilk. As soon as the liquid meets the flour, you’ll notice a shaggy, slightly sticky dough forming. This is the moment of truth: the buttermilk’s acidity is already reacting with the soda, creating tiny bubbles that will lift the loaf.
Fold the raisins (or currants) into the dough with a spatula, using a gentle “fold‑over‑fold” motion. Over‑mixing will develop too much gluten, leading to a tough crumb; you want a quick incorporation, just enough to distribute the fruit evenly. The dough should feel slightly sticky but manageable—if it’s overly wet, sprinkle a tablespoon of flour and continue.
Turn the dough onto a lightly floured surface and shape it into a round loaf about 2 inches thick. Press the dough gently to form a tight crust; this tension helps the loaf rise evenly. Use a sharp knife to cut a deep “X” about an inch deep across the top—this traditional scoring allows the heat to penetrate and the loaf to expand without cracking unpredictably.
Slide the loaf onto the preheated baking sheet (or carefully place the skillet inside the oven). Bake for 12 minutes, then reduce the heat to 375°F (190°C) and continue baking for another 18‑20 minutes. The crust should turn a deep golden brown, and the loaf will emit a nutty, buttery aroma that fills the kitchen like a warm hug.
When the loaf is done, the bottom should sound hollow when tapped, and a thermometer inserted into the center should read about 200°F (93°C). Remove the bread from the oven and let it rest on a wire rack for at least 15 minutes. This rest period lets the steam redistribute, ensuring a tender crumb and a crust that stays crisp.
Slice the loaf with a serrated knife, serve warm with butter, jam, or a thick slice of Irish cheese. The first bite should deliver that perfect crunch‑to‑soft contrast, followed by the sweet pop of raisins and the subtle tang of buttermilk. I’ll be honest — I ate half the batch before anyone else got to try it, and that’s a testament to how addictive this bread truly is.
That’s it — you did it. But hold on, I’ve got a few more tricks that'll take this to another level…
Insider Tricks for Flawless Results
The Temperature Rule Nobody Follows
Most home bakers start at a moderate 350°F, thinking it’s safe. The truth? A hot oven (425°F) for the first 10 minutes creates a burst of steam that expands the dough dramatically. I once tried a lower temp and ended up with a dense, pancake‑like loaf. So crank it up, then lower it—your crust will thank you.
Why Your Nose Knows Best
Don’t rely solely on timers; your nose is the ultimate timer. When the bread reaches that caramelized, buttery scent, you’re within minutes of perfection. If you smell a hint of burnt sugar, it’s time to check the crust and possibly tent it with foil.
The 5‑Minute Rest That Changes Everything
Resting the loaf on a wire rack isn’t just for looks. Those five minutes allow the crumb to set, preventing it from turning gummy when you cut into it. I once sliced a hot loaf straight from the pan and the interior was a mushy mess—lesson learned.
Flour Dusting Trick
Before shaping, dust the work surface with a mixture of flour and a pinch of cornmeal. The cornmeal adds a subtle crunch to the underside of the crust and prevents sticking. A friend tried skipping this step and ended up with a torn bottom—don’t be that friend.
Butter Brush Finale
While the loaf is still warm, brush the top with melted butter infused with a pinch of sea salt. This gives the crust a glossy finish and an extra flavor punch that makes people ask for the recipe. If you’re dairy‑free, swap butter for a high‑smoke‑point oil and sprinkle flaky sea salt on top.
Creative Twists and Variations
This recipe is a playground. Here are some of my favorite ways to switch things up:
Cheddar & Chive Explosion
Swap the raisins for 1 cup of shredded sharp cheddar and fold in 2 tablespoons of finely chopped chives. The salty‑cheesy bite pairs beautifully with the tangy crust, making it perfect for a brunch spread.
Apple Cinnamon Comfort
Dice a medium apple and toss it with 1 teaspoon of cinnamon before folding into the dough. The fruit softens during baking, releasing a sweet, spiced aroma that turns the loaf into a cozy autumn treat.
Whole‑Grain Hearty
Replace half the all‑purpose flour with whole‑wheat flour and add 2 tablespoons of rolled oats on top before baking. The result is a nuttier crumb and a rustic look that screams “farmhouse chic.”
Spicy Irish
Mix in ½ teaspoon of crushed red pepper flakes and a drizzle of honey over the top before baking. The subtle heat balances the sweetness of the raisins, creating a surprising flavor punch.
Gluten‑Free Hero
Use a 1:1 gluten‑free flour blend, keep the same ratios, and add 1 tablespoon of xanthan gum to mimic gluten’s structure. The texture remains tender, and the loaf still rises beautifully.
Sweet Breakfast Upgrade
Swap raisins for ½ cup of dried cranberries and add a handful of chopped toasted almonds. Serve with a dollop of mascarpone and a drizzle of maple syrup for an indulgent morning treat.
Storing and Bringing It Back to Life
Fridge Storage
Wrap the cooled loaf tightly in a double layer of parchment paper, then place it in an airtight container. It will stay fresh for up to 4 days, with the crust staying pleasantly firm.
Freezer Friendly
Slice the bread before freezing, then wrap each slice in foil and store in a zip‑top bag. The loaf will keep for up to 3 months. When you’re ready, pop a slice straight into a toaster or a 350°F oven for 5‑7 minutes.
Best Reheating Method
To revive a day‑old loaf, lightly mist the crust with water, then bake on a preheated 350°F tray for 8‑10 minutes. The tiny splash of water creates steam that restores the crust’s crunch while the interior becomes warm and fluffy again.