I still remember the day I nearly set my kitchen on fire trying to impress my mother-in-law with what I thought would be the perfect lemon tart. The custard curdled, the crust shattered like a dropped vase, and the smoke alarm provided an unwelcome soundtrack to my culinary humiliation. Fast forward three years, and that same woman now requests this lemon ricotta tart for every family gathering, claiming it's better than anything she's tasted in Rome. The difference? I finally stopped trying to make a traditional lemon custard and discovered the magic that happens when creamy ricotta meets bright, sunny citrus in a buttery shell that actually stays together.
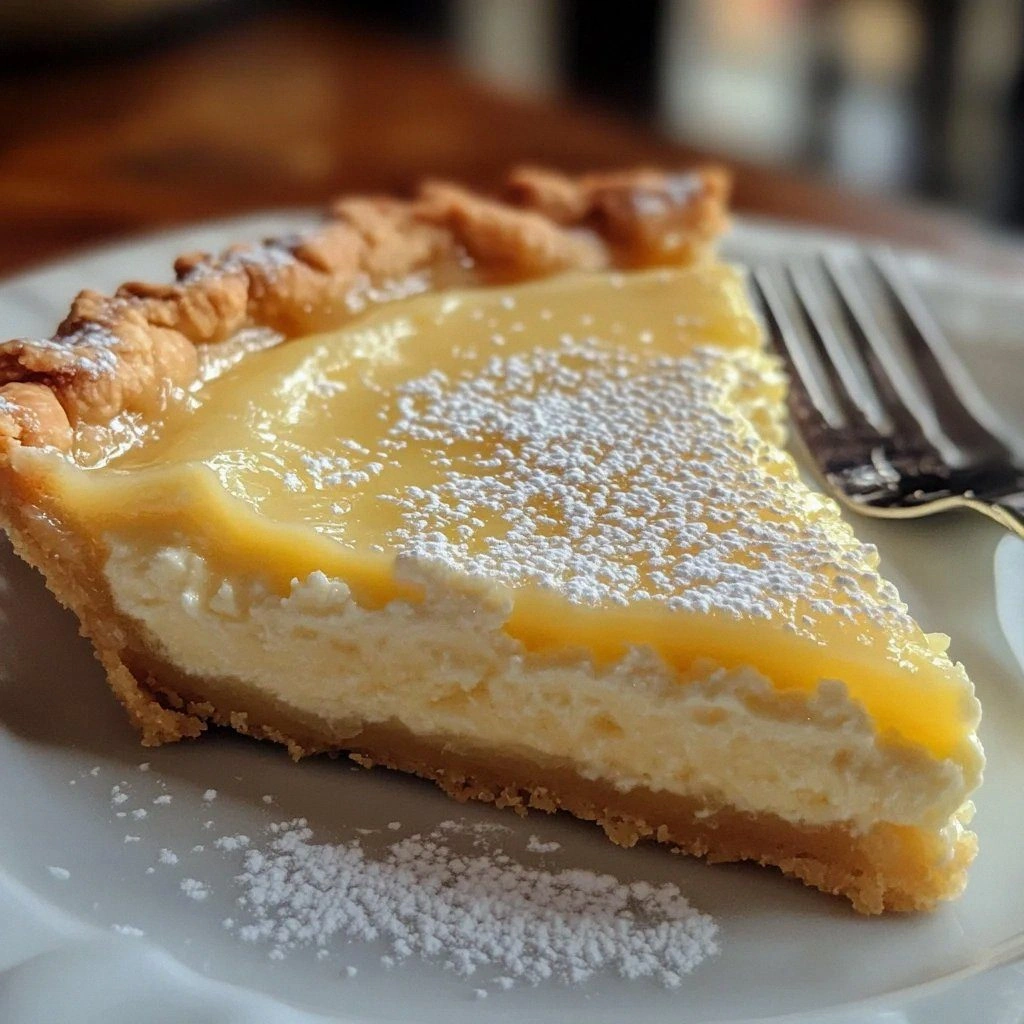
Picture this: It's Sunday morning, your coffee's brewing, and you're pulling a golden tart from the oven that smells like an Italian bakery had a beautiful accident with a lemon grove. The filling puffs up like a proud soufflé before settling into a cloud-like layer that quivers when you move the pan — that's how delicate and creamy it becomes. The edges of your pastry should be a deep amber brown, and when you tap the side of the tart pan, it should sound hollow, like a perfectly baked croissant whispering "I'm ready."
What makes this version completely different from every other lemon tart you've tried is the ricotta — not just any ricotta, mind you. We're talking about the fresh, cloud-like cheese that transforms what could be a one-note citrus punch into something that tastes like springtime on a fork. The lemon doesn't scream here; it sings in perfect harmony with the mild, slightly sweet cheese, creating a filling that's both lighter and more satisfying than the traditional custard. I dare you to taste this and not go back for seconds — actually, I dare you to not eat half of it standing at the kitchen counter before anyone else knows it exists.
The secret weapon? We'll drain the ricotta first, which most recipes skip, then fold in whipped egg whites that make the filling rise like a dream. The result is a tart that's impossibly airy yet rich, with a texture that melts on your tongue while the bright lemon flavor makes your taste buds dance. Picture yourself pulling this out of the oven, the whole kitchen smelling incredible, and watch as everyone gravitates toward you like you're holding the golden ticket to dessert heaven. Let me walk you through every single step — by the end, you'll wonder how you ever made it any other way.
What Makes This Version Stand Out
Cloud-like texture: The combination of drained ricotta and folded egg whites creates a filling that's lighter than air but still satisfies like a proper dessert should. Traditional lemon tarts can feel heavy and overly rich, but this version practically floats off your fork. Perfectly balanced sweetness: Most lemon desserts assault your palate with sugar, but this tart lets the natural tang of the citrus shine through. The ricotta's natural sweetness means you need far less sugar than traditional recipes, resulting in a more sophisticated flavor profile. Foolproof crust technique: I'll show you a press-in method that eliminates rolling pins, cracks, and tears. The dough comes together in a food processor and presses directly into your tart pan — no chilling, no fussing, no rolling between sheets of parchment paper that always stick anyway. Make-ahead magic: This tart actually improves after a few hours in the fridge, making it perfect for dinner parties. The filling sets beautifully and the flavors meld into something even more spectacular than when it's fresh from the oven. Ingredient flexibility: Can't find fresh ricotta? I've got a workaround. Only have bottled lemon juice? I'll tell you exactly how to doctor it so nobody knows the difference. This recipe bends without breaking. Crowd-pleasing complexity: Adults love the sophisticated balance of flavors, while kids can't resist the creamy texture. It's the dessert equivalent of that perfect dinner guest who gets along with everyone at the table.Alright, let's break down exactly what goes into this masterpiece...
Inside the Ingredient List
The Flavor Foundation
Fresh ricotta is the star here, and I cannot stress enough how much difference quality makes. Skip the plastic tub from the supermarket dairy section and head to an Italian deli or cheese shop where they scoop it from a large container. Good ricotta should taste slightly sweet, with a creamy texture that spreads like thick yogurt. If you can only find the supermarket stuff, don't panic — we'll doctor it with a splash of cream and a pinch of salt to wake up the flavors. The lemon zest provides the aromatic oils that make your kitchen smell like sunshine, while the juice delivers that bright acidity that balances the rich cheese.
The Texture Team
Egg whites are your secret weapon for achieving that ethereal texture that makes this tart unforgettable. When whipped to soft peaks and folded gently into the ricotta mixture, they create tiny air pockets that expand in the oven, giving you that soufflé-like rise. The egg yolks provide richness and help set the filling, creating a custard that's firm enough to slice but soft enough to melt on your tongue. Heavy cream adds luxurious richness without weighing down the filling, while a touch of honey rounds out the sweetness with complex floral notes that granulated sugar simply can't match.
The Unexpected Game-Changer
Here's where I lose some people, but stay with me — a tablespoon of good olive oil in the filling adds a fruity, peppery note that makes the lemon taste even brighter. It's like adding a pinch of salt to chocolate chip cookies; you don't taste it directly, but you'd miss it if it weren't there. Cornstarch might seem unnecessary, but it ensures your filling sets properly and prevents weeping, which is the dreaded phenomenon where liquid separates from the custard. A vanilla bean, split and scraped, adds those gorgeous black specks and a warmth that makes the tart taste like it came from a Parisian patisserie.
The Pastry Perfectionists
Butter, obviously, but here's the trick — use European-style butter with higher fat content for a crust that's both more flavorful and more tender. The extra fat means less water, which translates to less gluten development and a more tender, flaky crust. A touch of powdered sugar in the pastry adds sweetness and helps with browning, while an egg yolk binds everything together and adds richness. The real secret weapon? A tablespoon of vodka in the dough evaporates during baking, creating extra flakiness without adding flavor.
Everything's prepped? Good. Let's get into the real action...
The Method — Step by Step
- Start with the crust because it needs time to rest while you make the filling. In your food processor, combine flour, powdered sugar, and salt — pulse just to combine. Add cold butter cubes and pulse until the mixture looks like coarse breadcrumbs with some pea-sized pieces remaining. This uneven texture creates flakiness. Add the egg yolk and vodka, then pulse while drizzling in ice water just until the dough comes together when pinched. Don't over-process or you'll develop gluten and end up with tough pastry.
- Now here's where we get clever — instead of rolling out the dough and transferring it to the tart pan (inevitably tearing it in the process), we're going to press it in directly. Dump the crumbly dough into your tart pan and use the heel of your hand to press it evenly across the bottom and up the sides. The dough should be about 1/4-inch thick everywhere. Use a straight-sided glass to press the corners neatly and ensure even thickness. Trim the excess by rolling a rolling pin across the top of the pan, which gives you a clean edge.
- Prick the base all over with a fork — this prevents air bubbles from forming and creating an uneven surface. Pop the pan in the freezer for 15 minutes while you preheat your oven to 375°F. This quick chill firms up the butter so the crust holds its shape during baking. If you've ever struggled with shrinking pastry, you're not alone — and I've got the fix. The freezer trick works because cold butter takes longer to melt, giving the flour time to set before the fat disappears.
- Line the chilled crust with parchment paper and fill with pie weights or dried beans. Bake for 20 minutes until the edges start to turn golden. Carefully remove the weights and parchment, then bake another 5-7 minutes until the bottom looks dry and lightly golden. This blind baking ensures your crust stays crisp even after adding the wet filling. Watch closely here — the line between perfectly golden and tragically burnt is about 60 seconds.
- While the crust cools, drain your ricotta. Line a fine-mesh sieve with cheesecloth or coffee filters, add the ricotta, and set it over a bowl. Let it drain for at least 30 minutes, or up to 2 hours in the refrigerator. You'll be amazed at how much liquid comes out — sometimes up to 1/4 cup. This step is crucial because excess moisture is the enemy of a properly set filling. If you're short on time, gently press the ricotta with a spatula to speed things up.
- In a large bowl, whisk together the drained ricotta, egg yolks, honey, lemon zest and juice, olive oil, and vanilla until completely smooth. The mixture should be thick but pourable, like Greek yogurt. If it's too thick, add cream a tablespoon at a time. If it seems thin, don't worry — the cornstarch will help set it. This is the moment of truth when you taste the filling and realize you're about to create something magical.
- In a separate bowl, whip the egg whites with a pinch of salt until they hold soft peaks. They should mound gently when you lift the beaters, not stand up stiff like meringue. Over-whipping makes them difficult to fold in and can create a dense texture. Gently fold one-third of the whites into the ricotta mixture to lighten it, then fold in the remaining whites in two additions. Use a large rubber spatula and make figure-eight motions, being careful not to deflate the air you've worked so hard to incorporate.
- Pour the filling into your cooled crust and smooth the top with an offset spatula. Place the tart on a baking sheet (this catches any potential spills and makes it easier to move) and bake at 350°F for 25-30 minutes. The filling should puff up slightly and appear set around the edges while the center still has a slight jiggle when you gently shake the pan. Don't walk away from the oven here — the difference between perfectly set and overbaked happens quickly. The tart will continue to set as it cools, so err on the side of slightly underbaked.
- Cool the tart completely on a wire rack, then refrigerate for at least 2 hours before serving. This chilling time allows the flavors to meld and the texture to firm up properly. Resist the temptation to slice it while warm — I speak from experience when I say it will collapse into a delicious but unattractive mess. Just before serving, dust with powdered sugar or top with fresh berries if you're feeling fancy. The tart will keep for up to 3 days in the refrigerator, though it rarely lasts that long in my house.
That's it — you did it. But hold on, I've got a few more tricks that'll take this to another level...
Insider Tricks for Flawless Results
The Temperature Rule Nobody Follows
Room temperature ingredients aren't just a suggestion — they're the difference between a lumpy filling and a silky smooth masterpiece. Cold ricotta seizes up when mixed, creating tiny balls that no amount of whisking will smooth out. Take everything out of the fridge 30 minutes before you start, except the butter for the crust (that needs to stay ice-cold). Your future self will thank you when you're not standing over the mixer cursing those stubborn lumps that refuse to disappear.
Why Your Nose Knows Best
Don't rely on the timer alone — your nose is your best kitchen tool. When the tart is nearly done, your kitchen should smell like sweet lemon and buttery pastry, with no hint of egginess. If you catch a whiff of something that smells like scrambled eggs, you've overbaked it. A friend tried skipping this step once — let's just say it didn't end well. Trust your senses; they've been honed over thousands of years of human evolution for exactly this purpose.
The 5-Minute Rest That Changes Everything
After folding in your egg whites, let the filling rest for exactly 5 minutes before pouring it into the crust. This brief pause allows the cornstarch to hydrate fully, preventing any graininess in the final texture. It also lets the air bubbles redistribute evenly, creating a more uniform texture. I discovered this trick by accident when my phone rang mid-recipe, and the resulting tart was so perfectly smooth that I made it a permanent step.
The Zesting Technique That Makes a Difference
Use a Microplane grater for your lemon zest, but here's the key — zest only the yellow part, not the white pith underneath. The pith is bitter and will ruin the bright, clean flavor you're after. Rotate the lemon as you zest, working in strips from top to bottom. One medium lemon should give you about a tablespoon of zest, but I always zest two because I inevitably snack on half the first one while cooking.
Storage Secrets for Maximum Freshness
Store your cooled tart in the refrigerator uncovered for the first hour — this prevents condensation from forming on top. After that, loosely cover with plastic wrap. Covering it while still warm creates steam that will make your beautiful crust soggy. If you need to store it longer than a day, place a paper towel under the tart in the container — it absorbs excess moisture and keeps the bottom crisp.
Creative Twists and Variations
This recipe is a playground. Here are some of my favorite ways to switch things up:
The Limoncello Lover's Dream
Replace 2 tablespoons of the lemon juice with Limoncello for an adult version that packs a boozy punch. The alcohol burns off during baking, leaving behind a more complex citrus flavor with floral notes. Top with candied lemon peel for extra drama. This version is perfect for dinner parties when you want to impress without trying too hard.
The Berry Burst Variation
Drop fresh raspberries or blueberries onto the filling just before baking. They sink slightly during baking, creating beautiful jewel-toned pockets of fruit throughout the tart. The tartness of the berries plays beautifully against the creamy ricotta. I'll be honest — I ate half the batch before anyone else got to try it when I first made this version.
The Orange Creamsicle Remix
Swap the lemon for orange zest and juice, add a teaspoon of orange blossom water, and fold in some finely chopped dark chocolate. The result tastes like the sophisticated older cousin of those orange cream candies you loved as a kid. Kids can't get enough of this variation, and adults appreciate the nostalgia factor.
The Honey Lavender Sophisticate
Infuse your honey with culinary lavender by gently heating them together for 5 minutes, then straining. The floral notes complement the ricotta beautifully and make the tart taste like you're eating in a Provencal garden. Most recipes get this completely wrong by adding too much lavender — start with just 1/2 teaspoon and taste as you go.
The Chocolate Hazelnut Indulgence
Replace 1/4 cup of the ricotta with Nutella and add some toasted chopped hazelnuts to the crust. The chocolate-hazelnut combination with the bright lemon creates a Ferrero Rocher meets lemon tart situation that's absolutely addictive. Picture yourself pulling this out of the oven, the whole kitchen smelling incredible, and watch as everyone's eyes go wide with anticipation.
The Tropical Paradise Version
Swap the lemon for lime zest and juice, add some toasted coconut to the crust, and serve with a passion fruit coulis. The tropical flavors transport you straight to a beach in Thailand, even if you're eating it in your cramped city apartment. This version is particularly refreshing in summer when you want something bright but different from the usual lemon desserts.
Storing and Bringing It Back to Life
Fridge Storage
Your lemon ricotta tart will keep beautifully in the refrigerator for up to 3 days, though the flavors are at their peak within the first 48 hours. Wrap it loosely in plastic wrap after the initial uncovered hour in the fridge. Don't use aluminum foil — it can react with the acid in the lemon and impart a metallic taste. If you notice any weeping (clear liquid pooling), gently blot it with a paper towel. The crust will stay crisp if you stored it properly, but if it's softened slightly, a quick 5-minute warm-up in a 300°F oven will restore its crunch.
Freezer Friendly
This tart freezes surprisingly well, though I recommend freezing individual slices rather than the whole tart. Wrap each slice tightly in plastic wrap, then in foil, and freeze for up to 2 months. Thaw overnight in the refrigerator, then let come to room temperature for 30 minutes before serving. The texture changes slightly — it becomes a bit denser — but the flavors remain fantastic. Pro tip: freeze slices on a baking sheet first, then wrap them. This prevents the filling from getting squished during wrapping.
Best Reheating Method
While this tart is best served chilled or at room temperature, sometimes you want to revive a slice that's been in the fridge. Add a tiny splash of water to a small skillet, bring to a gentle simmer, then turn off the heat and place your slice on a plate over the steaming water for 2-3 minutes. This gentle warming brings back the creamy texture without cooking the filling further. Never microwave it — you'll end up with rubbery edges and a soggy center. If you must use a microwave, do it in 5-second bursts on 50% power, but honestly, just eat it cold and save yourself the disappointment.