I was in the middle of a late‑night kitchen raid when the oven door slammed shut, leaving my chocolate batter half‑cooked and my peanut butter swirl dripping like a guilty confession. I stared at the mess, feeling the sting of disappointment that comes from a failed dessert, and whispered, “This is the moment for a new classic.” The kitchen smelled of vanilla and cocoa, a heady perfume that made my taste buds dance even before the first bite. The heat of the oven, the crackle of butter melting, the soft hum of the fridge—all combined to create a sensory orchestra that I couldn’t ignore. That night, I decided to rewrite the rulebook and turn a disaster into the ultimate peanut butter cup brownie.
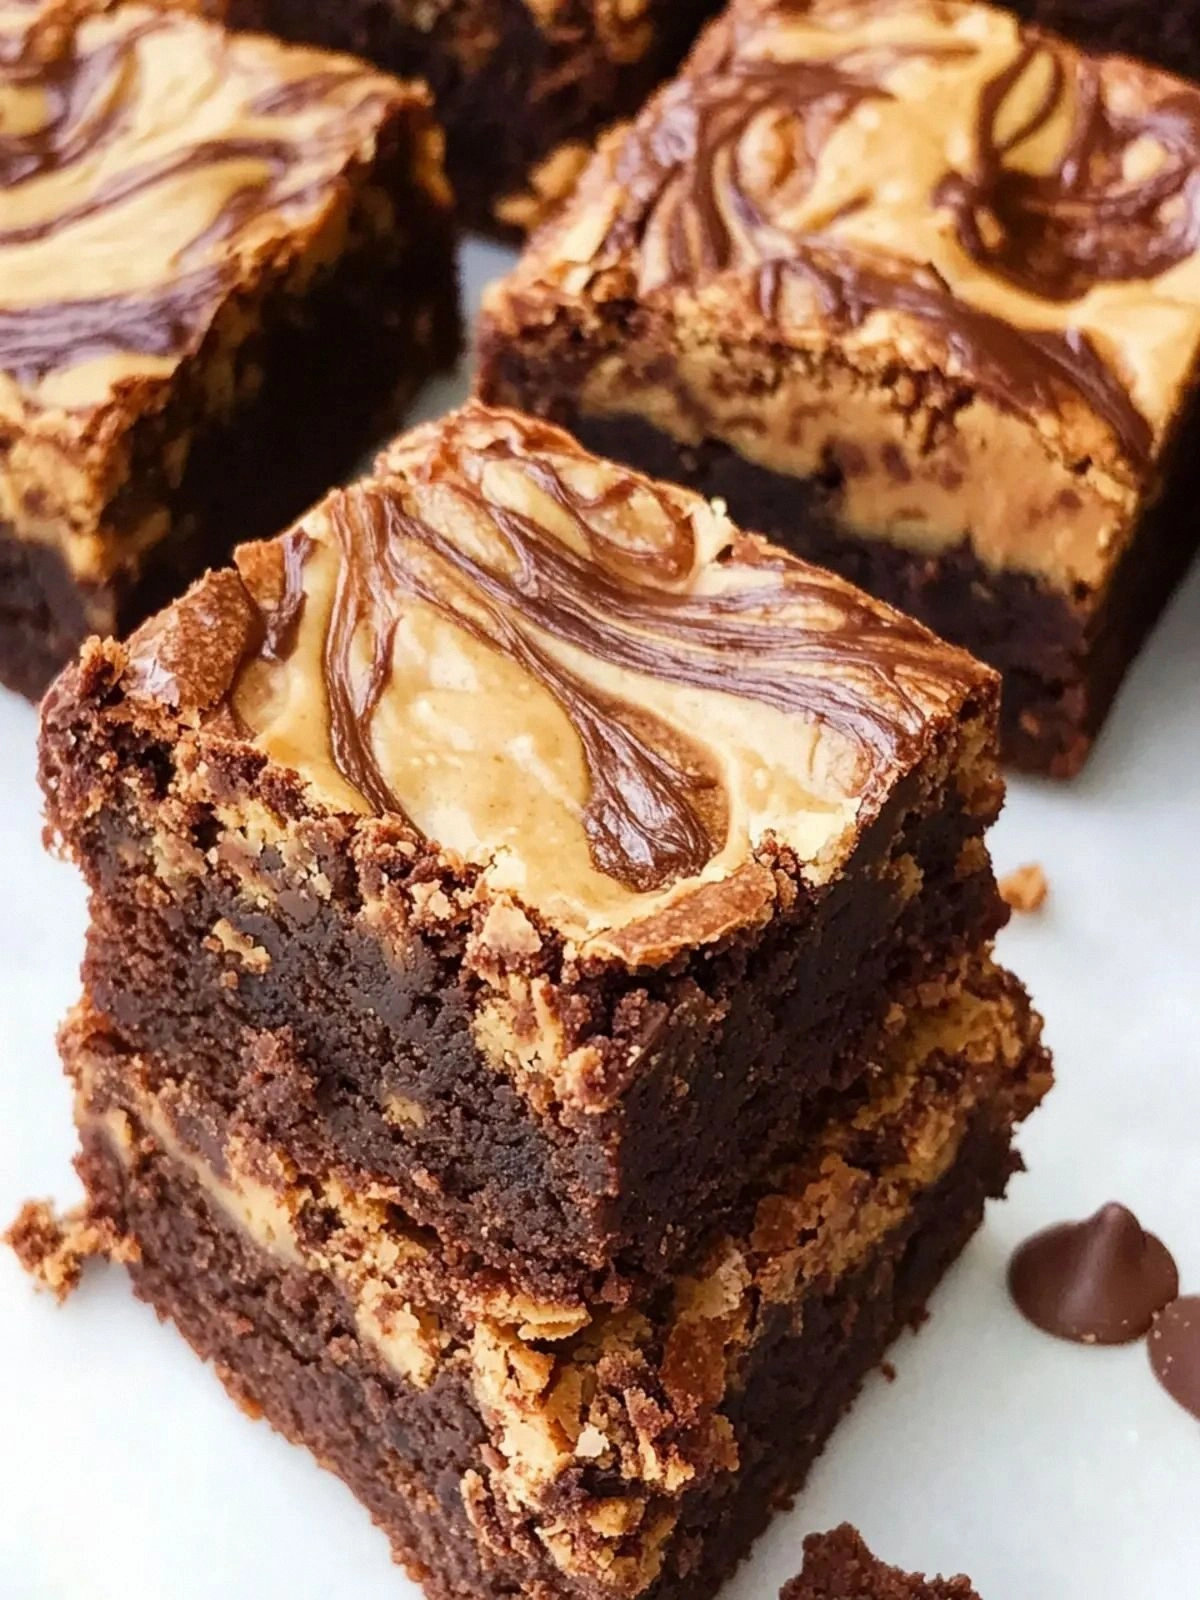
Picture this: a square of brownie so dense that it feels like a piece of chocolate brick, yet it melts with the same gentle grace as a spoonful of peanut butter on a hot day. The first bite is a symphony—crunchy edges, a gooey center, and a burst of peanut butter that lingers like a secret. The aroma is a warm hug, the color deep chocolate, and the texture a paradox of fudgy and crisp. I swear I could taste the maple syrup’s subtle caramel undertone before I even tasted the peanut butter. My friends, when they tasted it, said, “I dare you to taste this and not go back for seconds.” That’s the kind of confidence I want to share with you.
What makes this version stand out? It’s the marriage of gluten‑free flour with a coconut oil base that keeps the brownies moist, the maple syrup that adds a natural sweetness without overpowering, and the peanut butter swirl that creates a decadent contrast. The recipe is simple enough for beginners yet refined enough for seasoned bakers. I’ve tweaked the ratio of butter to oil to avoid a greasy finish, and I’ve added a splash of vanilla extract to elevate the flavor profile. The result is a brownie that is both indulgent and wholesome, a sweet treat that feels almost guilt‑free. I’ve tested it with friends who are gluten‑sensitive and they’re amazed at how normal it tastes. If you’ve ever struggled with brownies that are either too dry or too sweet, you’re not alone—and I’ve got the fix.
I’ll be honest—I ate half the batch before anyone else got to try it. The first bite was a revelation: the peanut butter swirl was silky, the chocolate was deep, and the maple syrup gave it a subtle caramel finish that made my mouth water. I couldn’t stop myself, and that’s exactly what I want you to do. Let me walk you through every single step—by the end, you’ll wonder how you ever made it any other way.
What Makes This Version Stand Out
- Texture: The combination of coconut oil and grass‑fed butter creates a brownie that is both fudgy and slightly crisp on the edges, a texture that shatters like thin ice when you bite into it.
- Flavor: Maple syrup replaces refined sugar, giving the brownies a natural caramel undertone that balances the richness of peanut butter.
- All‑Inclusive: Gluten‑free flour keeps the recipe accessible to those with dietary restrictions without compromising on taste.
- Peanut Butter Swirl: The swirl of natural smooth peanut butter adds a creamy layer that feels like velvet coating the chocolate.
- Quick Prep: The batter comes together in under 15 minutes, making it ideal for a last‑minute dessert.
- Make‑Ahead Friendly: Store in an airtight container and reheat for a warm, fresh experience.
- Ingredient Quality: Using grass‑fed butter or vanilla ghee ensures a cleaner flavor profile and better nutritional value.
- Versatility: The base can be swapped with cocoa nibs or dark chocolate chips for a different twist.
Alright, let's break down exactly what goes into this masterpiece...
Inside the Ingredient List
The Flavor Base
The gluten‑free all‑purpose flour is the backbone of our brownies. It provides structure without the gluten that can sometimes make brownies tough. If you’re on a strict paleo diet, you can swap it with almond flour, but expect a slightly denser crumb. The unsweetened cocoa powder gives the chocolate flavor without adding unnecessary sugar, allowing the maple syrup to shine. For the most authentic taste, choose a Dutch‑processed cocoa for a richer, less acidic profile.
The Texture Crew
Grass‑fed butter or vanilla ghee is the secret to that silky mouthfeel. Butter melts smoothly, releasing flavor, while ghee adds a nutty aroma. Coconut oil, on the other hand, adds a subtle tropical note and keeps the brownies moist. If you’re allergic to dairy, coconut oil alone will suffice, though the flavor will shift slightly toward a coconutty sweetness.
The Unexpected Star
Maple syrup or coconut sugar is the sweetener that keeps the brownies natural and flavorful. Maple syrup brings a subtle caramel depth, while coconut sugar offers a lower glycemic index and a hint of toasted coconut. If you prefer a sweeter brownie, add a tablespoon of honey, but keep in mind that it will alter the texture slightly.
The Final Flourish
Eggs bind everything together and give the brownies that classic cake‑like lift. Natural smooth peanut butter is the star ingredient that creates the swirl and adds protein and healthy fats. Vanilla extract lifts the overall flavor and gives the brownies a subtle aroma that ties everything together. If you’re vegan, replace the eggs with flaxseed meal or chia seeds mixed with water.
Everything's prepped? Good. Let's get into the real action...
The Method — Step by Step
- Preheat your oven to 350°F (175°C) and line an 8‑inch square pan with parchment paper, leaving a little overhang on the sides. This will make removing the brownies a breeze and give them a clean, even crust. Let the pan rest on a flat surface; a sloped pan can cause uneven baking.
- In a medium bowl, whisk together the gluten‑free flour, cocoa powder, and a pinch of salt. This dry mix is the foundation; make sure there are no lumps. A fine sift can help create a smoother batter.
- In a small saucepan, melt the grass‑fed butter or ghee and coconut oil over low heat. Stir until the mixture is glossy and the coconut oil has fully liquefied. The aroma will signal that it’s ready.
- Remove the saucepan from heat and whisk in the maple syrup (or coconut sugar) until the mixture is glossy and smooth. This step is crucial; a cold mixture can cause the batter to seize. Kitchen Hack: Add a tablespoon of warm water to the melted butter mixture to thin it out if it feels too thick.
- Let the wet mixture cool to room temperature, then beat in the eggs one at a time, ensuring each is fully incorporated before adding the next. The eggs act as a binder and give the brownies that slight rise.
- Fold the dry ingredients into the wet mixture using a spatula until just combined. Overmixing can lead to a tough crumb; a few streaks of flour are fine. The batter should be thick yet pourable.
- Pour half of the batter into the prepared pan, smoothing the top with a spatula. Then spoon dollops of peanut butter across the surface and swirl with a toothpick or a knife to create a marbled effect. The swirl should be visible but not too thick; a light touch keeps the brownie from becoming too oily.
- Cover the pan with a sheet of parchment paper and bake for 30 minutes. The brownies should be set around the edges but still slightly gooey in the center. Watch Out: Overbaking turns the brownies into a hard chocolate bar; keep an eye on the center.
- Remove from oven and let the brownies cool in the pan for 10 minutes. This resting period allows the flavors to settle and the structure to firm up. The edges will pull away from the parchment paper, signaling that they’re ready.
- Transfer the brownies to a cutting board, cut into squares, and serve. The first bite should feel like a silky chocolate blanket with a peanut butter heart. If you’re feeling adventurous, drizzle a thin line of melted dark chocolate over the top for an extra touch of decadence.
That's it — you did it. But hold on, I've got a few more tricks that'll take this to another level...
Insider Tricks for Flawless Results
The Temperature Rule Nobody Follows
Many bakers bake brownies at 375°F, but that high heat can cause the edges to overcook while the center remains underdone. Lowering the temperature to 350°F and extending the bake time allows the heat to penetrate evenly, ensuring a fudgy center and crisp edges. If your oven runs hot, set a lower temperature and check the brownies at the 25‑minute mark.
Why Your Nose Knows Best
Trust your nose. As the brownies bake, a toasty chocolate aroma will rise. If you notice a faint burnt smell, lower the oven temperature by 25°F. A strong chocolate scent indicates that the cocoa is releasing its oils, a sign of a good bake. A sour smell means you’re overcooking.
The 5‑Minute Rest That Changes Everything
After removing the brownies from the oven, let them rest for exactly five minutes before cutting. This short rest allows the interior to set, preventing the brownies from falling apart. It also lets the peanut butter swirl settle, making each square look more uniform. A rushed cut often results in uneven pieces.
The Swirl Technique
When swirling the peanut butter, use a light hand. A heavy swirl can cause the peanut butter to ooze out of the pan during baking. Hold the knife at a slight angle and make gentle, circular motions. This ensures a beautiful marbled pattern without compromising the texture.
The Final Touch
If you want a glossy finish, lightly brush the top of the brownies with a thin layer of melted milk chocolate after they cool. This adds a shiny sheen and a complementary chocolate flavor. Store the chocolate‑coated brownies in an airtight container to keep them fresh.
Creative Twists and Variations
This recipe is a playground. Here are some of my favorite ways to switch things up:
Dark Chocolate Explosion
Swap the unsweetened cocoa with dark chocolate chips and melt them into the batter. The result is a richer, bittersweet brownie that pairs perfectly with a splash of sea salt on top.
Coconut Crunch
Add a cup of shredded coconut to the dry mix for a tropical twist. The coconut adds a pleasant chew and a subtle sweetness that complements the peanut butter.
Spiced Latte Brownies
Stir in a teaspoon of espresso powder and a pinch of cinnamon into the batter. The coffee undertone enhances the chocolate flavor, while the cinnamon adds warmth.
Almond Joy Edition
Fold in a handful of toasted almonds and a drizzle of coconut milk into the batter before baking. The nuts add crunch and the coconut milk gives a silky finish.
Vegan Delight
Replace the eggs with flaxseed meal mixed with water and use coconut oil exclusively. The result is a moist, fudgy brownie that’s completely plant‑based.
Minty Fresh
Add a tablespoon of fresh mint extract to the batter. The mint pairs beautifully with chocolate and peanut butter, creating a refreshing twist.
Storing and Bringing It Back to Life
Fridge Storage
Store brownies in an airtight container in the refrigerator for up to five days. The cool temperature keeps them firm, but they’ll still taste fresh. When ready to eat, let them sit at room temperature for 15 minutes to soften slightly.
Freezer Friendly
Wrap each brownie individually in parchment paper and place them in a freezer bag. They can be frozen for up to two months. When you’re ready to enjoy, thaw overnight in the fridge.
Best Reheating Method
Reheat frozen brownies in a 350°F oven for 10 minutes. For a quick fix, microwave on medium for 20 seconds per brownie. Add a tiny splash of water before reheating to steam back to perfection, restoring the fudgy texture.