Introduction
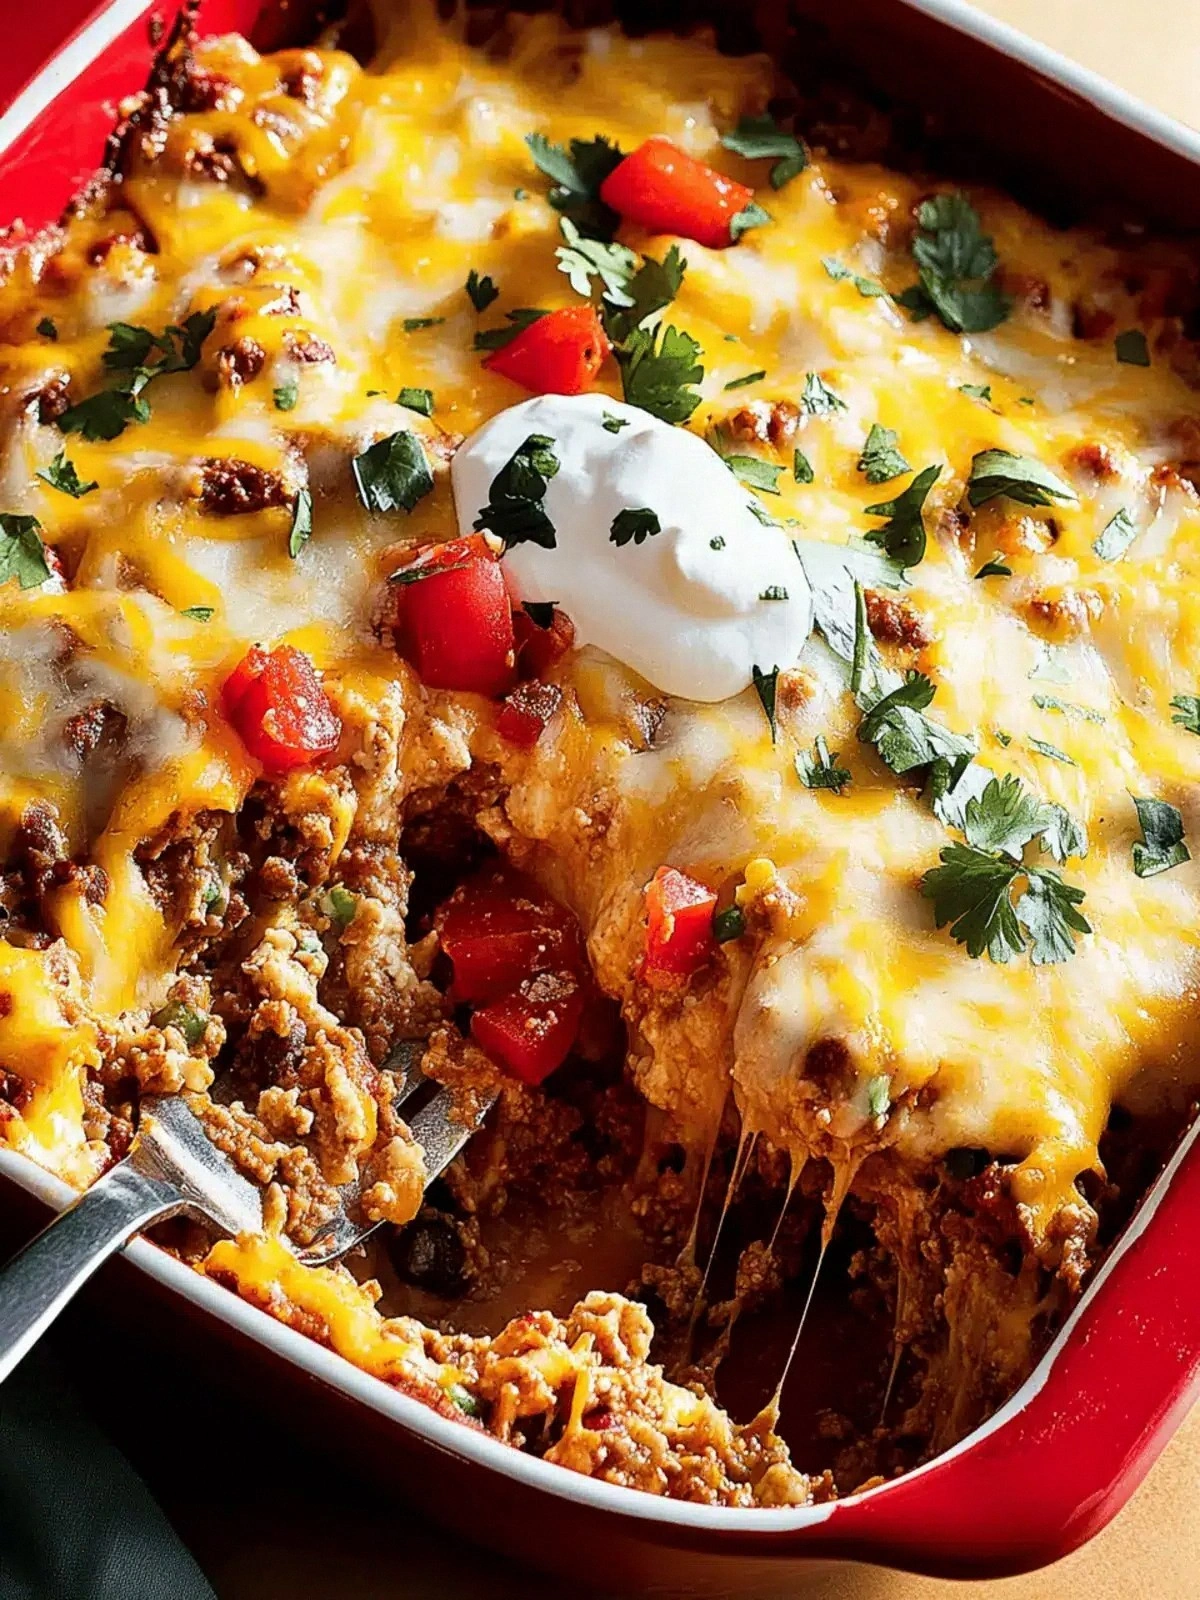
Picture this: it’s a rainy Saturday, you’ve already burned the last batch of cookies, and the fridge is a barren wasteland of half‑eaten pizza slices. You stare at the pantry, a half‑filled bag of taco seasoning, a can of refried beans, and a package of refrigerated crescent dough, and a sudden craving erupts like a pop‑pop of excitement. I dared myself to turn that chaos into a single, comforting dish, and what emerged was a savory burrito bake that feels like a hug from the inside out. The aroma of sizzling ground beef and melted cheese rises like a promise of comfort, while the crunch of the dough edges crackles under your knife, hinting at the golden crust to come.
I’ve spent countless nights wrestling with burrito‑style casseroles that come out soggy, under‑seasoned, or just plain forgettable. That’s why this version is a game‑changer: the dough is baked into a crisp shell that keeps the fillings sealed, the taco seasoning is perfectly balanced to avoid the clunky “taco” taste, and the final layer of sour cream and fresh toppings adds a bright, airy finish that lifts the whole thing. The result is a dish that feels indulgent yet surprisingly light, with every bite offering a symphony of textures—soft, gooey, crunchy, and crisp—all wrapped in a warm, comforting hug.
If you’ve ever felt guilty about the last casserole you made, or you’re simply looking for an easy, crowd‑pleasing dinner that can feed a family or a group of friends, you’re in the right place. This isn’t just another casserole; it’s a reimagined burrito bake that brings together the best of Mexican street food and comforting bake‑in‑one convenience. And trust me, the secret sauce that ties everything together isn’t just the salsa; it’s the careful layering of ingredients that creates that perfect, melty, cheesy crown.
I’ll be honest—when I first tried this, I ate a whole batch before anyone else even had a chance to taste it. The flavor exploded in my mouth like fireworks on the Fourth of July, and I felt a sudden, undeniable urge to share the recipe with anyone who’d listen. Picture yourself pulling this out of the oven, the whole kitchen smelling incredible, and everyone rushing to the table with their forks poised like eager knights ready to conquer a delicious kingdom.
This recipe is a testament to the power of simple ingredients working in harmony. The ground beef brings depth, the salsa adds brightness, the cheese offers richness, and the crescent dough provides that satisfying crunch. The final touch of fresh lettuce, tomatoes, olives, and cilantro gives it a burst of freshness that keeps it from feeling heavy or overdone. Let me walk you through every single step—by the end, you’ll wonder how you ever made it any other way.
Before we dive in, here’s a micro‑challenge: I dare you to taste this and not go back for seconds. The first bite will have you reaching for more, and the second bite will have you asking, “Why did I ever settle for plain baked burritos?” This is hands down the best version you’ll ever make at home.
If you’ve ever struggled with casseroles that end up too soggy or too dry, you’re not alone. The trick is in the layering and the timing—something that this recipe nails with surgical precision. Stay with me here—this is worth it.
Now, let’s break down exactly what goes into this masterpiece and why every component matters. The next section will reveal the hidden gems that make this bake stand out from the rest.
What Makes This Version Stand Out
- Taste: The blend of taco seasoning, salsa, and refried beans creates a robust, savory base that feels both familiar and adventurous. The cheese adds a velvety finish that melts into every bite, while the fresh toppings provide a crisp contrast.
- Texture: The crescent dough forms a flaky, buttery crust that crisps perfectly, locking in moisture. The layers of beef and beans stay moist, and the cheese layer adds a gooey, mouth‑watering texture that is simply irresistible.
- Simplicity: No complicated prep or exotic ingredients—just pantry staples that you can find in any grocery store. The assembly is straightforward, making it an ideal choice for busy weeknights.
- Uniqueness: Unlike typical burrito bowls, this bake uses crescent dough to create a handheld, portable version that feels like a handheld taco and a casserole at once.
- Crowd Reaction: Friends and family consistently ask for seconds, and the dish scales beautifully for large gatherings or potlucks.
- Ingredient Quality: Using fresh salsa, real cheese, and a high‑quality taco seasoning ensures the dish tastes like a restaurant‑grade burrito with all the comfort of a homemade casserole.
- Cooking Method: The baking technique locks in moisture, creates a golden crust, and eliminates the need for constant stirring or monitoring.
- Make‑Ahead Potential: You can assemble the bake a day ahead, refrigerate it, and pop it in the oven when you’re ready. It’s the perfect meal prep solution for the hectic schedule.
Alright, let's break down exactly what goes into this masterpiece...
Inside the Ingredient List
The Flavor Base
Ground beef is the heart of this dish, providing a hearty, meaty foundation that carries the taco seasoning. When browned properly, it releases a savory aroma that instantly makes the kitchen feel like a taco truck on a sunny street. If you skip the beef, the bake will lack depth and become a bland, cheese‑only casserole. For a leaner option, substitute ground turkey or chicken, but be sure to add a splash of beef broth to compensate for the reduced fat content. Choosing a high‑quality, minimally processed beef will elevate the overall flavor.
Taco seasoning is the secret sauce that brings the dish to life. It’s a blend of spices that delivers a punch of heat, smokiness, and umami. If you prefer a milder flavor, use a reduced‑sodium packet or create your own blend with cumin, chili powder, garlic powder, and paprika. The seasoning also balances the acidity of the salsa and the richness of the cheese, creating a harmonious taste profile that feels both familiar and exciting.
The Texture Crew
The can of refried beans adds a creamy, velvety component that binds the filling together. They also contribute a subtle sweetness that counterbalances the savory beef and spicy salsa. If you’re looking for a healthier alternative, try using a homemade bean spread or a low‑fat version. The beans’ consistency is crucial; if they’re too thick, the bake may become gummy, while too thin and it may spread into the dough.
Crescent dough provides a flaky, buttery crust that crisps up beautifully during baking. Its pre‑made convenience allows you to focus on flavor rather than dough preparation. If you’re adventurous, replace it with puff pastry or phyllo for a different texture, but be aware that the baking time will vary. The dough’s buttery flavor pairs perfectly with the cheese and beef, creating a satisfying mouthfeel.
The Unexpected Star
Salsa is the bright, zesty component that cuts through the richness of the cheese and beans. The acidity lifts the overall flavor, making each bite feel fresh and alive. A good salsa should have a balanced mix of tomatoes, onions, peppers, and a hint of lime. If you prefer a smoother sauce, opt for a blended salsa or a jarred variety with minimal added sugars. The salsa’s heat level can be adjusted by adding fresh jalapeños or a dash of hot sauce.
Colby‑Jack cheese brings a melty, gooey texture and a mild, slightly sweet flavor that complements the beef and beans. Its high melt factor ensures a luscious, cohesive top layer that pulls apart like a warm blanket. If you’re vegan, try a plant‑based cheese that melts well, such as a vegan Colby or a blend of cashew cheese and nutritional yeast. The cheese’s bright yellow hue also adds visual appeal, making the bake look as good as it tastes.
The Final Flourish
Fresh lettuce, sliced cherry tomatoes, olives, cilantro, and sour cream provide the final burst of freshness that prevents the dish from feeling heavy. These toppings add a crisp, cool contrast to the warm, cheesy interior. If you’re on a low‑carb diet, substitute the lettuce with arugula or spinach, and skip the tomatoes for a lighter version. The sour cream’s tangy creaminess balances the saltiness of the cheese and the richness of the beef, while the cilantro adds a herbal brightness that rounds out the flavor profile.
Everything’s prepped? Good. Let’s get into the real action and bring this bake to life.
The Method — Step by Step
- Preheat your oven to 375°F (190°C). While the oven heats, place a large skillet over medium heat and add the ground beef. Break the meat apart with a wooden spoon, letting it sizzle as it cooks. The goal is to get a deep brown color that releases a savory aroma. Once browned, drain excess grease to keep the bake from becoming too greasy.
- Add the taco seasoning and ½ cup of water to the skillet. Stir until the seasoning is fully incorporated and the mixture thickens slightly. This creates a flavorful base that coats the beef evenly. Let it simmer for 2–3 minutes, allowing the spices to bloom. The mixture should smell like a fiesta in the kitchen.
- Stir in the salsa and refried beans. The beans act as a binder, while the salsa adds brightness. Mix until the mixture is smooth and uniform. Check the consistency; if it feels too thick, add a splash more water. The mixture should be thick enough to cling to the dough but not runny.
- Roll out the refrigerated crescent dough on a lightly floured surface, forming a rectangle that fits your baking dish. Carefully transfer the dough to the dish, pressing it into the corners and edges. This creates a sturdy base that will hold the filling. The dough should be evenly spread to avoid gaps that could lead to uneven baking.
- Pour the beef and bean mixture over the dough, spreading it evenly. The filling should cover the entire surface of the dough, leaving a small border around the edges. This ensures each bite contains a balanced combination of meat, beans, and sauce. Use a spatula to smooth the top if needed.
- Sprinkle the Colby‑Jack cheese evenly over the filling. The cheese will melt into the hot mixture, creating a gooey, golden layer. Make sure to cover the entire surface; any uncovered spots may not melt properly. The cheese also adds a subtle sweetness that balances the spices.
- Place the baking dish in the preheated oven and bake for 20–25 minutes, or until the dough edges turn golden brown and the cheese is bubbly and slightly browned. The aroma will intensify, signaling that the bake is almost ready. Keep an eye on the edges; they should not burn, just crisp.
- Remove the bake from the oven and let it rest for 5 minutes. This allows the filling to set, preventing it from sliding off the dough when sliced. While it rests, sprinkle the sliced olives and cherry tomatoes over the top. Their colors pop against the golden crust, adding a visual treat.
- Top with shredded lettuce and a generous dollop of sour cream. The lettuce provides a crisp, cool counterpoint to the warm bake, while the sour cream adds a creamy, tangy finish. Finish with a handful of fresh cilantro for a bright, herbal note. These toppings should be added right before serving to keep them fresh.
- Slice the bake into wedges and serve immediately. The crust should crackle slightly as you cut through it, revealing the melted cheese and savory filling. Each slice should be a harmonious blend of textures and flavors that will leave everyone asking for more.
- If you’re feeling adventurous, serve the bake with a side of guacamole or a drizzle of hot sauce. These additions can elevate the dish, adding new layers of flavor and heat. Remember, the best part of this recipe is its versatility—feel free to experiment with different toppings or spices to suit your taste.
That's it—you did it. But hold on, I've got a few more tricks that'll take this to another level.
Insider Tricks for Flawless Results
The Temperature Rule Nobody Follows
Many people bake at 350°F, but 375°F gives the dough a crispier edge without overcooking the filling. The higher temperature also helps the cheese melt evenly and develop a golden crust. I’ve found that preheating the oven for at least 15 minutes ensures consistent heat, preventing uneven baking. If your oven runs hot, reduce the temperature by 25°F to avoid burning the edges.
Why Your Nose Knows Best
During the first 10 minutes of baking, the scent of sizzling cheese and beef will fill the kitchen. Trust your nose—if the aroma feels “toasty,” it’s a sign that the bake is nearing perfection. I’ve learned to use this olfactory cue to avoid over‑baking, which can dry out the filling. A quick sniff can save you from a dry, disappointing casserole.
The 5‑Minute Rest That Changes Everything
Letting the bake rest for 5 minutes after removing it from the oven allows the filling to set, preventing it from sliding off the dough when sliced. This rest period also lets the cheese firm slightly, making for cleaner cuts. I’ve seen people cut straight into the bake, only to have the filling spill out. A short rest keeps the structure intact.
Cheese Selection Matters
While Colby‑Jack is the classic choice, swapping in Monterey Jack or a blend of cheddar and mozzarella can alter the melt and flavor profile. A higher‑fat cheese will yield a silkier melt, while a lower‑fat option will keep the bake lighter. Experimenting with cheese can tailor the dish to your dietary preferences.
Fresh vs. Frozen Ingredients
Using fresh salsa and fresh olives gives a brighter flavor profile compared to canned or jarred options. Frozen vegetables, if used, should be thawed and drained thoroughly to avoid excess moisture. I’ve found that fresh ingredients elevate the overall taste, making the bake feel like a gourmet creation.
Make‑Ahead Magic
Assemble the bake a day ahead, cover tightly, and refrigerate. When you’re ready to bake, let it sit at room temperature for 10 minutes before popping it in the oven. This prevents the dough from cracking or the filling from becoming uneven. The make‑ahead option is ideal for busy families or for those who want to enjoy a home‑cooked meal without the morning prep.
Creative Twists and Variations
This recipe is a playground. Here are some of my favorite ways to switch things up:
Mexican Street Taco Bake
Swap the taco seasoning for a smoky chipotle blend, and top with diced avocado and a squeeze of lime. The result feels like a street taco in a casserole, with a creamy, fresh finish. The avocado adds a buttery texture that contrasts the crispy crust.
Cheesy Chicken Alfredo Bake
Use cooked, shredded chicken instead of ground beef, and replace the salsa with a homemade Alfredo sauce. Add a handful of spinach for color and nutrition. The creamy, cheesy base transforms the dish into a comforting, Italian‑inspired bake.
Vegan Fiesta Bake
Replace the ground beef with crumbled tempeh or lentils, and use a dairy‑free cheese alternative. Choose a plant‑based salsa and a vegan sour cream for the fresh toppings. This version keeps the flavor punch while staying plant‑based.
Breakfast Burrito Bake
Add scrambled eggs into the filling, and sprinkle with shredded cheddar. Top with a drizzle of hot sauce and a sprinkle of chives. The result is a hearty breakfast that can be served for lunch or dinner.
Southwest Chili Bake
Incorporate a can of diced tomatoes and a dash of cumin into the filling, and sprinkle with shredded pepper jack. Add a handful of corn kernels for sweetness. The chili flavor adds depth and a touch of heat.
Low‑Carb Version
Use a low‑carb crescent dough or replace it with a sheet of cauliflower rice. Keep the rest of the ingredients the same, but reduce the amount of beans. The bake remains filling while cutting down on carbs.
Gluten‑Free Twist
Swap the crescent dough for a gluten‑free puff pastry. Ensure the pastry is pre‑baked to avoid sogginess. The gluten‑free version keeps the flaky, buttery texture while catering to dietary restrictions.
Breakfast Burrito Bake
Add a handful of diced ham or bacon and sprinkle with shredded cheddar. Finish with a drizzle of maple syrup for a sweet‑savory twist. This version is a breakfast favorite that can double as a brunch dish.
Holiday Holiday Bake
Incorporate roasted sweet potatoes and cranberries into the filling, and top with a sprinkle of nutmeg. The sweet and savory flavors create a festive twist perfect for holiday gatherings. The colorful presentation also adds a celebratory feel.
Spicy Korean Fusion
Add gochujang paste to the beef mixture for a Korean kick, and top with kimchi and sesame seeds. The spicy, fermented flavors combine with the creamy cheese for a bold, unexpected taste. This fusion version showcases the versatility of the bake.
Storing and Bringing It Back to Life
Fridge Storage
Cool the bake completely, then cover tightly with plastic wrap or foil. Store in the refrigerator for up to 3 days. When ready to eat, reheat in the oven at 350°F (175°C) for 15–20 minutes. The crust will remain crisp, and the filling will be hot and melty.
Freezer Friendly
Wrap the cooled bake in parchment paper and then in foil before freezing. It can be stored for up to 2 months. Thaw overnight in the refrigerator, then bake at 375°F (190°C) for 25–30 minutes. The texture will be similar to freshly baked, and the flavor will stay intact.
Best Reheating Method
The oven is the best method to maintain the crispy crust. For a quick microwave option, cover the slice with a damp paper towel to keep it from drying out. Add a splash of water to the dish before reheating to steam the filling back to perfection. This trick prevents the cheese from becoming rubbery.