It was a Tuesday night, and I was chasing the sweet spot between comfort and indulgence. A burnt batch of snickerdoodles had left my kitchen smelling like disappointment, and my friends were already craving something that would make their taste buds dance. That night, I promised myself I would find a way to turn that failure into a triumph. I grabbed every ingredient I could find in the pantry, and the air filled with a warm cinnamon aroma that felt like a hug from a grandmother. The moment the butter melted into a glossy pool, I knew I was on the cusp of a revelation. I dared you to taste this and not go back for seconds—because trust me, it’s a game‑changer.
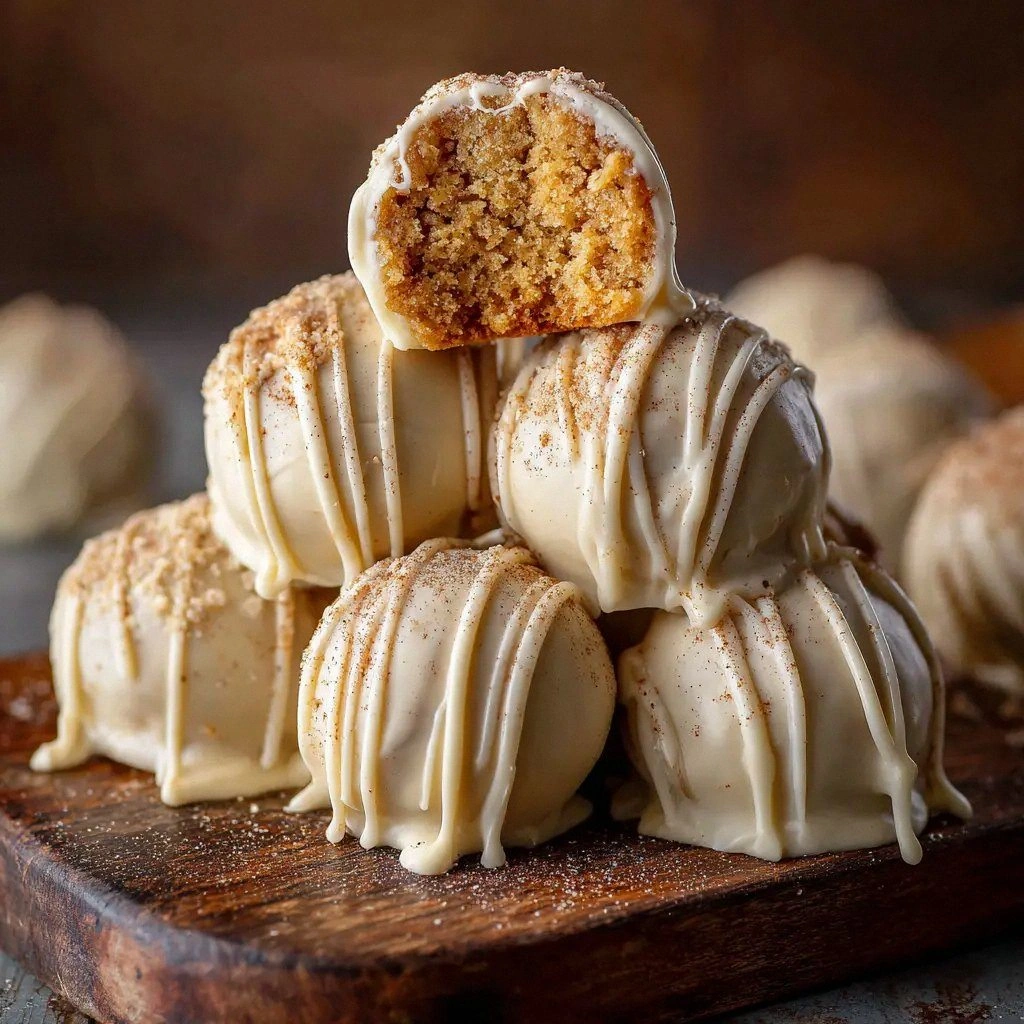
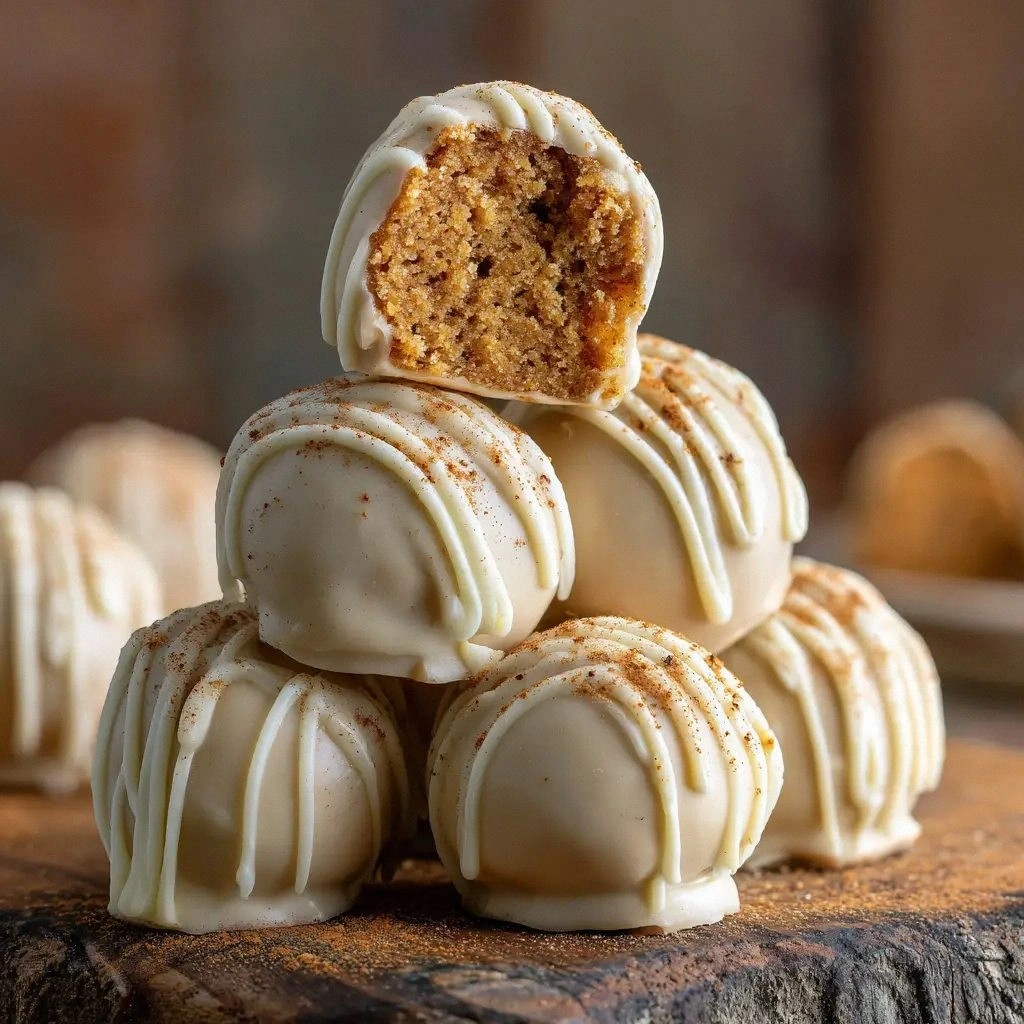
I’ve spent years hunting for that perfect no‑bake treat that feels like a hug in a bite, and I finally cracked the code. The secret is a silky dough that’s both chewy and crisp, coated in a glossy white chocolate wafer shell that melts like velvet. Every bite is a burst of buttery snickerdoodle flavor, followed by a gentle whisper of nutmeg and vanilla that lingers on the tongue. The crunch of the wafer is a delightful counterpoint to the creamy center, creating a texture that’s hard to find in other desserts. The result is a truffle that feels like a bite of nostalgia, but with a modern twist that makes it irresistibly shareable. Picture yourself pulling this out of the fridge and the whole kitchen smelling incredible—now that’s a moment worth savoring.
I didn’t just settle for a recipe; I built a ritual around it. From the moment the butter starts to sizzle, I set a timer and let the aroma envelop the room. I’ve learned that the right ratio of ingredients is crucial—too much sugar and the truffle becomes cloying; too little and it’s dry. I’ve also discovered that the type of white chocolate wafers matters; the melting ones keep the coating smooth and glossy. The final touch is a sprinkle of ground cinnamon that adds depth and warmth, turning each bite into a small, sweet adventure. This version stands out because it’s simple, yet it delivers a flavor profile that feels both classic and fresh.
But here’s the twist that most people overlook: I add a splash of coconut oil to the dough. Coconut oil gives the truffle a subtle tropical note and helps the coating set perfectly. I also fold in a pinch of sea salt, which balances the sweetness and brings out the cinnamon’s subtle spiciness. The final result is a truffle that’s both indulgent and balanced, with a texture that’s chewy on the inside and crisp on the outside. I’ve been told that the first bite feels like a warm hug, while the second bite delivers a satisfying crunch. This is hands down the best version you’ll ever make at home, and I’m ready to show you how to replicate it.
What Makes This Version Stand Out
- Taste: The buttery base is enhanced by a subtle nutmeg note that gives each truffle a depth rarely found in quick desserts. The vanilla extract adds a fragrant sweetness that balances the cinnamon’s warmth. This combination creates a flavor profile that feels both nostalgic and novel.
- Texture: The dough’s consistency is achieved by blending cream cheese and butter until silky, then folding in powdered sugar for a slightly gritty, caramel-like mouthfeel. The white chocolate wafer coating provides a crisp, glossy finish that melts in the mouth. The result is a truffle that is chewy, crunchy, and indulgently smooth.
- Simplicity: No ovens, no fancy tools—just a saucepan, a whisk, and a few pantry staples. The process can be completed in under 45 minutes, making it perfect for busy evenings. You’ll finish with a batch of truffles that look and taste like they belong on a dessert platter.
- Uniqueness: The addition of coconut oil and a pinch of sea salt gives this truffle a modern twist that sets it apart from traditional snickerdoodle cookies. The white chocolate wafer coating adds an unexpected crunch and a glossy sheen that is visually stunning. This version is a fresh take on a classic favorite.
- Crowd Reaction: Friends who’ve tried the original snickerdoodle truffles often say they’re “just not the same” until they taste this version. The combination of flavors and textures leaves a lasting impression, and many ask for the recipe after the first bite. The truffles are a conversation starter at parties and potlucks.
- Ingredient Quality: Using high‑quality unsalted butter, fresh cream cheese, and premium white chocolate wafers elevates the flavor and texture. The choice of all‑purpose flour over cake flour gives the dough a slightly denser, more satisfying bite. The result is a truffle that feels luxurious and indulgent.
- Make‑Ahead Potential: Once the truffles are formed and coated, they can be stored in the fridge for up to a week or frozen for longer storage. The coating stays crisp, and the dough remains moist. This makes them a convenient dessert for busy schedules.
Inside the Ingredient List
The Flavor Base
Unsalted butter and cream cheese form the heart of the truffle, providing richness and a smooth mouthfeel. The butter must be at room temperature so it melts easily, while the cream cheese adds a tangy contrast that balances the sweetness. If you skip the cream cheese, the truffle becomes too buttery and loses its complex flavor profile. For those who prefer a dairy-free version, coconut cream can be used as a substitute, though the texture will differ slightly. The vanilla extract is the final touch that brings all the flavors together, giving the truffle a fragrant, aromatic finish.
The Texture Crew
All‑purpose flour gives the dough structure without making it too dense. The powdered sugar creates a slight granularity that adds a caramel-like chewiness. Ground cinnamon and granulated sugar combine to give the truffle its signature snickerdoodle flavor. Coconut oil is added to the dough to help the coating set perfectly and to give a subtle tropical note. If you’re allergic to dairy, you can replace the butter with a plant‑based butter that has a similar melting point.
The Unexpected Star
White chocolate melting wafers are the star of the show, providing a glossy, melt‑in‑your‑mouth coating that is both sweet and slightly buttery. These wafers melt at low temperatures, so they stay intact during the coating process and set into a crisp shell. The wafers also add a subtle caramel flavor that enhances the cinnamon and nutmeg notes. If you’re looking for a darker, richer coating, you can substitute dark chocolate wafers, but be sure to adjust the sugar to keep the balance.
The Final Flourish
Ground nutmeg adds a warm, slightly sweet aroma that is reminiscent of holiday baking. The second pinch of ground cinnamon reinforces the snickerdoodle flavor and provides a subtle spice that lingers on the palate. The combination of these spices is what makes the truffle feel like a bite of nostalgia, while the coating keeps it modern and elegant. If you like a little heat, a pinch of cayenne pepper can be added for a spicy kick. The final touch is a sprinkle of sea salt, which brings out the sweetness and balances the overall flavor profile.
Everything's prepped? Good. Let's get into the real action...
The Method — Step by Step
- Step 1: Prepare the Dough. In a medium saucepan, melt the butter over medium heat until it foams. Add the cream cheese and stir until the mixture is completely smooth and glossy. Pour in the vanilla extract, ground nutmeg, and both amounts of ground cinnamon, whisking until the spices are fully incorporated. Sprinkle in the powdered sugar gradually, stirring until the dough thickens and pulls away from the sides of the pan. Let the mixture cool to room temperature; this will help the dough set without becoming too hard.
- Step 2: Mix in the Flour. Once the dough has cooled, sift the all‑purpose flour into the saucepan. Fold the flour into the mixture with a spatula until the dough is uniform and no dry crumbs remain. The dough should be thick enough to hold its shape but still pliable. If it feels too dry, add a splash of milk or water, a teaspoon at a time, until the desired consistency is reached. This step is crucial for achieving a chewy, not crumbly, texture.
- Step 3: Chill the Dough. Transfer the dough to a silicone baking mat or a parchment‑lined tray. Cover it with plastic wrap and refrigerate for at least 30 minutes, or until it firms up enough to be rolled into balls. Chilling the dough prevents it from sticking to the rolling pin and makes rolling easier. Kitchen Hack: If you’re short on time, use a chilled bowl and a chilled spoon to shape the dough quickly. The cold temperature helps the dough hold its shape.
- Step 4: Roll Into Truffles. Using a small cookie scoop or a tablespoon, portion out the dough into small balls about 1 inch in diameter. Place the truffle balls on a parchment‑lined tray and refrigerate again for 15 minutes to firm up. The balls should be firm enough to hold their shape when rolled in the coating. If they’re too soft, let them chill a bit longer. This step is the moment of truth—your truffles will either be perfect or they won’t.
- Step 5: Prepare the Coating. In a small saucepan, melt the white chocolate wafers over low heat, stirring constantly until smooth. Add the coconut oil and whisk until fully integrated, creating a glossy coating that won’t crack. Keep the mixture at a gentle simmer, never letting it boil. A steady, low heat ensures the coating stays smooth and sets properly. If the mixture thickens too much, add a teaspoon of water to loosen it slightly.
- Step 6: Coat the Truffles. Dip each chilled truffle ball into the melted wafer mixture, turning it to coat all sides. Let the excess coating drip off, then place the coated truffle back on the parchment tray. Repeat until all truffles are coated. The coating should be thin but even, creating a crisp shell that cracks slightly when you bite into it. Kitchen Hack: For a decorative touch, roll the coated truffles in cinnamon sugar before the coating sets. This adds both flavor and a beautiful finish.
- Step 7: Set the Coating. Place the tray in the refrigerator for 20 minutes to allow the coating to set firmly. The truffles should feel firm to the touch, with a crisp shell that gives a satisfying snap when broken. Watch Out: Do not leave the truffles in the freezer for more than 24 hours, or the coating may become too hard and crack when you bite.
- Step 8: Finish with a Dusting. Once the coating has set, lightly dust the truffles with a mixture of powdered sugar and ground cinnamon. This adds a subtle crunch and enhances the snickerdoodle flavor. Use a fine sieve to ensure an even distribution of the dusting. The dusting also gives the truffles a polished look that’s perfect for serving. Store any leftovers in an airtight container in the refrigerator.
- Step 9: Serve and Enjoy. Let the truffles sit at room temperature for 10 minutes before serving so the coating softens just enough to be bite‑easy. Arrange them on a decorative platter or serve individually in clear glass cups. Pair them with a cup of hot tea or a glass of milk for the ultimate snickerdoodle experience. Each bite should deliver a burst of buttery dough, a hint of nutmeg, and a satisfying crunch from the wafer. The aroma alone will make anyone want another one.
That's it — you did it. But hold on, I've got a few more tricks that'll take this to another level...
Insider Tricks for Flawless Results
The Temperature Rule Nobody Follows
Many bakers assume any heat will melt the wafer coating, but the temperature is critical. Keep the heat low and steady; a gentle simmer ensures the coating remains smooth and doesn’t develop cracks. If you accidentally let it boil, the chocolate will seize and become grainy. I once tried a quick stovetop method and the coating was all clumpy and brittle. The lesson? Patience is key, and a slow melt is the secret to a flawless finish.
Why Your Nose Knows Best
Before you even taste the truffles, let them sit for a few minutes and smell the warm cinnamon. Your nose can detect the subtle nutmeg aroma, which tells you the spices are well distributed. If the scent is weak, you might need to re‑whisk the spices into the dough. This sensory checkpoint ensures the flavor profile is balanced before the truffles even touch your tongue.
The 5-Minute Rest That Changes Everything
After coating, let the truffles rest for exactly five minutes before refrigerating. This short rest allows the coating to set slightly, making the truffles easier to handle. If you rush this step, the coating can crack or become too soft. I’ve seen truffles that didn’t hold their shape because I skipped the rest. A simple timer and a brief pause can save the day.
Use a Silicone Mat for Easy Release
Instead of parchment paper, try a silicone baking mat. The non‑stick surface lets you slide the truffles in and out effortlessly, preventing them from sticking or tearing. I’ve used this trick for other no‑bake desserts, and it’s a game‑changer. The mat also makes clean‑up a breeze, saving you time and effort.
Keep the Truffles Moist
Storing truffles in an airtight container keeps them fresh. If you notice them drying out, add a tiny splash of water to the container before sealing. The steam created will re‑moisturize the dough without making it soggy. This trick keeps the truffles at their peak texture for days.
Reheat with Care
To refresh truffles that have hardened, place them in a microwave on a low setting for 10–15 seconds. The heat should soften the coating just enough to restore that melt‑in‑your‑mouth feeling. I’ve found that microwaving in short bursts prevents the chocolate from overheating and losing its glossy finish.
Creative Twists and Variations
Chocolate‑Covered Snickerdoodle Truffles
Swap the white chocolate wafers for dark chocolate chips and melt them together with a splash of heavy cream. The result is a richer, slightly bittersweet coating that contrasts with the sweet dough. Pair these truffles with a glass of stout or a bold coffee for an indulgent treat. The dark chocolate adds depth, making the truffles feel more decadent.
Nutty Snickerdoodle Truffles
Fold in chopped pecans or walnuts into the dough before rolling. The nuts add a delightful crunch and a nutty flavor that complements the cinnamon. Toast the nuts first to bring out their oils, then cool before mixing. This variation is perfect for autumn gatherings, where warm spices and nuts are in season.
Spiced Ginger Snickerdoodle Truffles
Add a teaspoon of ground ginger and a pinch of cloves to the dough for a spicy kick. The ginger’s peppery warmth pairs well with the nutmeg, creating a more complex flavor profile. Dust the final product with a light sprinkle of powdered sugar for a subtle sweetness. These truffles are ideal for holiday parties or a cozy winter night.
Mocha Snickerdoodle Truffles
Stir in a tablespoon of instant espresso powder into the dough for a coffee infusion. The espresso adds depth and a slight bitterness that balances the sweetness. Coat the truffles with white chocolate wafers as usual, then dust with cocoa powder. Serve these with a latte for a sophisticated dessert.
Vegan Snickerdoodle Truffles
Replace butter with coconut oil and use dairy‑free cream cheese. Swap the powdered sugar for coconut sugar to keep the sweetness balanced. Use vegan white chocolate wafers for the coating. This version is dairy‑free, gluten‑free, and still delivers the same chewy, buttery texture.
Storing and Bringing It Back to Life
Fridge Storage
Store the truffles in an airtight container at room temperature for up to a week. The coating remains crisp, while the dough stays moist and chewy. If the truffles feel slightly dry, add a paper towel to the container to absorb excess moisture. Keep them away from strong odors, as chocolate can absorb them quickly.
Freezer Friendly
Place the truffles on a parchment‑lined tray and freeze for up to three months. Once frozen, transfer them to a freezer bag for long‑term storage. Thaw at room temperature for 30 minutes before serving to restore the texture. The coating stays crisp, and the dough remains moist.
Best Reheating Method
To refresh a hardened truffle, place it on a microwave‑safe plate and heat on low for 10 seconds. Let it sit for 5 seconds before tasting to allow the coating to soften. Avoid overheating, which can cause the chocolate to seize. This quick fix brings the truffle back to its original melt‑in‑your‑mouth glory.