Picture this: the kitchen is a battlefield, the oven a looming volcano, and you—armed with nothing but a stubborn craving and a half‑finished batch of strawberry jam—decide to make a dessert that will make your friends question their life choices. I was halfway through a grocery run, the fridge was a sad, empty void, and my neighbor’s birthday was in two days. I thought, “Why not turn that disaster into something edible?” I grabbed the nearest strawberries, a tub of cream cheese, and a box of graham crackers, and the rest was pure, unadulterated magic.
The moment those strawberries hit the cutting board, a sweet aroma erupted, mingling with the faint metallic tang of fresh cream cheese. The sound of the knife slicing through the fruit was a satisfying snap, like a tiny thunderclap. I could almost taste the future—a silky, tangy filling that would cling to the crust like a velvet blanket. The kitchen lights flickered, casting a warm glow that made the batter look like liquid gold. I laughed, because I had never thought a dessert could feel like a small rebellion against blandness.
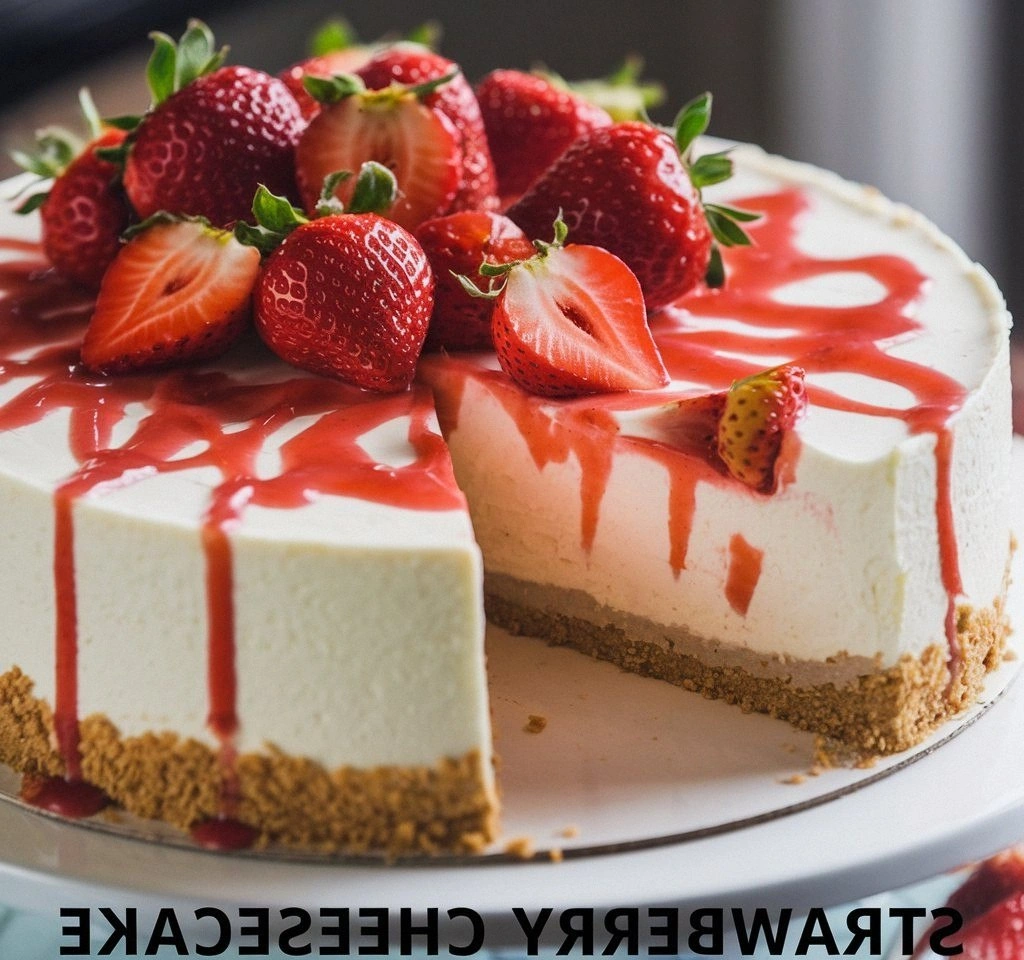
I’ve tried countless cheesecake recipes that promised “simple” and delivered “mediocre.” This one, however, is a revelation. It balances the buttery crunch of a graham crust, the lush creaminess of a well‑stitched filling, and the bright punch of strawberries in a way that makes every bite feel like a fresh summer breeze. It’s not just a dessert; it’s a statement that you can create something extraordinary with pantry staples. The secret? A few unconventional tweaks that turn a classic into a showstopper.
I dare you to taste this and not go back for seconds. I promise it will change the way you think about cheesecake forever. Let me walk you through every single step—by the end, you’ll wonder how you ever made it any other way.
What Makes This Version Stand Out
- Texture: The crust is crisp on the outside and buttery on the inside, creating a delightful contrast that sets the stage for the filling.
- Flavor: The subtle lemon zest lifts the sweetness, while the strawberries provide a natural tartness that balances the richness.
- Ease: No elaborate fondant or custard; the method relies on simple, reliable techniques that even novice bakers can master.
- Versatility: The base can be swapped for a gluten‑free or dairy‑free version without sacrificing flavor.
- Presentation: The glossy strawberry topping and dusting of powdered sugar give it a professional finish.
- Make‑ahead: It can be assembled a day ahead, allowing flavors to meld and making it a stress‑free option for busy hosts.
Inside the Ingredient List
The Flavor Base
The graham cracker crumbs form the backbone of this cheesecake. They provide a subtle sweetness and a crunchy foundation that supports the creamy filling. If you skip them, you lose the essential textural contrast that makes each bite memorable. For a twist, try using digestive biscuits or a blend of graham and chocolate cookies.
Melted butter binds the crumbs together, giving the crust a buttery mouthfeel that melts in your mouth. A pinch of salt is crucial; it cuts through the richness and brings out the flavors of the other ingredients. If you’re watching sodium, use a low‑sodium butter or reduce the amount to 1 tablespoon.
The Texture Crew
Cream cheese is the heart of the filling, and its softness determines the smoothness of the final product. Use room‑temperature cream cheese; if it’s too cold, it will clump and ruin the silky texture. I always let it sit out for at least 30 minutes before mixing.
Eggs act as the binder, ensuring the cheesecake holds together without cracking. Use large eggs for the best consistency. If you’re vegan, a flaxseed “egg” can mimic the binding effect, but the texture will be slightly different.
The Unexpected Star
Fresh strawberries bring natural sweetness and a burst of color. They’re the star that sets this cheesecake apart from ordinary versions. If out of season, frozen strawberries work, but thaw and drain them to avoid a watery filling.
Lemon zest and juice add a bright, citrusy lift that counterbalances the richness of the cream cheese. The zest also imparts a subtle aroma that enhances the overall sensory experience. If you prefer a sweeter profile, reduce the lemon juice to one tablespoon.
The Final Flourish
Whipped cream adds an airy, cloud‑like texture that elevates the dessert to a luxurious level. It also acts as a visual cue of indulgence, making the cheesecake look even more decadent. For a lighter version, replace half the cream with Greek yogurt.
Powdered sugar, sprinkled on top, gives the cheesecake a soft, sweet finish and a subtle sparkle. It also helps the strawberries adhere to the surface, creating a cohesive look. If you’re avoiding sugar, a light dusting of cinnamon can add a warm undertone.
Everything's prepped? Good. Let's get into the real action...
The Method — Step by Step
- Crust Prep: Combine 1½ cups graham cracker crumbs, ¼ cup melted butter, and 2 tablespoons sugar in a bowl. Stir until the mixture resembles wet sand. Press the crumbs firmly into a 9‑inch springform pan, creating an even layer. Chill in the fridge for 15 minutes to set. This step ensures the crust stays intact during baking.
- Cream Cheese Blend: In a stand mixer, beat 4 packages (32 oz) of softened cream cheese on medium speed until smooth and creamy—no lumps. Add 1 cup granulated sugar and continue mixing until the mixture is light and fluffy. This airy base will keep the cheesecake from being dense.
- Egg Integration: Add eggs one at a time, beating on low speed after each addition, just until incorporated. Overmixing can cause the mixture to become too liquid, leading to cracks. The batter should be silky and pourable.
- Flavor Boost: Stir in 1 teaspoon vanilla extract, 2 tablespoons lemon zest, and 1 tablespoon lemon juice. The citrus will brighten the filling and prevent it from tasting too heavy. The mixture should emit a fragrant citrus aroma.
- Fill the Crust: Pour the batter over the chilled crust, smoothing the top with a spatula. Tap the pan gently on the counter to release any air bubbles. The filling should sit evenly on the crust without gaps.
- Baking: Preheat the oven to 325°F (160°C). Place the cheesecake in a water bath—lay a baking sheet on the oven rack, fill it with hot water, and then place the pan on top. Bake for 45 minutes, or until the center is set but still slightly jiggly. This ensures a creamy interior without a hard shell.
- Cooling: Remove the cheesecake from the oven and let it cool on a wire rack for 15 minutes. Then, wrap the pan with plastic wrap and refrigerate for at least 4 hours, preferably overnight. The cooling process allows flavors to meld and the texture to firm up.
- Strawberry Topping: Roughly chop 1 cup of fresh strawberries. Whisk ½ cup heavy cream with 2 tablespoons powdered sugar until soft peaks form. Fold the strawberries into the whipped cream, then spoon the mixture over the chilled cheesecake. The topping should be glossy and slightly loose, making it easy to spread.
- Final Touches: Dust the top with a light sprinkle of powdered sugar. Chill the cheesecake for another 30 minutes before serving. The sugar adds a delicate crunch and a sweet finish that ties everything together.
That's it—you did it. But hold on, I've got a few more tricks that'll take this to another level. These insider secrets will help you avoid common pitfalls and elevate the flavor profile to professional heights.
Insider Tricks for Flawless Results
The Temperature Rule Nobody Follows
Many bakers bake cheesecakes at 350°F, but this temperature is too high and can cause the edges to brown prematurely while the center remains undercooked. 325°F is the sweet spot that allows the filling to set evenly. Keep the oven door slightly ajar during the last 10 minutes to prevent condensation from forming on the top.
Why Your Nose Knows Best
During baking, the scent of vanilla and lemon will intensify. Trust that aroma; if it starts to smell overly sweet, reduce the sugar slightly. Your nose is a reliable judge of flavor balance, and it will guide you to the perfect cheesecake.
The 5-Minute Rest That Changes Everything
After removing the cheesecake from the water bath, let it sit at room temperature for 5 minutes before wrapping it. This brief rest helps the interior settle and reduces the risk of cracking when it cools. I always set the pan on a rack for exactly 5 minutes.
The Secret of a Crumbly Crust
Press the crust firmly into the pan; a loose crust can cause the cheesecake to sink. Use a glass or a flat-bottomed spoon to press evenly. If you prefer a crispier crust, bake it for an additional 5 minutes before adding the filling.
The Power of a Quick Chill
After the 45-minute bake, place the cheesecake in a freezer for 10 minutes to set the edges quickly. This step locks in the shape and prevents the center from sliding. I find this trick invaluable when serving large parties.
Creative Twists and Variations
This recipe is a playground. Here are some of my favorite ways to switch things up:
Blueberry Bliss
Swap strawberries for blueberries and add a splash of blueberry puree to the filling. The result is a deep, fruity flavor that pairs beautifully with the tangy cream cheese.
Chocolate Drizzle
After the cheesecake cools, drizzle melted dark chocolate over the top. The bittersweet coating contrasts with the sweet strawberries, creating a complex taste profile.
Almond Crunch
Incorporate chopped toasted almonds into the crust and sprinkle toasted almond slivers over the finished cheesecake. The crunch adds texture and nutty flavor, making each bite exciting.
Lemon Zest Twist
Increase the lemon zest to 4 tablespoons and reduce the sugar by half. The cheesecake will have a bright, tart edge that’s perfect for hot summer days.
Coconut Cream Variation
Replace heavy cream with coconut cream for a tropical version. The subtle coconut flavor complements the strawberries and adds a silky texture.
Raspberry Swirl
Fold in a swirl of raspberry jam into the filling before baking. The vibrant color and sweet tartness make the cheesecake visually stunning.
Storing and Bringing It Back to Life
Fridge Storage
Wrap the cheesecake tightly in plastic wrap and store it in the refrigerator for up to 5 days. The cool temperature keeps the filling firm and prevents mold growth.
Freezer Friendly
For longer storage, wrap the cheesecake in parchment paper, then in a freezer bag. It stays fresh for up to 3 months. Thaw overnight in the fridge before serving.
Best Reheating Method
If you need to warm the cheesecake, place it in a preheated oven at 300°F for 10 minutes. Add a splash of water to the bottom of the pan to keep the surface from drying out. This gentle heat restores the creamy texture without overbaking.