I was standing in my kitchen, staring at a pan of chicken that had already turned from golden to a sad, burnt brown before I even had a chance to taste it. The smoke billowed like a small, angry cloud, and my neighbor’s window was suddenly the only thing that could have saved the evening. I stared at the charred remains, feeling that familiar pang of disappointment that comes when a dinner plan goes sideways. That night, I made a promise to myself that I would never let a simple chicken dish disappoint again. I vowed to find a recipe that would turn any ordinary night into an unforgettable feast.
The next day, I discovered a recipe that promised sweet, fiery, and utterly irresistible flavors, all wrapped around succulent chicken. The aroma that hit me first was that of garlic sizzling in oil, followed by the bright zing of lime and the unmistakable sweetness of chili sauce. I could almost hear the sizzle of the pan, the sound of the sauce thickening and caramelizing. My taste buds tingled even before I took a bite—sweet, spicy, and a hint of umami that made the dish feel like a passport to an exotic street market. The texture was a dance of crispy edges and tender, juicy meat that seemed to melt in my mouth.
What sets this version apart is that it doesn’t rely on pre‑made sauces or complicated marinades. It uses a handful of fresh, pantry‑friendly ingredients that you probably already have in your kitchen. The sweet chili sauce becomes the star, but the combination with soy sauce, lime, and garlic creates a flavor profile that is both familiar and adventurous. The technique I’ll share turns a simple pan‑fry into a showstopper that looks as good as it tastes. I dare you to taste this and not go back for seconds.
The secret twist? I’ll show you how to infuse the chicken with a subtle citrus brightness before the sauce even touches it, giving the dish a layered depth that most recipes miss. This technique transforms the chicken into a flavor sponge that soaks up the sauce like a sponge in the ocean. The result is a dish that feels both comforting and daring, perfect for a weekday dinner or a weekend gathering. This isn’t just another chicken recipe—it’s a culinary experience that will keep you coming back for more.
Let me walk you through every single step — by the end, you’ll wonder how you ever made it any other way. I’ll keep it simple, playful, and packed with tips that will elevate your cooking game. Picture yourself pulling this out of the pan, the kitchen smelling incredible, and friends asking for the recipe. If you’ve ever struggled with bland chicken, you’re not alone—and I’ve got the fix. Stay tuned, because this next part? Pure magic.
What Makes This Version Stand Out
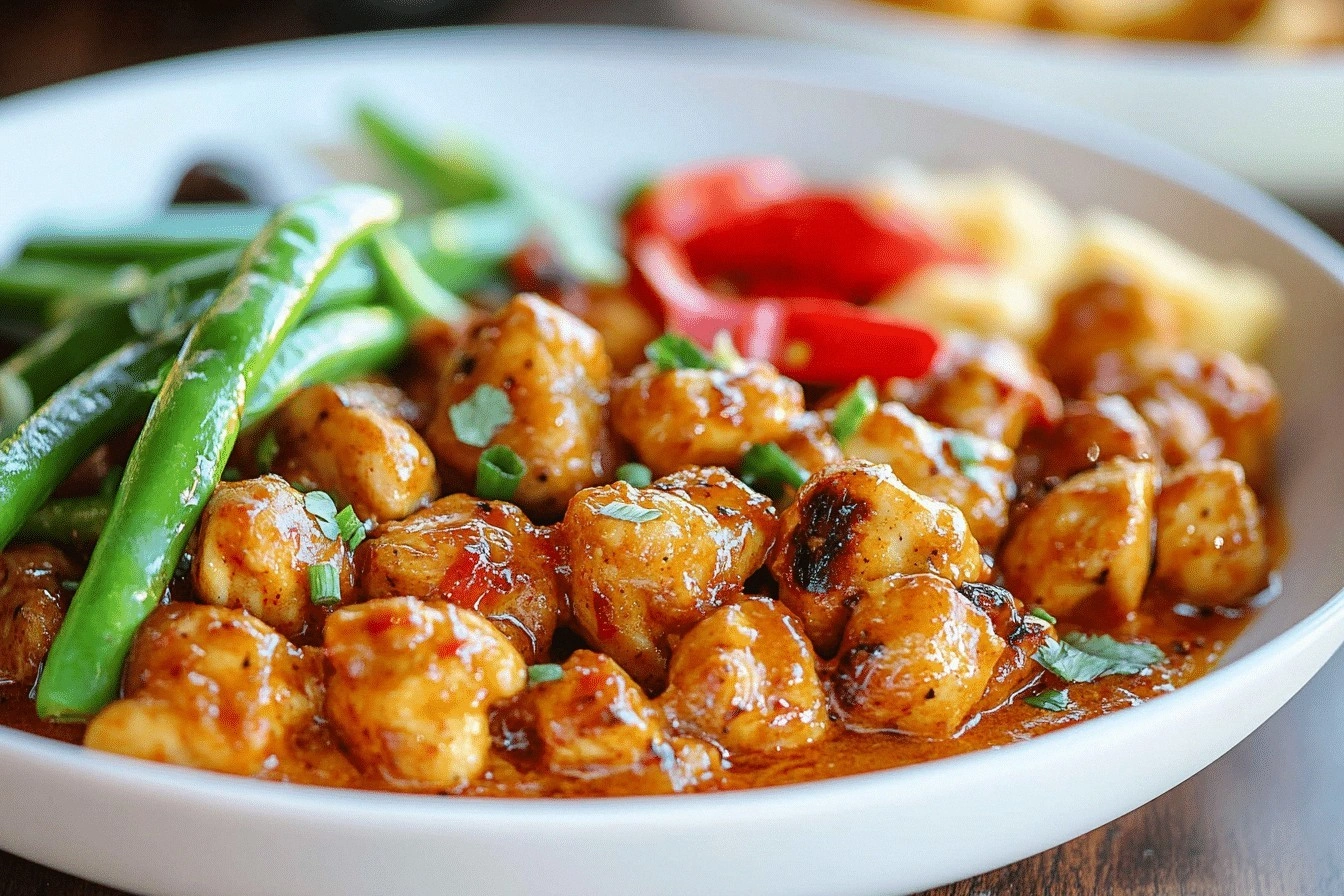
- Flavor: The balance of sweet, spicy, and citrus creates a symphony on the palate that feels both exotic and comforting.
- Texture: The chicken develops a caramelized crust while remaining juicy inside, a contrast that excites the senses.
- Simplicity: No pre‑made marinades, no complicated steps—just a handful of pantry staples that you can whip together in 15 minutes.
- Ingredient Quality: Using fresh garlic and lime juice instead of bottled versions elevates the dish to restaurant‑level flavor.
- Versatility: Works beautifully grilled, pan‑sautéed, or even oven‑roasted, making it adaptable to any cooking method.
- Make‑ahead Potential: The sauce can be prepared ahead of time, and the chicken can be marinated up to 24 hours for even deeper flavor.
- Crowd‑Pleaser: The vibrant color and bold taste make it a hit at family gatherings or dinner parties.
- Time‑Efficiency: Total cooking time is under an hour, perfect for busy weeknights.
Alright, let's break down exactly what goes into this masterpiece. This recipe is all about harnessing the power of a few key ingredients to create something truly special. I’ll walk you through each element, why it matters, and how to tweak it if you’re feeling adventurous.
Inside the Ingredient List
The Flavor Base
Boneless chicken thighs or breasts form the foundation of this dish. Their natural fat content ensures the meat stays moist and flavorful, even after caramelizing. If you prefer a leaner option, chicken breasts will work, but be careful not to overcook them, or they’ll dry out. The key is to sear them quickly at high heat before adding the sauce.
Sweet chili sauce is the star of the show. It’s a vibrant blend of chili, sugar, vinegar, and garlic that gives the dish its signature sweet heat. The sauce’s thickness allows it to cling to the chicken, creating a glossy, caramelized coating. If you can’t find a pre‑made version, you can whip up a quick batch in a few minutes—just simmer equal parts sugar and vinegar with fresh chilies and garlic until it thickens.
Soy sauce adds a savory umami punch that balances the sweetness and brightens the overall flavor. A splash of soy sauce brings depth and complexity, making the dish feel more rounded. If you’re watching sodium, opt for a low‑sodium version or use a teaspoon of tamari instead.
The Texture Crew
Garlic cloves are essential for that aromatic, slightly sweet undertone that lifts the dish. Freshly minced garlic releases more flavor than pre‑minced or powdered. To avoid a harsh bite, sauté the garlic briefly before adding the sauce so it caramelizes and softens.
Fresh lime juice adds a zesty brightness that cuts through the sweetness and balances the richness of the sauce. The acidity also helps to tenderize the chicken, giving it a juicy bite. Use a fresh lime rather than bottled lime juice for the most vibrant flavor.
Olive oil or vegetable oil is the cooking medium that keeps the chicken moist and helps the sauce adhere. A light brush of oil before searing creates a crisp exterior. If you prefer a neutral taste, use vegetable oil; for a slightly fruity note, choose extra‑virgin olive oil.
The Unexpected Star
Optional fresh chili flakes give an extra spicy kick for those who love heat. Sprinkle them at the end of cooking so the heat lingers without overpowering the sweetness. If you’re sensitive to spice, omit them or use just a pinch.
Fresh herbs like cilantro or green onions add a burst of color and freshness that completes the dish. They also provide a subtle herbal note that balances the richness of the sauce. Chop them finely and sprinkle them over the finished chicken for a pop of flavor.
The Final Flourish
Everything’s prepped? Good. Let’s get into the real action. The next steps will transform these simple ingredients into a dish that feels like a culinary masterpiece. Remember to keep the heat moderate so the sauce doesn’t burn, and watch the chicken closely to ensure it doesn’t overcook.
The Method — Step by Step
- First, pat the chicken pieces dry with paper towels. A dry surface ensures a better sear and prevents steaming. Season both sides generously with salt and black pepper. This simple step unlocks the chicken’s natural flavors and creates a savory crust.
- Heat a large skillet over medium‑high heat and add 1 tablespoon of oil. Once the oil shimmers, place the chicken thighs in the pan. Let them cook undisturbed for 3–4 minutes until a golden crust forms. Flip and repeat on the other side. This is the moment of truth; the sizzle should sound like a satisfying crackle.
- Reduce the heat to medium and add minced garlic to the pan. Sauté for 30 seconds, letting the aroma bloom. Be careful not to burn the garlic; a quick, fragrant burst is all you need. This step infuses the oil with a subtle, sweet undertone.
- Pour in the sweet chili sauce and soy sauce, stirring to coat the chicken evenly. The sauce should thicken slightly and cling to the meat. Let it simmer for 2 minutes, allowing the flavors to meld. The pan will start to steam, and the edges of the sauce will begin to caramelize.
- Add the lime juice and the optional chili flakes. Stir quickly to incorporate. The acidity from the lime will brighten the dish, while the chili flakes will add a subtle heat. Keep the heat low enough that the sauce doesn’t burn, but high enough to keep it glossy.
- Cover the skillet with a lid and reduce the heat to low. Let the chicken cook for an additional 5–7 minutes, or until it reaches an internal temperature of 165°F (74°C). The sauce will thicken into a glossy glaze that coats the chicken.
- Remove the lid and increase the heat to medium‑high. Let the sauce reduce further for 2 minutes, stirring occasionally. This step concentrates the flavors and creates a beautiful, caramelized coating. Watch the edges; they should pull away from the pan, indicating that the sauce has thickened.
- Turn off the heat and let the chicken rest for 3 minutes. Resting allows the juices to redistribute, ensuring each bite remains moist. While resting, sprinkle fresh herbs over the chicken for a burst of color and freshness.
- Serve immediately over rice, noodles, or a crisp salad. The dish pairs wonderfully with a side of steamed vegetables or a simple cucumber salad. The sweet, spicy, and citrusy flavors will linger on your palate, leaving you craving a second plate.
That's it — you did it. But hold on, I've got a few more tricks that'll take this to another level. The next section will reveal insider tips that even seasoned cooks swear by, ensuring your dish always turns out perfect.
Insider Tricks for Flawless Results
The Temperature Rule Nobody Follows
Most people cook chicken at a single temperature, but the secret is to start high for a quick sear and then lower the heat to finish. This two‑step process locks in juices and creates a crisp exterior. I’ve seen even the most seasoned chefs skip the heat reduction, resulting in soggy edges. Stick to the two‑step method and watch the transformation.
Why Your Nose Knows Best
When the sauce starts to thicken, the aroma will shift from sweet to caramelized. Trust your nose; this is the moment the glaze is ready. If you’re unsure, give it an extra minute, but don’t overcook. The scent is a reliable indicator of perfect caramelization.
The 5‑Minute Rest That Changes Everything
Letting the chicken rest after cooking allows the juices to redistribute throughout the meat. Skipping this step means the juices rush to the surface and escape when you cut into the chicken. A short rest keeps the chicken moist and tender.
The Garlic Glow
Sauté the garlic just until it turns golden, not brown. A golden garlic adds a nutty flavor without bitterness. Timing is crucial; a minute too long and you’ll get a burnt, harsh taste.
The Lime Lift
Add lime juice at the end of cooking to preserve its bright acidity. Adding it too early can cause the lime to lose its sharpness as it cooks. A final splash before serving gives the dish a fresh, zesty finish.
Creative Twists and Variations
This recipe is a playground. Here are some of my favorite ways to switch things up:
Grilled Perfection
Take the chicken to a pre‑heated grill instead of a skillet. Brush the sauce on the last few minutes of grilling to create a smoky glaze. The result is a charred exterior with a sweet, spicy interior.
Coconut‑Infused Delight
Replace half the sweet chili sauce with coconut milk for a creamy, tropical twist. The coconut adds richness while the chili keeps the heat alive. Serve over jasmine rice for an exotic experience.
Spicy Peanut Variation
Stir in a tablespoon of creamy peanut butter with the sauce. The nutty flavor pairs beautifully with the sweet chili, creating a new dimension of taste. Garnish with crushed peanuts for crunch.
Vegetarian Version
Swap the chicken for firm tofu or tempeh. Marinate the protein in the sauce before pan‑frying for a vegetarian option that still delivers on flavor.
Low‑Sodium Option
Use a low‑sodium soy sauce and reduce the amount of added salt. The sauce’s natural sweetness will compensate, keeping the dish delicious without excess sodium.
Breakfast Boost
Serve the chicken over a bed of fluffy scrambled eggs and toast. The sweet chili glaze adds a surprising kick to a classic breakfast, turning it into a power‑packed meal.
Storing and Bringing It Back to Life
Fridge Storage
Cool the chicken to room temperature before refrigerating. Store in an airtight container for up to 3 days. The sauce will thicken slightly in the fridge, but it remains flavorful.
Freezer Friendly
Wrap the chicken tightly in foil or freezer bags and freeze for up to 2 months. Thaw overnight in the fridge before reheating. The texture stays juicy, and the glaze stays glossy.
Best Reheating Method
Reheat in a skillet over medium heat, adding a splash of water or broth to steam the chicken. This keeps the meat moist and the sauce from drying out. Finish with a drizzle of fresh lime juice for that bright finish.