Picture this: it’s a rainy Saturday, the kitchen lights flicker, and you’re scrolling through Pinterest, craving something sweet that doesn’t involve a stove. Suddenly, a friend’s post catches your eye—a photo of golden bars that look like chocolatey clouds, no oven required, just a pot and a whisk. I laughed, then decided to test it out, because honestly, who can resist a dessert that feels like a treat and takes less than 20 minutes? I poured the butter, sugar, and milk into a saucepan, and the aroma that flooded the room was a heady mix of caramelized butter and chocolate—like a sunrise in your mouth. That moment was the spark that turned a casual curiosity into a culinary obsession.
I’ve tried every no‑bake cookie bar recipe out there, from the bland “quick oats” versions to the overly sweet “chocolate‑covered” bars that fall apart. None of them had that buttery, melt‑in‑your‑hand texture that makes you pause and think, “Wait, is this a dessert or a snack?” This version is the one that finally nails it. It balances sweetness with a subtle richness from the butter, while the oats provide chewiness and the coconut adds a tropical twist. The walnuts give a satisfying crunch that contrasts with the silky chocolate. And the best part? The chocolate isn’t just a topping—it’s infused into the whole mixture, so every bite is chocolatey. I dare you to taste this and not go back for seconds; it’s that addictive.
What sets this recipe apart is the deliberate layering of flavors and textures. The butter and sugar create a glossy base that holds the oats together, while the milk lifts the mixture into a silky consistency. The chocolate chips are heated just enough to melt but not so much that they separate, giving the bars a cohesive chocolate flavor throughout. The shredded coconut adds a subtle nutty sweetness that balances the bitterness of the chocolate, and the walnuts provide a crunchy finish that keeps the bars from feeling too soft. The vanilla isn’t just a flavor enhancer; it’s a subtle aroma that ties everything together, making each bite feel like a finished masterpiece. By the end of this guide, you’ll see why this is hands down the best version of no‑bake cookie bars you’ll ever make at home.
And here’s the kicker: the secret to the perfect chew is a tiny splash of milk added just before the chocolate melts. That little tweak keeps the mixture from drying out and gives the bars a tender bite that feels almost like a fresh cookie. If you’re wondering why this trick works, it’s all about the balance of fat and liquid—milk adds a touch of moisture that keeps the oats from becoming too dense. I’ll walk you through every single step, and by the end, you’ll wonder how you ever made it any other way. Let’s dive in.
What Makes This Version Stand Out
- Taste: The buttery base is caramelized just enough to add depth, while the chocolate chips melt into a smooth, rich sauce that coats every grain of oats. This isn’t a flat sweetness; it’s layered, complex, and utterly satisfying.
- Texture: Quick oats provide chewiness, coconut adds a light crunch, and walnuts deliver a satisfying bite. The result is a bar that feels like a cookie, but with a luxurious, melt‑in‑your‑mouth finish.
- Ease: No oven, no baking sheet, just a saucepan, a whisk, and a chill. The entire process takes under 30 minutes, making it perfect for busy evenings or last‑minute dessert needs.
- Uniqueness: The addition of a splash of milk before the chocolate melts is a small tweak that makes a huge difference, turning a simple mixture into a silky, cohesive bar.
- Crowd Reaction: Friends who’ve tried these bars say they’re “too good to be no‑bake” and keep asking for the recipe. The bars are a hit at potlucks, parties, and family gatherings.
- Ingredient Quality: Using high‑quality semi‑sweet chocolate chips and fresh coconut makes all the difference. The richer the chocolate, the more decadent the bars.
- Make‑ahead Potential: These bars hold up for up to a week in the fridge and can be frozen for longer storage without losing flavor or texture.
Inside the Ingredient List
The Flavor Base
Butter: The butter isn’t just a fat; it’s the backbone of the bars. When melted with sugar, it creates a glossy, caramelized base that binds the oats and chocolate together. If you skip butter, the mixture becomes dry and crumbly. For a richer flavor, opt for European butter, which has a higher butterfat content and a more pronounced taste.
Sugar: Granulated sugar dissolves quickly, allowing the butter to caramelize slightly without burning. It also helps create that glossy sheen on the finished bars. If you prefer a less sweet version, you can reduce the sugar by a quarter cup, but the texture will be a bit less cohesive.
The Texture Crew
Quick Oats: Quick oats are the perfect texture agent for no‑bake bars. They absorb moisture quickly, giving the bars a chewy consistency that’s not too dense. If you use rolled oats, the bars will be slightly firmer and may take longer to set. Quick oats also cook faster, which keeps the overall prep time short.
Shredded Coconut: Coconut adds a subtle tropical sweetness and a pleasant chew. It also helps disperse the chocolate throughout the mixture. If you’re allergic or just don’t like coconut, you can replace it with a bit more oats or a tablespoon of ground flaxseed for added nutrition.
The Unexpected Star
Walnuts: Walnuts provide a nutty crunch that contrasts beautifully with the soft chocolate and oats. They also bring a dose of healthy fats and omega‑3 fatty acids. If you’re looking for a different flavor, try pecans or almonds for a slightly sweeter profile.
Milk: A splash of milk is the secret to a silky texture. It prevents the oats from becoming too dry and helps the chocolate melt evenly. For a dairy‑free version, use oat milk or coconut milk, but be aware that the bars may be slightly sweeter.
The Final Flourish
Vanilla: Vanilla isn’t just a garnish; it’s a flavor enhancer that rounds out the sweetness and chocolate notes. A teaspoon is enough to elevate the entire dish. If you prefer a stronger vanilla flavor, add an extra ½ teaspoon, but be careful not to overpower the chocolate.
Semi‑Sweet Chocolate Chips: These chips melt into a smooth sauce that coats the oats and coconut. They’re the star of the show, delivering that rich, bittersweet flavor that makes the bars irresistible. If you want an even deeper chocolate flavor, use dark chocolate chips.
Everything’s prepped? Good. Let’s get into the real action.
The Method — Step by Step
- Combine the butter, sugar, and milk in a medium saucepan over medium heat. Stir constantly until the butter melts completely and the mixture is smooth. The mixture should smell like caramelized butter—if it doesn’t, you’re ready to move on. This step forms the silky base that holds everything together.
- Bring the mixture to a gentle simmer. Keep the heat low to avoid scorching the sugar. Once it reaches a simmer, remove the pan from the heat and let it cool for a minute; this prevents the chocolate from seizing.
- Add the chocolate chips to the hot butter mixture. Stir vigorously until the chocolate is completely melted and the mixture is glossy. The chocolate should coat the back of a spoon—a sign that it’s ready.
- Whisk in the oats, shredded coconut, and walnuts until everything is evenly coated. The mixture should look like a thick batter that clumps together when scooped. This is the moment of truth; if you see lumps, give it another stir.
- Add the vanilla and a splash of milk. The milk is the secret to a silky texture, preventing the oats from drying out. Stir until the milk is fully incorporated and the mixture has a uniform, glossy consistency.
- Line an 8x8 inch square pan with parchment paper, leaving an overhang on two sides for easy removal. Pour the mixture into the pan and spread it evenly with a spatula. Press down firmly so the bars set evenly.
- Refrigerate the pan for at least 30 minutes, or until the bars are firm. If you’re in a hurry, pop it in the freezer for 15 minutes—just watch it closely to avoid over‑freezing.
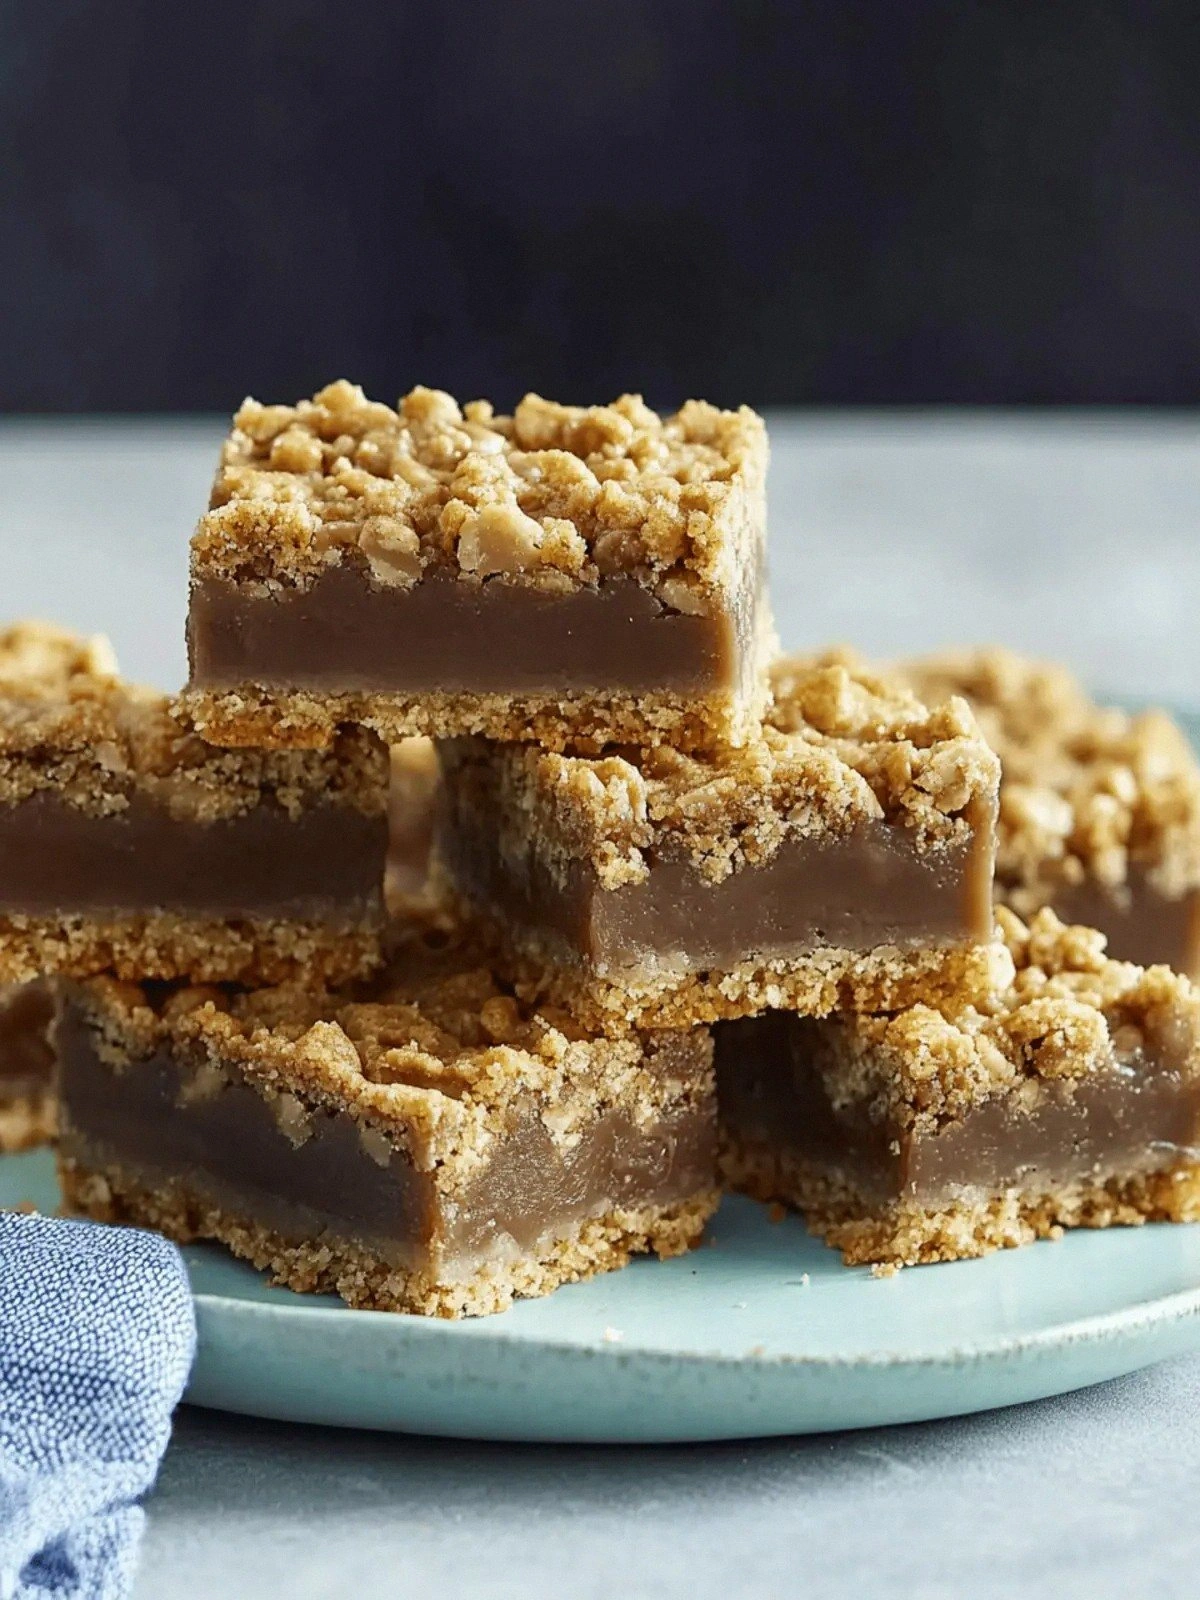
- Once set, lift the bars out of the pan using the parchment overhang. Place them on a cutting board and cut into squares. The bars should hold together; if they crumble, they need more chilling time.
That’s it—you did it. But hold on, I've got a few more tricks that will take these bars from great to unforgettable.
Insider Tricks for Flawless Results
The Temperature Rule Nobody Follows
Why it matters: The chocolate should be heated to just below 200°F; too hot and it will seize, too cool and it won’t coat the oats. Use a candy thermometer or simply test with a spoon. If the chocolate is too thick, add a splash of milk to thin it out. This small adjustment ensures a silky texture that’s not too sticky.
Why Your Nose Knows Best
Smell it: Before you add the oats, give the mixture a quick sniff. A buttery caramel scent indicates the sugar has caramelized enough. If it smells raw, let it simmer a bit longer. Your nose is the best judge of readiness, so trust it.
The 5-Minute Rest That Changes Everything
Why it matters: After stirring in the oats, let the mixture sit for five minutes before pouring it into the pan. This allows the oats to absorb the moisture fully, preventing a dry crumb. I once rushed this step and the bars crumbled—don’t make that mistake.
The Perfect Press
How to press: Use a flat-bottomed glass or the back of a spoon to press the mixture into the pan. A firm press ensures the bars set evenly and reduces gaps that can cause cracking during chilling.
The Chill Trick
Why it matters: Chilling in the fridge for at least 30 minutes is essential. If you skip this step, the bars will be gummy. I once left them at room temperature for 10 minutes and they were a mess. Trust the chill.
Creative Twists and Variations
This recipe is a playground. Here are some of my favorite ways to switch things up:
Cocoa‑Infused Delight
Swap the semi‑sweet chocolate chips for dark chocolate chips and add a tablespoon of cocoa powder. The result is a richer, more intense chocolate flavor that pairs well with a splash of espresso powder.
Tropical Twist
Replace the shredded coconut with toasted coconut flakes and add a handful of dried pineapple. The tropical sweetness complements the chocolate, giving the bars a vacation vibe.
Nutty Banana Crunch
Add a mashed banana to the mixture and replace walnuts with chopped pecans. The banana adds natural sweetness and the pecans bring a buttery crunch that’s a delightful contrast.
Spiced Cinnamon Bars
Add 1 teaspoon of ground cinnamon and a pinch of nutmeg. The warm spices elevate the chocolate and oats, making the bars feel cozy and comforting.
Almond Butter Boost
Swap the walnuts for almond butter and add a tablespoon of toasted almond slices. The almond butter creates a creamy texture while the almond slices add a subtle crunch and nutty aroma.
Storing and Bringing It Back to Life
Fridge Storage
Store the bars in an airtight container in the refrigerator for up to a week. Keep them sealed to prevent moisture from seeping in, which can soften the bars. When you’re ready to enjoy, let them sit at room temperature for a few minutes for optimal texture.
Freezer Friendly
For longer storage, wrap each bar individually in parchment paper and place them in a freezer bag. They’ll keep for up to three months. When you’re ready, thaw at room temperature or microwave for 10 seconds to soften.
Best Reheating Method
To revive the bars, add a tiny splash of water or milk and microwave on low for 10–15 seconds. The moisture steams the bars back to their original silky texture. This trick works wonders for bars that have become slightly stale.