Picture this: it’s a rainy Thursday night, the kind where the clouds are so low they could almost be brushed aside with a spatula, and you’re staring at a half‑finished bowl of instant noodles that tastes like regret. I was there, clutching a soggy packet, when my roommate tossed a challenge across the kitchen table—“Make something that actually feels like a hug, but with a surprise punch.” I laughed, I scoffed, and then I remembered the soft, buttery Hawaiian rolls that had been lingering in the pantry, the cheese that was melting in the fridge, and a lone slice of pineapple that begged for redemption. I said, “Okay, you’re on,” and the rest is a story that will make your taste buds do a happy dance.
The kitchen soon turned into a symphony of sizzling butter, the crackle of bacon hitting the pan like a tiny fireworks show, and the sweet aroma of pineapple caramelizing just enough to whisper, “I’m here to stay.” I could hear the faint pop of jalapeños releasing their heat, a subtle reminder that this isn’t just any grilled cheese—it’s a tropical rollercoaster with a savory backbone. My senses were on overload: the golden‑brown crust of the roll, the stretchy melt of cheddar, the smoky crunch of bacon, and that unexpected burst of pineapple that made me think of a luau in my mouth. Every bite was a layered story, a perfect marriage of sweet, salty, spicy, and creamy that made me dare you to taste this and not go back for seconds.
Most grilled cheese recipes get this completely wrong. They either drown the bread in cheese until it’s a soggy mess, or they forget the little extras that elevate a simple sandwich into an unforgettable experience. This version stands out because it respects the integrity of each component—using the soft, slightly sweet Hawaiian roll as a canvas, adding a splash of heat with jalapeños, and finishing with a caramelized pineapple kiss that balances the salt of the bacon. The secret? A quick butter‑baste technique that gives the roll a crisp, buttery crust without sacrificing its fluffy interior. And if you think that’s all, wait until you see the trick I use to keep the cheese from leaking out like a busted dam.
Let me walk you through every single step — by the end, you’ll wonder how you ever made a grilled cheese any other way. Okay, ready for the game‑changer? This next part? Pure magic. I’ll be honest — I ate half the batch before anyone else got to try it, but that’s only because it’s hands down the best version you’ll ever make at home. Picture yourself pulling this out of the pan, the whole kitchen smelling incredible, the cheese stretching like a golden ribbon, and the pineapple glistening with a caramel sheen. Stay with me here — this is worth it.
What Makes This Version Stand Out
- Taste: The sweet‑savory balance hits every palate, with pineapple cutting through the richness of cheese and bacon like a tropical sunrise.
- Texture: A crisp, buttery crust gives way to a pillowy interior, while the cheese stretches like molten gold and the jalapeños add a satisfying snap.
- Simplicity: Fewer than ten ingredients, a single pan, and under thirty minutes—no fancy equipment required.
- Uniqueness: The addition of pineapple and jalapeños on a Hawaiian roll is a twist you won’t find in your average deli sandwich.
- Crowd Reaction: Expect gasps, smiles, and the inevitable “What’s in this?!” from anyone who takes a bite.
- Ingredient Quality: Using authentic Hawaiian rolls ensures a subtle sweetness that pairs perfectly with the salty and spicy elements.
- Cooking Method: The butter‑baste technique locks in moisture while creating that coveted golden‑brown finish.
- Make‑Ahead Potential: Prep the fillings ahead of time; the final assembly and pan‑sear take just minutes.
Alright, let's break down exactly what goes into this masterpiece…
Inside the Ingredient List
The Flavor Base
The cornerstone of this sandwich is the combination of cheese and butter. I use cheddar for its sharp bite, but mozzarella works if you crave extra stretch. Butter is the unsung hero; it creates a barrier that keeps the roll from soaking up too much moisture while delivering that irresistible golden crust. Skipping butter will leave you with a soggy roll that feels more like a wet towel than a sandwich.
The Texture Crew
Bacon (or ham, if you prefer) adds that smoky crunch that contrasts beautifully with the soft roll. Cook it until it’s crisp, then let it rest on a paper towel to drain excess fat—this prevents a greasy bite. Jalapeños bring a bright, peppery heat; slice them thin so they melt into the cheese rather than overpowering it. If you’re not a fan of heat, a quick pickle in vinegar can tame the spice while preserving the crunch.
The Unexpected Star
Pineapple slices are the secret weapon. Their natural sugars caramelize in the pan, creating a sweet glaze that balances the salty bacon and sharp cheese. Choose fresh pineapple when possible; canned versions can be too mushy. If you only have canned, drain and pat dry, then give them a quick sear to develop that caramelized crust.
The Final Flourish
Hawaiian rolls are the soul of this dish. Their subtle honeyed flavor and plush crumb make them the perfect vehicle for the bold fillings. When selecting rolls, look for ones that are soft to the touch but still hold their shape—avoid overly dry bakery rolls that will crumble under the weight of the toppings. A quick toast in the oven for a minute can revive any slightly stale roll before you begin.
Everything's prepped? Good. Let's get into the real action…
The Method — Step by Step
Start by gathering all your ingredients on the counter. This may sound like a no‑brainer, but trust me, a tidy workspace prevents the dreaded “where’s the butter?” panic. Slice the Hawaiian rolls horizontally, being careful not to cut all the way through—think of it as creating a pocket. The roll should stay hinged so the fillings stay inside during cooking. That sizzle when it hits the pan? Absolute perfection.
In a small skillet over medium heat, melt the butter until it foams, then add the sliced jalapeños. Cook for about 30 seconds, just until the edges start to soften and release their aroma. This quick sauté not only reduces raw heat but also infuses the butter with a subtle peppery punch that will coat the roll later.
Kitchen Hack: Add a pinch of smoked paprika to the butter while sautéing jalapeños for an extra layer of smoky depth.While the jalapeños are dancing in the butter, lay out your cheese slices on a plate. If you’re using cheddar, let it sit at room temperature for a few minutes; this makes it melt faster and more evenly. Place the cooked bacon (or ham) on top of the cheese, then add the caramelized pineapple slices. The pineapple should already be lightly browned—if not, give it a quick 1‑minute sear in the same butter‑jalapeño mix.
Now, carefully open each roll and spoon a generous amount of the butter‑jalapeño mixture onto both the inside and outside surfaces. This double‑coating ensures that the crust becomes a buttery golden shield while the interior stays moist and flavorful.
Watch Out: Over‑buttering can cause flare‑ups; if the butter starts to smoke, reduce the heat immediately.Close the rolls, pressing gently to seal the fillings. Place the assembled sandwiches back into the skillet, buttered side down, and press lightly with a spatula. Cook on medium‑low heat for 3‑4 minutes, allowing the butter to turn a deep amber without burning. You’ll hear a faint hissing—listen for that, it means the crust is forming.
Flip the sandwiches carefully using a wide spatula. The other side should also achieve a golden‑brown hue within another 3‑4 minutes. As the cheese melts, you’ll notice the edges of the roll pulling away slightly—this is your cue that the internal steam is doing its job and the cheese is bubbling beneath the crust.
Once both sides are beautifully toasted, remove the sandwiches from the pan and let them rest on a cutting board for about a minute. This brief rest allows the cheese to set just enough so it won’t ooze out the moment you bite. Trust me, that minute makes a world of difference in presentation.
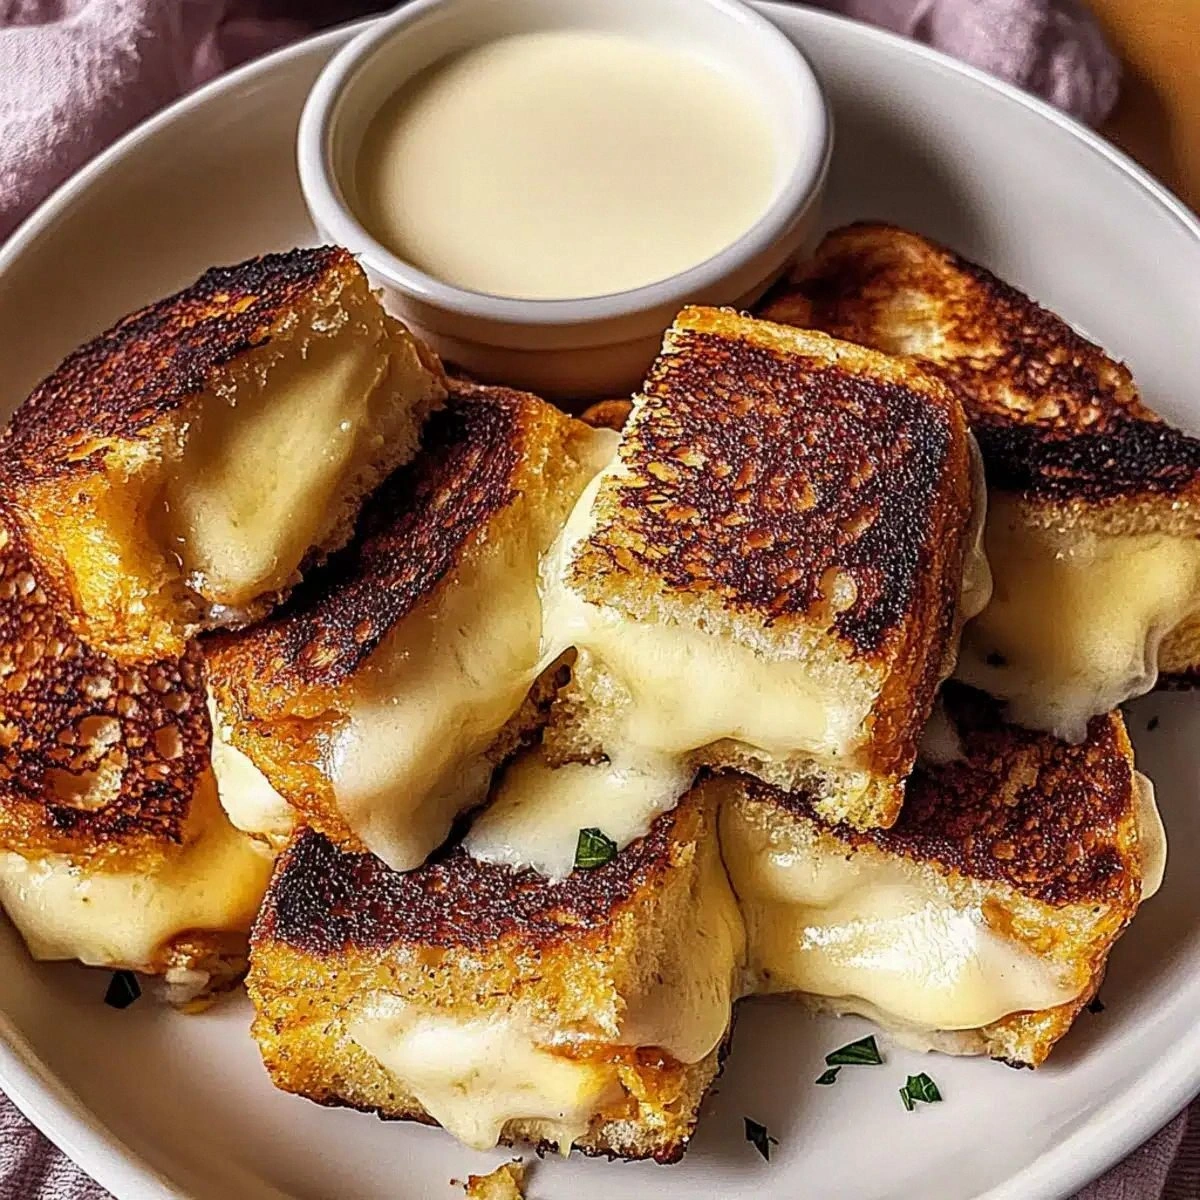
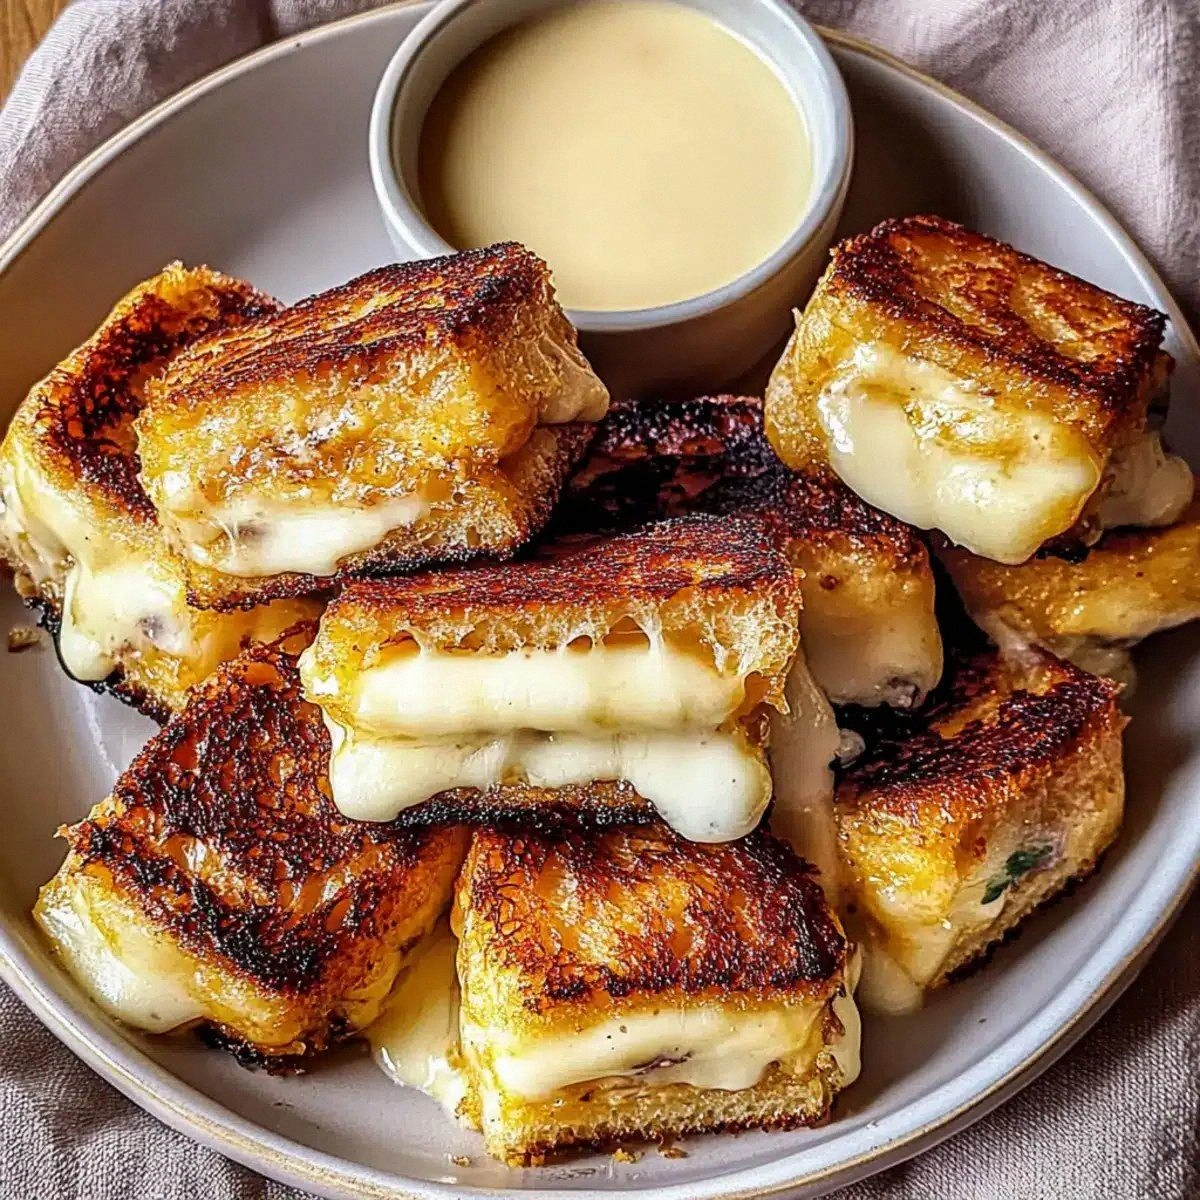
Slice each sandwich diagonally for that classic grilled‑cheese look. The cross‑section should reveal a molten cheese river, specks of crispy bacon, and a glistening pineapple stripe. Serve immediately while the crust is still crisp and the interior steam‑hot.
Kitchen Hack: Use a serrated knife dipped in hot water for a clean cut that doesn’t compress the sandwich.That’s it — you did it. But hold on, I’ve got a few more tricks that'll take this to another level. The next section reveals insider tips that will make every future batch even more unforgettable.
Insider Tricks for Flawless Results
The Temperature Rule Nobody Follows
Most home cooks crank the heat to “high” hoping for a fast crust, only to end up with burnt butter and raw cheese. The secret is to keep the pan at a steady medium‑low (around 300°F/150°C). This allows the butter to brown gradually, creating a nutty flavor while giving the cheese time to melt fully. I once tried the “high‑heat” shortcut and the result was a charcoal‑tasting disaster—don’t be that person.
Why Your Nose Knows Best
Before you even lift the lid, trust the scent. When the butter turns a rich amber and the roll releases a toasted aroma, you’re at the perfect moment to flip. If you smell a faint burnt odor, lower the heat immediately. Your nose is a built‑in timer that’s far more reliable than any kitchen gadget.
The 5‑Minute Rest That Changes Everything
After the sandwich leaves the pan, let it sit for exactly five minutes. This pause lets the cheese fibers re‑align, preventing a cheesy waterfall when you cut. It also gives the pineapple’s caramelized sugars a chance to settle, ensuring every bite has a consistent sweet‑savory balance. Skipping this step is the difference between a soggy mess and a restaurant‑quality masterpiece.
Butter‑Baste the Bottom, Not Just the Top
While most recipes only butter the exterior, I recommend brushing a thin layer of melted butter on the bottom of the roll before the first sear. This creates a uniform crust on both sides, preventing the dreaded “soft bottom” that can make the sandwich feel uneven. The result is a sandwich that’s golden all the way through.
Layer Order—The Hidden Architecture
The order in which you stack the fillings matters. Start with cheese, then bacon, then pineapple, and finish with jalapeños. This hierarchy ensures the cheese acts as a glue, the bacon stays crisp, the pineapple’s moisture is trapped, and the jalapeños stay on top where they can release their heat directly into the melt. A friend once swapped the order and ended up with a soggy roll—lesson learned.
Creative Twists and Variations
This recipe is a playground. Here are some of my favorite ways to switch things up:
Spicy Island Remix
Swap the jalapeños for thinly sliced serrano peppers and add a drizzle of sriracha mayo inside the roll. The extra heat pairs beautifully with the pineapple’s sweetness, creating a bold flavor punch that will impress any spice lover.
Veggie Delight
Replace the bacon with grilled portobello mushroom slices and add a handful of fresh arugula after cooking. The earthy mushrooms bring depth, while the peppery arugula adds a fresh bite that balances the richness.
Cheesy Overload
Mix cheddar with a slice of provolone for extra meltiness, and sprinkle a thin layer of grated Parmesan on the outside before searing. The Parmesan caramelizes, giving the crust a subtle umami crunch.
Sweet & Savory Breakfast
Swap the bacon for a fried egg and add a thin spread of maple syrup inside the roll. The egg’s runny yolk becomes a sauce that mingles with the caramelized pineapple for a breakfast‑brunch hybrid.
Island BBQ Fusion
Use BBQ sauce in place of butter for the outer coat and add a slice of smoked gouda. The smoky BBQ glaze complements the pineapple and bacon, delivering a backyard‑grill vibe without the grill.
Storing and Bringing It Back to Life
Fridge Storage
Place any leftover sandwiches in an airtight container or wrap tightly in foil. They’ll stay fresh for up to 48 hours. When you’re ready to eat, reheat in a skillet over medium heat, adding a tiny splash of water to the pan and covering for a minute—this steams the interior back to melty perfection.
Freezer Friendly
Wrap each assembled but un‑cooked sandwich tightly in parchment paper, then place in a zip‑top freezer bag. They freeze well for up to two weeks. To cook from frozen, add an extra minute per side and keep the heat a touch lower to ensure the interior thaws without burning the crust.
Best Reheating Method
The stovetop is king. Heat a non‑stick pan over medium‑low, add a dab of butter, and cover the sandwich with a lid for 2‑3 minutes. The lid traps steam, reviving the cheese’s gooeyness while the butter crisps the roll. Avoid microwaves—they’ll sog the roll and ruin the texture.