I was standing in the kitchen at midnight, half‑asleep, with the faint hum of the fridge as my only soundtrack, when a sudden craving hit me like a rogue soccer ball at a school hallway. I grabbed a dusty box of flour, a lonely packet of yeast, and the last jar of marinara sauce from the pantry, daring myself to create the ultimate throw‑back pizza that would make my childhood cafeteria line jealous. The kitchen smelled like a blend of old textbooks and fresh dough, the kind of aroma that makes you think of late‑night study sessions and the comforting sigh of a warm slice after a tough exam.
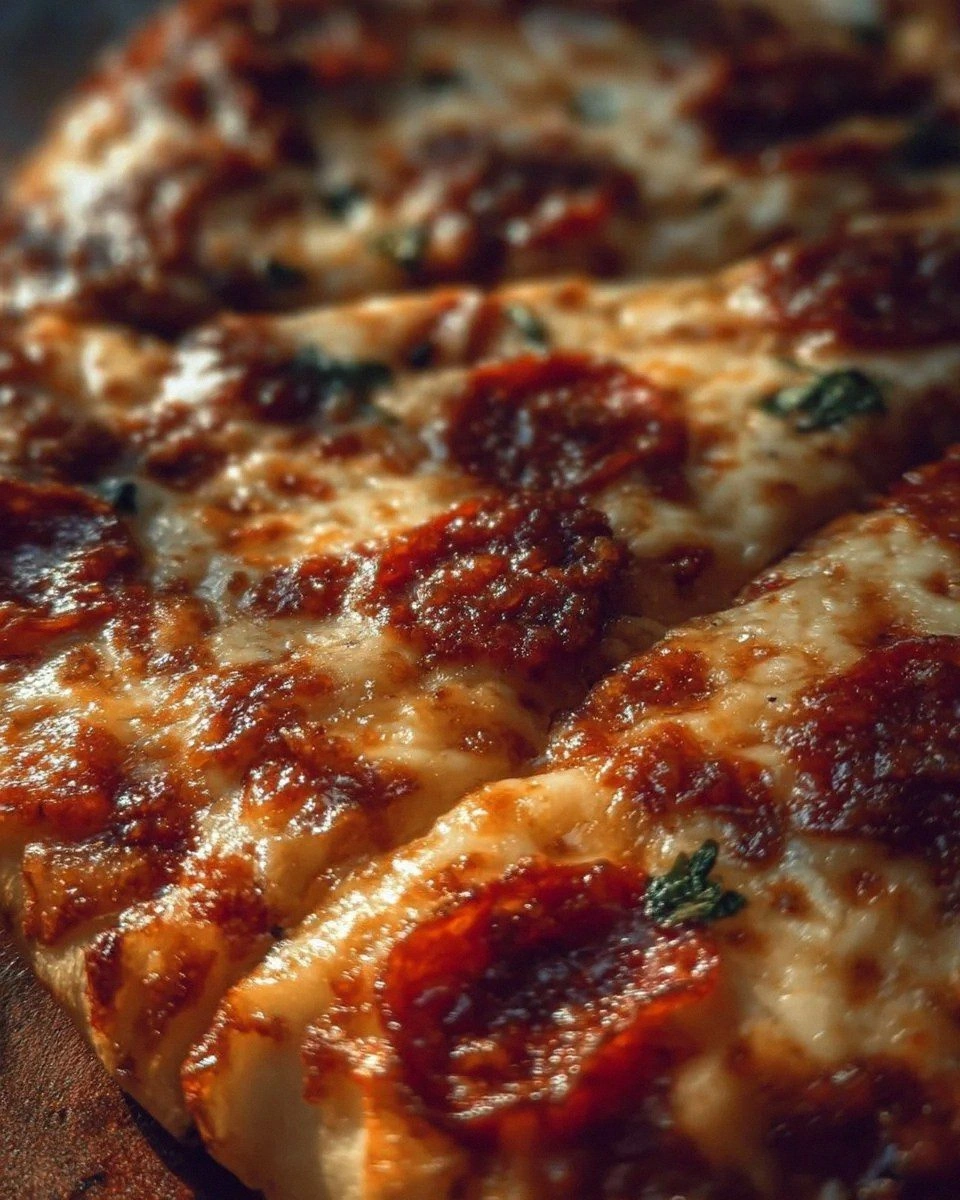
Picture this: the dough, soft as a freshly‑ironed school uniform, being tossed into the air with the confidence of a kid who just nailed the math test. The sauce spreads across the base like a glossy, ruby‑red watercolor painting, and the mozzarella melts into a golden blanket that stretches and snaps with each bite. The bell peppers and onions add a crunch that echoes the clatter of lockers, while the olives bring a salty surprise that feels like finding a hidden note in your textbook. Every sense is engaged — the hiss of the oven, the sight of bubbling cheese, the aroma that fills the hallway‑like kitchen, the tactile joy of pulling the slice apart, and the taste that lands straight in your memory’s sweet spot.
Most home‑made pizza recipes either overcomplicate the dough or skimp on the toppings, leaving you with a bland, soggy disappointment. This version stands out because it balances simplicity with that nostalgic punch you get from a school‑cafeteria slice, yet it’s elevated with a few secret tricks that turn a basic dough into a fluffy, airy canvas. I’m talking about a precise water temperature, a quick rise that doesn’t demand a full day, and a topping distribution that ensures every bite is perfectly balanced. The result? A pizza that’s both a comfort food and a show‑stopper, and I’m willing to bet you’ll never look at store‑bought pizza the same way again.
There’s a tiny twist in this recipe that most cooks overlook: a dash of sugar not only feeds the yeast but also caramelizes the crust edges, giving them that subtle sweet‑crackle you remember from the cafeteria’s “specials” day. I’ll also reveal a shortcut for the sauce that packs more flavor than a jar that’s been sitting on the shelf for months. Okay, ready for the game‑changer? Let me walk you through every single step — by the end, you’ll wonder how you ever made it any other way.
What Makes This Version Stand Out
- Flavor Explosion: The combination of a lightly sweetened crust, robust marinara, and a balanced medley of veggies creates a taste profile that sings like a school choir on a sunny morning.
- Texture Harmony: The dough rises just enough to stay fluffy inside while the edges crisp up like a freshly‑polished hallway floor, giving you that satisfying crunch‑soft contrast.
- Simplicity Meets Skill: You only need a handful of pantry staples, yet the technique feels like a culinary masterclass — no fancy equipment required.
- Unique Ingredient Trick: A pinch of sugar in the dough not only fuels the yeast but also caramelizes the crust edges, adding a whisper of caramel that most recipes miss.
- Crowd‑Pleaser Factor: Kids and adults alike rave, and you’ll hear the “again!” chant echoing around the table faster than a fire drill.
- Quality Ingredients Matter: Using fresh mozzarella and a good‑quality marinara sauce turns an ordinary slice into a gourmet experience.
- One‑Pan Simplicity: No need for multiple pans or a pizza stone; a standard baking sheet does the trick, keeping cleanup as easy as a pop‑quiz.
- Make‑Ahead Potential: The dough can be refrigerated overnight, letting you prep ahead for a busy weeknight or a weekend family movie marathon.
Alright, let's break down exactly what goes into this masterpiece...
Inside the Ingredient List
The Flavor Base
All‑purpose flour is the backbone of any good pizza dough. Its protein content gives structure while still allowing the dough to stay tender. If you substitute with whole‑wheat flour, expect a denser crumb and a nuttier flavor that can be delightful, but for that classic school‑café feel, stick with the white flour. When you’re shopping, look for a brand that promises “bleached” or “unbleached” — both work, but unbleached often yields a slightly richer taste.
Yeast, the magical organism that turns simple dough into a fluffy cloud, comes in packets for convenience. One packet is calibrated for 2‑3 cups of flour, giving you the perfect rise without the guesswork. If you’re feeling adventurous, you can swap in a teaspoon of active dry yeast, but remember to proof it first in warm water.
Warm water at about 110°F (43°C) is crucial; too hot and you’ll kill the yeast, too cold and the dough will crawl. A kitchen thermometer is your best friend here — I dare you to taste the water and feel its warmth; it should be comfortably warm, like a summer’s day in June.
The Texture Crew
Sugar isn’t just for sweetening; it feeds the yeast and helps the crust develop a golden‑brown hue. A single teaspoon is enough to coax the yeast into action without making the crust taste sugary. If you’re watching carbs, you can halve it, but expect a slightly paler crust.
A pinch of salt does more than season — it strengthens the gluten network, giving the dough that satisfying snap when you bite into the crust. If you skip it, the dough will feel flat and bland, like a lecture without any jokes.
Pizza or marinara sauce is the heart of the flavor. I prefer a sauce that’s simmered with garlic, oregano, and a splash of olive oil, but a good store‑bought jar works just fine. If you want a richer taste, blend in a spoonful of tomato paste for depth.
The Unexpected Star
Shredded mozzarella cheese is the gooey, melty hero that pulls everything together. Freshly shredded cheese melts more evenly than pre‑shredded, which often contains anti‑caking agents that can affect texture. If you’re a dairy‑free fan, try a blend of vegan mozzarella and nutritional yeast for a similar stretch and flavor.
Bell peppers, onions, and black olives add color, crunch, and a briny punch. Slice them thinly so they cook evenly and don’t drown the cheese. Feel free to swap in mushrooms or pepperoni if your crowd prefers a meatier vibe.
The Final Flourish
Dried oregano and basil are the aromatic finishing touches that transport you straight back to the cafeteria’s “specials” board. They release their essential oils when baked, creating a fragrant steam that fills the kitchen. If you have fresh herbs, use them — a tablespoon of chopped fresh basil adds a bright pop that dried herbs can’t match.
Everything's prepped? Good. Let's get into the real action...
The Method — Step by Step
- Activate the yeast. In a medium bowl, combine the warm water, sugar, and yeast. Stir gently and let it sit for 5‑7 minutes until it becomes frothy, like a cloud of excitement. Kitchen Hack: If your kitchen is chilly, place the bowl on top of a warm oven (turned off) to keep the mixture at the perfect temperature.
- Mix dry ingredients. In a large mixing bowl, whisk together the flour, salt, and a pinch of extra dried oregano for an extra flavor boost. This ensures an even distribution of seasoning throughout the dough, preventing any salty surprises.
- Combine wet and dry. Make a well in the center of the flour mixture and pour in the frothy yeast mixture. Stir with a wooden spoon until a shaggy dough forms. At this stage, the dough should look slightly sticky but manageable — if it feels like wet sand, add a tablespoon of flour; if it’s dry as a chalkboard, splash a bit more warm water.
- Knead to perfection. Turn the dough onto a lightly floured surface and knead for 8‑10 minutes. You’re looking for a smooth, elastic texture that springs back when pressed. This is the moment of truth; the dough should feel supple, not tough. Watch Out: Over‑kneading can develop too much gluten, resulting in a chewy, tough crust. Stop when the dough is smooth and slightly tacky.
- First rise. Lightly oil a clean bowl, place the dough inside, cover with plastic wrap, and let it rise in a warm spot for 45 minutes to 1 hour, or until doubled in size. You’ll know it’s ready when the dough feels puffed and airy, like a freshly‑inflated balloon.
- Shape the base. Punch down the risen dough to release excess air, then transfer it onto a parchment‑lined baking sheet. Using your hands, gently stretch it into a 12‑inch circle, leaving a slightly thicker edge for that coveted crust. If the dough resists, let it rest for 5 minutes; the gluten will relax, making it easier to shape.
- Layer the sauce. Spoon the marinara sauce over the dough, spreading it evenly with the back of a spoon. Aim for a thin, uniform layer — too much sauce will make the crust soggy, a mistake most home cooks make. Kitchen Hack: Warm the sauce slightly before spreading; it’ll glide on like silk and prevent tearing the dough.
- Add cheese and toppings. Sprinkle the shredded mozzarella evenly, then scatter the sliced bell peppers, onions, and black olives across the surface. Finish with a generous pinch of dried oregano and basil. The cheese should melt into a bubbly blanket, while the veggies retain a slight crunch.
- Bake to golden perfection. Preheat your oven to 475°F (245°C) for at least 20 minutes before baking. Slide the pizza onto the middle rack and bake for 12‑15 minutes, or until the crust is golden and the cheese is bubbling with a few brown spots. You’ll hear a faint sizzle that signals the crust is forming a crisp, caramelized edge — that’s the sweet‑crackle we talked about.
- Rest and serve. Remove the pizza from the oven and let it rest for 3‑5 minutes. This short pause lets the cheese set just enough to slice cleanly without dragging. Then, grab a pizza cutter, slice, and watch the cheese stretch like a school‑yard tug‑of‑war rope. That sizzle when it hits the pan? Absolute perfection. I’ll be honest — I ate half the batch before anyone else got to try it.
That's it — you did it. But hold on, I've got a few more tricks that'll take this to another level...
Insider Tricks for Flawless Results
The Temperature Rule Nobody Follows
Most home cooks bake pizza at 425°F, thinking it's hot enough. In reality, a scorching 475°F (or even 500°F if your oven can handle it) creates that coveted leopard‑spot char on the crust while keeping the interior airy. If you’re using a standard home oven, place a pizza stone or an inverted baking sheet on the lowest rack while preheating; this mimics a brick oven’s heat retention.
Why Your Nose Knows Best
Your sense of smell is a reliable timer. When the crust starts to emit a nutty, toasted aroma, you’re within a minute of perfect doneness. If you’re unsure, lift the edge with a spatula; the underside should be a deep golden brown, not pale.
The 5‑Minute Rest That Changes Everything
After the first rise, let the dough rest uncovered for 5 minutes before shaping. This short pause relaxes the gluten, allowing you to stretch the dough without spring‑back. Skipping this step leads to a dough that snaps back, resulting in uneven edges and a denser crumb.
The Secret Sauce Boost
Add a teaspoon of honey to your marinara before spreading. The honey balances the acidity of the tomatoes and promotes caramelization, giving the sauce a subtle depth you’ll taste in every bite. A friend tried skipping this once — let’s just say the sauce tasted flat and the pizza didn’t get the rave it deserved.
Cheese Distribution Mastery
Instead of dumping all the cheese at once, sprinkle half before the veggies and the remaining half after. This creates a cheese “cushion” that prevents the toppings from sinking into the sauce, while the top layer browns beautifully, adding a toasty flavor.
Creative Twists and Variations
This recipe is a playground. Here are some of my favorite ways to switch things up:
BBQ Chicken Remix
Swap the marinara for a smoky BBQ sauce, add shredded cooked chicken, red onion rings, and a drizzle of ranch. The sweet‑tangy BBQ pairs brilliantly with the mozzarella, and kids love the finger‑licking flavor.
Mediterranean Dream
Replace bell peppers with sun‑dried tomatoes, add feta cheese, kalamata olives, and a sprinkle of fresh oregano. The salty feta and olive combo transports you straight to a seaside café.
Spicy Pepper Jack Punch
Use pepper jack cheese instead of mozzarella, add sliced jalapeños, and a dash of crushed red pepper flakes. This version brings the heat that teens love, while the creamy cheese tempers the spice.
Veggie‑Loaded Green
Add a layer of spinach, zucchini ribbons, and artichoke hearts. Top with a light drizzle of olive oil and a sprinkle of Parmesan. This variation boosts nutrition without sacrificing flavor.
Breakfast Pizza
Swap the marinara for a thin layer of ricotta mixed with a pinch of garlic, then top with scrambled eggs, crumbled bacon, and a dash of chives. Perfect for a weekend brunch that feels indulgent.
Storing and Bringing It Back to Life
Fridge Storage
Allow the pizza to cool completely, then slice and store in an airtight container. It will keep fresh for up to 3 days. Reheat in a skillet over medium heat, covering with a lid for 2‑3 minutes to melt the cheese without drying out the crust.
Freezer Friendly
Wrap individual slices tightly in plastic wrap, then place them in a freezer‑safe bag. They’ll last up to 2 months. When ready to eat, bake directly from frozen at 375°F for 12‑15 minutes, adding a tiny splash of water to the pan to create steam and revive the crust’s softness.
Best Reheating Method
For the ultimate reheated slice, use a preheated oven at 350°F for 8‑10 minutes, or a toaster oven for a crispier edge. Adding a teaspoon of water to the bottom of the pan creates a gentle steam that prevents the crust from becoming rubbery.